10 Types of Knives and Their Uses: The Ultimate Kitchen Arsenal
Walk into any professional kitchen, and you will see a dizzying array of steel. From massive cleavers that look like they belong in a horror movie to tiny, beak-like blades for peeling garlic, every knife serves a specific purpose. But for the home cook, this variety can be overwhelming.
If you are browsing knifeindex.com/ trying to build your perfect kit, you might be asking: “Do I really need ten knives?” The answer is no—but you do need to know what exists so you can choose the right tools for your cooking style. Using a bread knife to filet a fish isn’t just difficult; it’s dangerous.
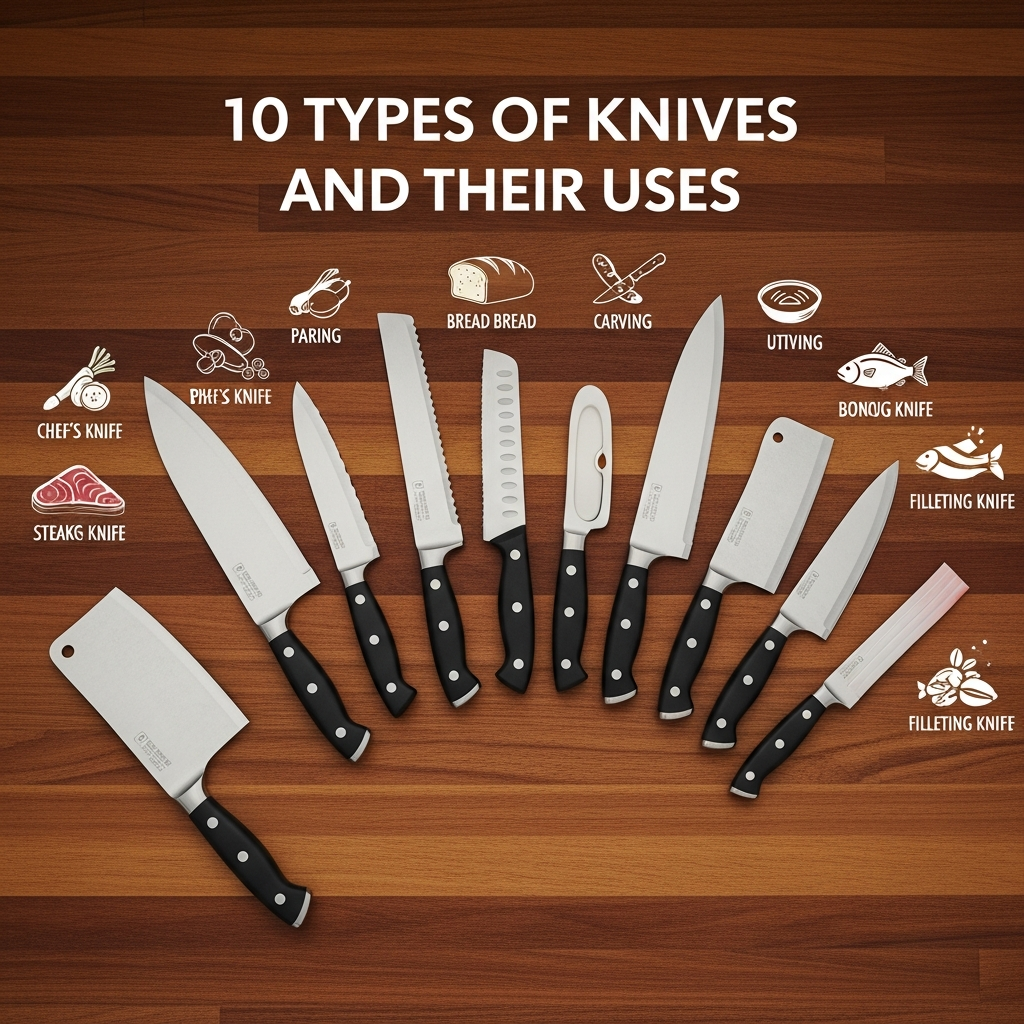
In this comprehensive guide, we will break down the 10 essential types of knives and their uses. We will explore the geometry, the best tasks for each, and help you navigate the best chef knife brands to find your perfect match.
External Insight
For a broader look at kitchen education, check out this guide from Everything Kitchens: Everything Kitchens: Knife Education Guide.
The History and Evolution of Kitchen Knives
Before diving into the specific types of knives that populate modern kitchens, it is worth understanding where these tools originated and how they have evolved over thousands of years. The kitchen knife is perhaps humanity’s oldest tool, with archaeological evidence suggesting that early humans were crafting cutting implements from flint, obsidian, and bone as far back as 2.6 million years ago during the Oldowan period. These primitive tools were essential for survival, enabling our ancestors to butcher game, process plant materials, and prepare food for consumption.
The transition from stone to metal knives marked a revolutionary advancement in culinary technology. The Bronze Age, beginning around 3300 BCE, introduced copper and bronze blades that could be cast, hammered, and sharpened to a finer edge than stone. However, it was the Iron Age, starting approximately 1200 BCE, that truly transformed knife-making. Iron was more abundant than copper and tin, and when carbon was introduced to create steel, bladesmiths discovered they could produce knives with superior hardness, edge retention, and durability. The Romans were particularly adept at developing steel knives, and their legions spread iron-working techniques throughout Europe and beyond.
In Japan, a parallel tradition of bladesmithing emerged that would eventually produce some of the finest kitchen knives in the world. Japanese sword-making techniques, perfected over centuries during the feudal era, were adapted to create kitchen knives with exceptional sharpness and precision. The katana, the legendary samurai sword, influenced the design of Japanese kitchen knives through shared principles of differential hardening, where the blade’s edge is hardened to a higher degree than the spine. This technique, known as “honyaki,” creates a blade that holds an incredibly sharp edge while remaining flexible enough to resist chipping. Today, regions like Sakai, Seki, and Echizen are renowned for producing knives that blend centuries-old traditions with modern metallurgy.
The European knife-making tradition took a different path, emphasizing robustness and versatility. In Germany, the city of Solingen became known as the “City of Blades,” with a knife-making heritage dating back to the Middle Ages. German knives typically feature thicker spines, more pronounced curves, and softer steel that is easier to maintain. The iconic Wusthof brand, founded in Solingen in 1814, exemplifies this tradition, as does Zwilling J.A. Henckels, established in 1731. These companies, along with Swiss manufacturers like Victorinox, helped standardize the modern Western chef’s knife into the versatile tool we recognize today.
The Industrial Revolution brought mass production techniques to knife manufacturing, making quality cutlery accessible to ordinary households for the first time. Before the 19th century, good knives were expensive luxury items owned primarily by the wealthy. The development of drop-forging, precision grinding, and eventually stainless steel in the early 20th century democratized knife ownership. Stainless steel, invented by Harry Brearley in 1913, was a game-changer for kitchen knives. Unlike carbon steel, which rusts easily and requires constant maintenance, stainless steel resists corrosion, making it ideal for the moist environment of a kitchen. Today, most Western kitchen knives are made from some variant of stainless steel, though high-end Japanese knives often still use carbon steel for its superior sharpness.
The late 20th and early 21st centuries have seen an explosion of innovation in knife design and materials. Powder metallurgy steels like CPM-S35VN and SG2 offer edge retention that would have seemed miraculous to previous generations. Handle materials have evolved from simple wood to engineered composites like G10, Micarta, and high-performance polymers that provide superior grip and durability. The globalization of culinary traditions has also influenced knife design, with Western manufacturers adopting Japanese profiles and vice versa. The result is a modern knife market that offers an unprecedented variety of specialized tools, each optimized for specific tasks and user preferences. Understanding this rich history helps explain why different knife types exist and why choosing between them requires thoughtful consideration of your cooking style, maintenance habits, and aesthetic preferences.
The rise of culinary media, from television cooking shows to YouTube channels and food blogs, has also fueled interest in specialized kitchen knives. As home cooks have become more sophisticated, they have sought out professional-grade tools that were once found only in restaurant kitchens. This democratization of culinary knowledge has created a vibrant community of knife enthusiasts who discuss steel compositions, edge geometries, and blade profiles with the same passion that car enthusiasts discuss engines. For anyone serious about cooking, understanding the different types of knives and their intended uses is not just practical knowledge; it is a gateway to a deeper appreciation of the culinary arts themselves.
1. The Chef’s Knife (The King)
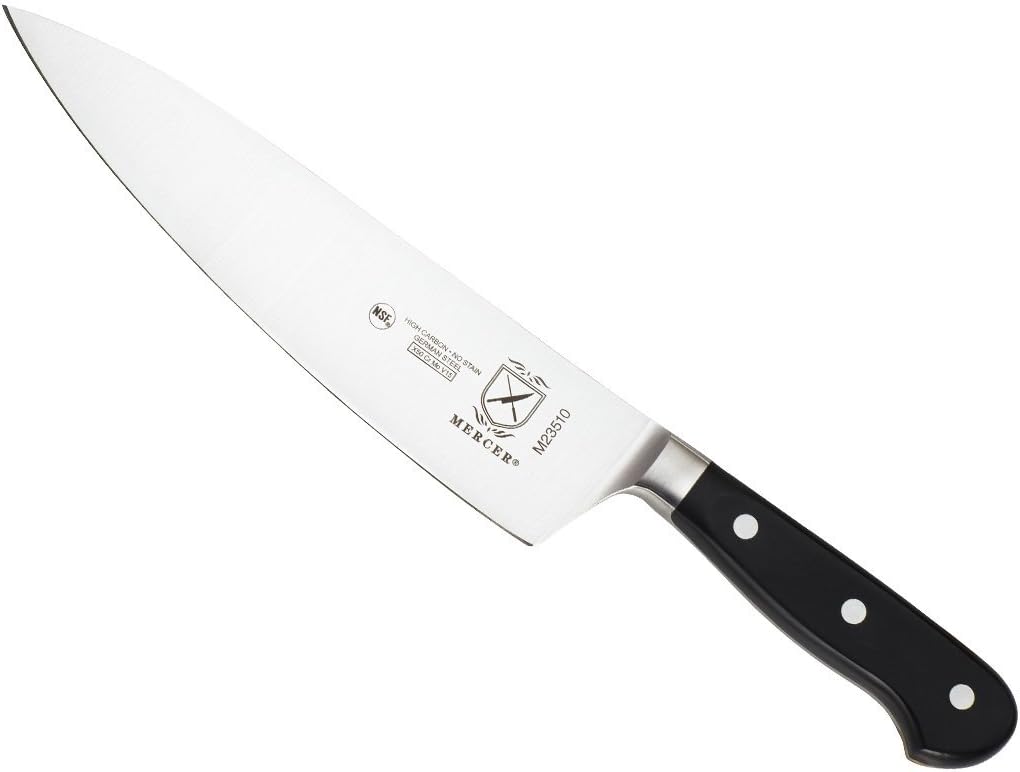
If the kitchen were an orchestra, the Chef’s Knife would be the conductor. It is the multi-purpose workhorse designed to handle 90% of your prep tasks. Typically 8 to 10 inches long, it features a curved belly that allows for a rhythmic “rocking” motion.
Best Uses: Chopping onions, mincing herbs, disjointing chicken, slicing beef.
The Debate: Do you want the heavy durability of a German blade (see best German kitchen knives) or the razor-sharp precision of a Japanese blade (see best Japanese kitchen knives)?
The Anatomy of a Chef’s Knife
Understanding the anatomy of a chef’s knife is essential for selecting the right tool and using it properly. The blade of a chef’s knife is typically divided into several functional zones, each designed for specific tasks. The tip of the blade, the first two inches or so, is used for delicate precision work such as mincing garlic, deveining shrimp, or scoring pastry. The middle section of the blade, from approximately two to five inches from the tip, is the workhorse zone used for the majority of chopping and slicing tasks. The heel of the blade, the portion closest to the handle, is the thickest and most robust section, designed for heavy-duty tasks like cutting through chicken bones, dense root vegetables, and hard squash.
The curvature of the blade, known as the “belly,” is one of the most important design features of a chef’s knife. A pronounced belly, characteristic of German-style knives, facilitates a rocking motion where the tip remains in contact with the cutting board while the heel rises and falls. This technique is ideal for rapidly chopping herbs, mincing garlic, and dicing onions. French-style chef’s knives feature a slightly flatter profile with a more gradual curve, which suits a “slide-cutting” technique where the blade is drawn backward across the food. Japanese gyuto knives, which are the Japanese interpretation of the Western chef’s knife, tend to have even flatter profiles optimized for push-cutting and precise vegetable work.
The spine of the knife, the unsharpened top edge, varies in thickness depending on the knife’s heritage. German knives typically have thicker spines, often 2.5 to 3 millimeters at the heel, which adds weight and durability but can feel clumsy during delicate tasks. Japanese knives often have thinner spines, sometimes as slim as 1.5 to 2 millimeters, which reduces wedging when cutting through dense foods and provides a more nimble feel. The trade-off is that thinner spines are more susceptible to damage if the knife is used for prying or twisting motions. Some manufacturers offer a compromise with a distal taper, where the spine is thicker at the heel for strength and gradually tapers to a finer point at the tip for precision.
The bolster, the thickened junction between the blade and handle, serves multiple functions. It provides a counterbalance that shifts the knife’s center of gravity toward the handle, improves safety by preventing the hand from slipping forward onto the blade, and adds structural rigidity. However, many modern chefs and enthusiasts prefer bolster-free designs, which allow the entire blade edge to be sharpened from heel to tip. A full bolster can eventually interfere with sharpening as the blade wears down over years of use. Some premium knives feature a half-bolster or no bolster at all, which is a design choice that reflects a preference for sharpenability over traditional aesthetics.
The handle of a chef’s knife is equally important as the blade, though it often receives less attention. Traditional Western handles are made from dense hardwoods like rosewood, ebony, or pakkawood, a resin-impregnated wood composite that resists moisture and bacterial growth. Japanese wa-handles, in contrast, are typically octagonal or D-shaped and made from lighter woods like magnolia or ho wood, often with a buffalo horn ferrule. The wa-handle design shifts the balance point forward toward the blade, which many chefs prefer for a more blade-forward cutting feel. Modern synthetic handles made from POM (polyoxymethylene), linen micarta, or fiberglass-reinforced nylon offer exceptional durability, dishwasher safety, and consistent grip even when wet or greasy.
Blade length is another critical consideration when selecting a chef’s knife. While 8-inch (210mm) blades are the most popular and versatile, serious home cooks and professionals often prefer 9.5 to 10-inch (240mm to 270mm) blades for their increased efficiency when processing large quantities of food. A longer blade means fewer strokes are needed to cut through large items like watermelons or cabbages, and it provides a larger sweet spot for chopping. However, longer blades require more skill to control and demand more counter space. Conversely, 6-inch (150mm) and 7-inch (180mm) chef’s knives are available for cooks with smaller hands or limited workspace, though they sacrifice some versatility. Finding the right blade length is a personal choice that depends on your physical comfort, kitchen setup, and the types of food you most frequently prepare.
Choosing Between German and Japanese Chef’s Knives
The choice between a German-style and Japanese-style chef’s knife is one of the most significant decisions a home cook can make, and it fundamentally shapes the cooking experience. German knives, epitomized by brands like Wusthof, Zwilling, and Messermeister, are engineered for durability and versatility. They typically use softer steel, usually in the range of 56-58 HRC on the Rockwell hardness scale. This softer steel is more resistant to chipping and can be honed back to sharpness with a few strokes on a honing steel, making maintenance straightforward for the average cook. The trade-off is that German knives require more frequent sharpening to maintain a razor edge, and they rarely achieve the extreme sharpness that harder Japanese steels can attain.
Japanese knives, in contrast, are built around the philosophy of specialized excellence. Brands like Shun, Miyabi, and MAC use harder steels, typically 60-64 HRC, that can be sharpened to a keener edge and hold that edge for longer periods. This hardness is achieved through higher carbon content and precise heat treatment processes. However, harder steel is more brittle and susceptible to chipping if the knife is used improperly, such as cutting through bones, frozen foods, or twisting the blade while it is embedded in food. Japanese knives demand more respectful handling and typically require water stone sharpening rather than simple honing to restore the edge.
The edge geometry also differs significantly between German and Japanese knives. German knives are typically sharpened to a 20-22 degree angle per side (40-44 degrees inclusive), creating a robust edge that withstands heavy use. Japanese knives are often sharpened to a more acute 12-15 degree angle per side (24-30 degrees inclusive), which slices through food with noticeably less resistance. This difference is immediately apparent when cutting tomatoes, where a Japanese knife will glide through the skin with almost no pressure, while a German knife may require a slight sawing motion. Many professional chefs maintain both styles in their kitchens, reaching for the German knife for heavy-duty tasks and the Japanese knife for precision work.
The weight and balance of these two traditions also differ markedly. German chef’s knives typically weigh between 250 and 350 grams for an 8-inch blade, with the balance point located at or slightly behind the bolster. This weight provides momentum that assists with chopping, making German knives feel authoritative and substantial in the hand. Japanese gyuto knives often weigh between 150 and 250 grams for a comparable blade length, with the balance point shifted forward toward the blade. This lighter weight reduces fatigue during long prep sessions but requires the user to provide more of the cutting force. Over the course of an hour of vegetable prep, the difference in fatigue between a 350-gram German knife and a 180-gram Japanese knife becomes quite pronounced.
The aesthetic sensibilities of these two traditions also reflect different cultural values. German knives emphasize functional simplicity, with clean lines, visible rivets, and substantial bolsters that convey strength and reliability. Japanese knives often feature elaborate damascus cladding, where layers of different steel alloys are forge-welded together to create flowing patterns reminiscent of wood grain or water ripples. This damascus technique, originally developed for sword-making, serves a functional purpose by combining a hard core steel for cutting performance with softer outer layers that absorb shock and resist corrosion. The beauty of a well-made damascus blade can elevate a kitchen tool into a work of art that inspires its owner to cook with greater care and attention.
- Deep Dive: What is a Chef Knife Used For?
- Top Battle: Shun vs. Wusthof
- Budget Picks: Best Affordable Chef Knives
2. The Santoku Knife (The Everyday Warrior)
Originating in Japan, the Santoku (“Three Virtues”) is shorter, lighter, and flatter than a Chef’s knife. It is designed for an up-and-down chopping motion rather than rocking. Many home cooks prefer it for its agility and non-intimidating size (usually 5 to 7 inches).
Best Uses: Slicing, dicing, and mincing vegetables and boneless meats.
The Three Virtues: Understanding the Santoku’s Name
The term “Santoku” translates from Japanese as “three virtues” or “three uses,” and understanding this naming reveals much about the knife’s intended role in the kitchen. The traditional interpretation is that the Santoku excels at three core tasks: slicing, dicing, and mincing. However, some interpretations suggest the three virtues refer to its ability to handle meat, fish, and vegetables with equal proficiency. Still others propose that the three virtues describe the knife’s qualities of sharpness, durability, and versatility. Regardless of which interpretation one prefers, the name reflects the Santoku’s design philosophy as a multi-purpose blade that can handle the majority of daily cooking tasks without the bulk of a full-sized Western chef’s knife.
The Santoku emerged in post-World War II Japan, a period when Western culinary influences were transforming traditional Japanese home cooking. As Japanese households began incorporating more meat and Western-style dishes into their diets, the traditional Japanese knife set—which included specialized blades like the deba, usuba, and yanagiba—proved impractical for the average home cook. The Santoku was developed as a bridge between Eastern and Western cutting traditions, combining the general-purpose utility of a Western chef’s knife with the lightweight precision that Japanese cooks preferred. Its immediate popularity in Japan led to its eventual adoption worldwide, and today the Santoku is second only to the chef’s knife in global popularity.
The blade profile of a Santoku is distinctly different from a Western chef’s knife, and these differences have practical implications for cutting technique. The Santoku features a much flatter edge profile with minimal belly, which means it is not designed for the rocking-chopping technique that Western cooks learn. Instead, the Santoku is optimized for a straight up-and-down chopping motion, known in Japanese as “katsuramuki” when applied to vegetables. This push-cutting technique involves lifting the blade completely off the cutting board between strokes and bringing it straight down through the food. The flat profile ensures that the entire edge makes contact with the board simultaneously, eliminating the “accordion” effect where vegetables remain connected by thin uncut sections.
Another distinctive feature of many Santoku knives is the granton edge, also called a kullenschliff or scalloped edge. These oval dimples ground into the blade just above the cutting edge create air pockets that reduce friction and prevent food from sticking to the blade during cutting. This is particularly useful when slicing starchy vegetables like potatoes or soft cheeses that tend to adhere to smooth blade surfaces. The granton edge is more commonly found on Santoku knives than on traditional chef’s knives, though some Western manufacturers have adopted the feature for their chef’s knife lines. It is worth noting that granton edges do not improve sharpness or cutting performance; they only address the sticking issue.
The tip of a Santoku knife is another notable design element. Unlike the pointed tip of a chef’s knife, which is useful for piercing and detail work, the Santoku features a more rounded “sheep’s foot” tip that curves down to meet the cutting edge. This design reduces the risk of accidentally piercing items you do not intend to cut and makes the knife safer to use in crowded kitchen environments. However, it also means the Santoku cannot perform tip-dependent tasks like coring tomatoes or removing the eyes from potatoes with the same precision as a chef’s knife. Some cooks find this limitation frustrating, while others appreciate the safety and simplicity of the rounded tip design.
The ideal Santoku length is typically between 165mm (6.5 inches) and 180mm (7 inches), significantly shorter than the standard 210mm (8.3-inch) chef’s knife. This reduced length makes the Santoku more maneuverable in tight spaces and less intimidating for novice cooks. It also means the Santoku is lighter, typically weighing between 150 and 200 grams compared to 250-350 grams for a comparable chef’s knife. For home cooks who prep meals for small households or who have limited counter space, the Santoku’s compact dimensions can be a genuine advantage. However, the shorter blade length also means fewer cutting strokes are needed to process the same amount of food, which can be a disadvantage when cooking for large groups.
Santoku vs. Chef’s Knife: Making the Right Choice
The decision between a Santoku and a traditional chef’s knife ultimately comes down to cutting style, physical comfort, and the types of food you most frequently prepare. If your cutting technique relies on the rocking motion where the knife tip stays in contact with the board, a chef’s knife with its pronounced belly is the better choice. The curved profile of a chef’s knife is specifically engineered for this technique, and trying to rock-chop with a flat Santoku will feel awkward and inefficient. Conversely, if you naturally use a push-cutting or chopping motion where the entire blade lifts off the board between cuts, a Santoku will feel more natural and deliver cleaner cuts.
Hand size and grip strength also influence the choice between these two knife styles. The Santoku’s lighter weight and shorter blade make it easier to control for cooks with smaller hands or reduced grip strength. The traditional Western chef’s knife handle is designed for a power grip where all four fingers wrap around the handle and the thumb rests on the spine, a grip that requires a certain amount of hand strength to maintain over extended periods. Japanese wa-handles, common on Santoku knives, accommodate a variety of grip styles including the pinch grip, where the thumb and index finger grip the blade just ahead of the handle while the remaining fingers wrap around the handle. This pinch grip provides excellent control with less fatigue, which is one reason many professional chefs prefer Japanese-style knives regardless of their hand size.
The types of cuisine you prepare should also influence your decision. If your cooking centers on Western dishes that involve breaking down whole chickens, cutting through thick-skinned squash, and chopping large quantities of root vegetables, a full-sized chef’s knife with its robust build and longer blade will serve you better. If you focus on Asian cuisines that emphasize precise vegetable cuts, thinly sliced meats, and minimal processing of large bones, a Santoku’s precision and agility will be more valuable. Many serious home cooks eventually acquire both styles, using the chef’s knife for heavy-duty prep work and the Santoku for more delicate tasks. This two-knife approach provides maximum versatility without the expense and storage requirements of a larger collection.
- Usage Guide: What is a Santoku Knife Used For?
- Comparison: Chef Knife vs. Santoku Knife
- Buying Guide: Wusthof vs Zwilling vs Shun (Who makes the best Santoku?)
 Wüsthof Classic Ikon 8″ Chef’s Knife
The ultimate Western workhorse. Precision forged with a contoured handle.
Check Price on Amazon Shun Classic 7″ Santoku
The Japanese icon. VG-MAX steel with Damascus cladding for precision slicing.
Check Price on Amazon3. The Paring Knife (The Surgeon’s Tool)
Small but mighty. The paring knife is essentially a mini chef’s knife intended for “air work”—tasks done while holding the food in your hand rather than on the board.
Best Uses: Peeling apples, hulling strawberries, deveining shrimp, coring tomatoes.
The Different Styles of Paring Knives
While the term “paring knife” is often used generically, there are actually several distinct styles of paring knives, each optimized for specific types of hand work. The standard paring knife, sometimes called a spear-point paring knife, features a blade that tapers to a central point with a slight curve along the cutting edge. This is the most versatile style and can handle everything from peeling apples to trimming artichokes. The blade length is typically 3 to 4 inches, providing enough cutting surface for most tasks while remaining maneuverable in tight spaces.
The bird’s beak paring knife, also known as a tourné knife, is a specialized variation with a pronounced downward curve that resembles a bird’s beak. This unusual shape is designed for cutting curved surfaces and creating decorative cuts like the seven-sided football shape known as “tourné” in classical French cuisine. The inward curve allows the blade to follow the natural contour of round vegetables, removing precisely the amount of material needed without gouging or creating flat spots. While the bird’s beak paring knife is less versatile than the standard style, it is indispensable for garde manger work, garnishes, and any task that requires sculpting spherical or cylindrical foods.
The sheep’s foot paring knife features a straight cutting edge and a spine that curves down to meet it at a blunt tip, similar to the Santoku profile but in miniature. This design eliminates the sharp point found on standard paring knives, making it safer to use when working quickly or teaching children basic knife skills. The straight edge is ideal for trimming tasks where a flat cut is desired, such as leveling the bottom of vegetables so they sit flat on a plate or removing the tops from strawberries with a single clean stroke. The sheep’s foot design is also popular among woodworkers and crafters who need a small knife for detail work.
The clip-point paring knife features a spine that has a concave cutout near the tip, creating a finer, more delicate point than the spear-point design. This style is particularly useful for tasks that require precise piercing, such as removing the eyes from potatoes, coring tomatoes, or starting a cut in tough-skinned fruits like citrus. The clip-point design concentrates the piercing force onto a smaller area, allowing the knife to penetrate with less pressure. However, the fine tip is also more fragile and susceptible to breaking if the knife is used for prying or twisting motions.
Mastering Paring Knife Techniques
Proper paring knife technique is fundamentally different from the cutting board techniques used with larger knives. The paring knife is designed for “in-hand” work, where the food is held in one hand while the knife is manipulated with the other. This requires a different grip than the standard handle grip used for chef’s knives. The most common grip for paring work involves holding the knife with the handle resting in the palm and the thumb placed on the back of the blade for control. The index finger may rest on the spine of the blade or wrap around the handle, depending on the task and personal preference.
When peeling round fruits and vegetables with a paring knife, the technique involves drawing the knife toward the thumb in a controlled motion, using the thumb as both a guide and a depth stop. The thumb of the hand holding the food should be positioned behind the path of the blade, not in front of it. This technique, known as “thumb-peeling,” allows for rapid work once mastered but requires practice to develop the muscle memory that prevents injury. Many professional chefs can peel an entire case of apples or potatoes in minutes using this technique, removing only the skin and minimal flesh.
For detail work like deveining shrimp or trimming silver skin from meat, the paring knife should be held like a pencil, with the thumb and first two fingers gripping the blade near the bolster. This grip provides maximum control for fine, precise movements. The tip of the blade does most of the work in these applications, with the user making small, careful cuts rather than the sweeping strokes used for peeling. The pencil grip is also useful for scoring bread dough, removing seeds from peppers, and any task that requires the precision of a surgeon’s scalpel rather than the power of a chef’s knife.
Safety considerations are paramount when working with paring knives because the cutting is done close to the body and the non-dominant hand is in close proximity to the blade. Always cut away from your body when possible, and never try to catch a falling knife. A sharp paring knife is actually safer than a dull one because it requires less force to cut, reducing the likelihood of the blade slipping. Because paring knives are inexpensive relative to larger knives, many professionals replace them frequently rather than investing time in sharpening. However, a high-quality paring knife from a premium manufacturer will hold an edge for months of home use and can be a joy to use.
- Usage Guide: What is a Paring Knife Used For?
- Comparison: Paring Knife vs. Utility Knife
- Recommendation: Best Budget Options (like the Victorinox Paring)
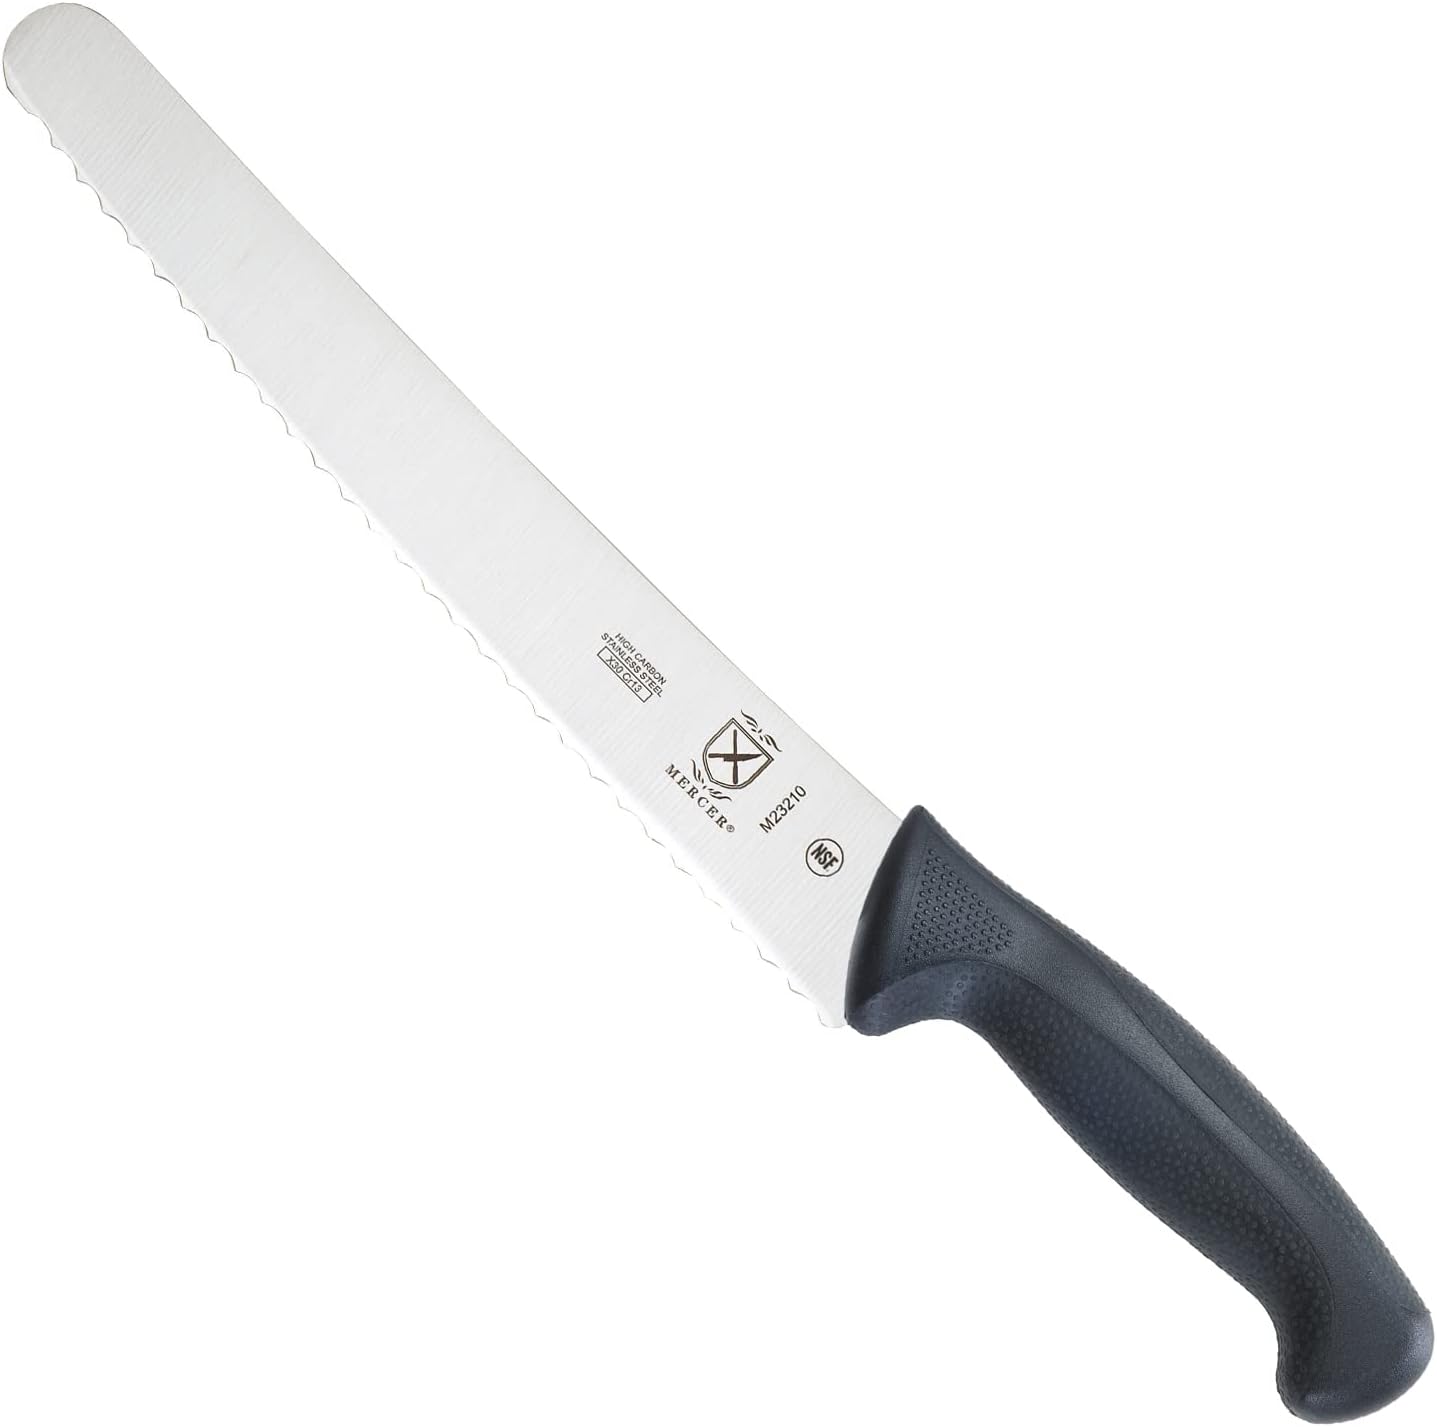
4. The Bread Knife (The Serrated Slicer)
Don’t let the name fool you; this is for more than just baguettes. The saw-like teeth allow the knife to cut through hard exteriors without crushing soft interiors.
Best Uses: Crusty bread, tomatoes, soft cakes, large melons, peppers.
How Serrations Work: Physics at the Dinner Table
The bread knife’s effectiveness is based on sound physics that most cooks never consider. When a smooth-edged knife encounters a hard crust, the entire cutting force is concentrated along a single line of contact. If the crust is harder than the food’s interior, this force distribution can cause the knife to crush the soft interior before it penetrates the crust, resulting in a squashed loaf. Serrated knives solve this problem by concentrating the cutting force onto multiple small points—the tips of each serration—creating localized pressure points that easily penetrate hard surfaces. As each serration tip breaks through the crust, the scalloped recesses between the teeth then slice through the softer interior using a sawing action.
The geometry of serrations varies significantly between manufacturers, and these differences affect cutting performance. Pointed serrations, with sharp V-shaped teeth, are aggressive and cut quickly but can tear delicate bread structures. Scalloped serrations, with rounded recesses between the teeth, produce cleaner cuts with less tearing but require slightly more effort. Some premium bread knives feature a wave pattern where the serrations alternate between large and small teeth, combining aggressive cutting with clean results. The number of serrations per inch also matters: more teeth per inch produce finer cuts but may clog more easily with soft bread, while fewer teeth cut more aggressively but leave a rougher surface.
The length of a bread knife is more critical than most cooks realize. Standard bread knives range from 8 to 10 inches, with 9 inches being the most common. A longer blade allows you to cut through large boules and artisan loaves with a single stroke, reducing the back-and-forth sawing that can tear bread. However, longer blades are also more difficult to control and require more storage space. For home kitchens, a 9-inch bread knife represents the sweet spot, providing enough length for large loaves while remaining maneuverable. Those who frequently bake their own bread or buy large artisan loaves may prefer a 10-inch blade, while casual bread eaters can manage perfectly well with an 8-inch knife.
One of the most common mistakes home cooks make is using a bread knife exclusively for bread. The serrated knife is actually the best tool for many non-bread tasks that involve hard exteriors and soft interiors. Tomatoes, especially ripe heirloom varieties with delicate flesh, are far easier to slice with a serrated knife than with even the sharpest chef’s knife. The serrations penetrate the tomato skin without compressing the fruit, producing clean slices that maintain their structure. Similarly, angel food cake, chiffon cake, and other delicate foam cakes benefit from a serrated knife’s gentle cutting action. Layer cakes are often leveled and split using serrated knives because the long blade and sawing action create an even cut without compressing the cake layers.
The Bread Knife Sharpening Problem
The primary disadvantage of serrated knives is that they are extremely difficult to sharpen at home. Unlike straight-edged knives, which can be sharpened on flat whetstones or with guided sharpening systems, serrated knives require specialized sharpening tools and techniques. Each serration must be sharpened individually, usually with a tapered round sharpening rod that matches the diameter of the serration scallops. This process is time-consuming and requires considerable skill to maintain consistent angles across all the teeth. As a result, many home cooks treat bread knives as disposable items, replacing them when they become dull rather than investing in sharpening.
Some manufacturers have addressed the sharpening problem by producing bread knives with differential heat treatment, where the cutting edge is hardened more than the spine. This creates a blade that maintains its serration sharpness longer than uniformly hardened blades. Other innovations include replaceable blade systems and single-sided serrations that can be touched up on a flat stone. For most home cooks, however, the most practical approach is to buy a high-quality bread knife with a reputation for edge retention and to use it only for its intended purposes. Proper use and storage will extend the life of a bread knife significantly, delaying the day when replacement becomes necessary.
Storage is particularly important for bread knives because the serrations are vulnerable to damage from contact with other metal objects. Throwing a bread knife into a drawer with other utensils will quickly dull the serration tips as they bang against harder surfaces. A knife block, magnetic strip, or individual blade guard is essential for protecting a bread knife investment. Some bread knives come with their own fitted guards, which are worth using. If you must store a bread knife in a drawer, wrapping the blade in a soft cloth or using a universal blade guard will significantly extend its useful life.
- Deep Dive: What is a Serrated Knife Used For?
- The Debate: Bread Knife vs. Serrated Knife
- Top Picks: Best Bread Knife
5. The Boning/Fillet Knife (The Protein Specialist)
These knives are thin, often flexible, and extremely sharp. They are designed to navigate around bones and cartilage to maximize yield.
Boning Knife: Stiffer, for beef, pork, and chicken joints. (See Boning vs Fillet Knife).
Fillet Knife: Flexible, for removing skin from fish.
The Art of Butchery: Boning Knife Mastery
Professional butchers and chefs develop an almost intuitive relationship with their boning knives, learning to feel the blade’s interaction with bone, cartilage, and connective tissue. The boning knife is designed to separate meat from bone while maximizing yield and maintaining the integrity of both the meat and the bones for stock-making. Unlike the chef’s knife, which cuts through muscle tissue, the boning knife navigates around and between structures, following natural seams where muscles attach to bones. This requires a knife with a thin, narrow blade that can maneuver in tight spaces and a sharp, durable edge that can sever tough connective tissue without slipping.
The flexibility of a boning knife is a critical design parameter that affects its performance for different tasks. Stiff boning knives, with blades that resist bending, are preferred for beef and pork butchery where the knife must navigate around large, dense bones and cut through thick connective tissue. The stiffness provides the leverage needed to separate joints and the strength to avoid blade damage when encountering unexpected resistance. Flexible boning knives, which bend easily along their length, are preferred for poultry and fish where the blade must follow the contours of delicate bone structures without cutting into them. The flexibility allows the blade to conform to the shape of a chicken breastbone or the ribcage of a fish, maximizing yield while minimizing waste.
Curved boning knives represent a specialized subset designed for specific butchery tasks. The upward curve of the blade, reminiscent of a skinning knife, allows the user to make long, sweeping cuts along the contour of bones without the tip digging into the meat. This design is particularly useful for removing silver skin from beef tenderloin or separating pork ribs from the belly. The curve also provides clearance for the user’s knuckles when working on a cutting board, reducing fatigue during extended butchery sessions. Some boning knives feature a reversed curve, where the blade bends downward, which is useful for poultry butchery and tasks that require the knife to be drawn toward the user in a controlled manner.
Fillet Knife Techniques for Perfect Fish Preparation
The fillet knife is perhaps the most specialized knife in the kitchen, designed for the single purpose of separating fish flesh from bone and skin with minimal waste. The extreme flexibility of a fillet knife is its defining characteristic; a quality fillet knife can be bent nearly 90 degrees and spring back to true. This flexibility allows the blade to follow the natural curve of a fish’s spine and rib bones, removing the maximum amount of usable flesh while leaving the skeleton clean. The blade is also typically longer than a boning knife, usually 7 to 9 inches, to allow for long, single-stroke cuts that produce smooth, professional-looking fillets.
The technique for filleting a round fish, such as salmon or trout, begins with an incision behind the gills and pectoral fin, cutting down to the backbone. The knife is then turned horizontally and drawn along the backbone toward the tail, using the backbone as a guide. The flexibility of the blade allows it to follow the natural curve of the spine while maintaining contact with the bones, ensuring maximum yield. Once the first fillet is removed, the process is repeated on the other side. Skinning the fillet requires a different technique: the knife is held nearly flat against the cutting board, with the blade angled slightly downward, and drawn between the flesh and skin using a gentle sawing motion. The flexibility of the fillet knife is essential for this task, as a stiff blade would cut through the skin or leave too much flesh attached.
Maintaining a fillet knife requires special attention because the thin, flexible blade is more susceptible to damage than sturdier knives. Honing steels are generally too aggressive for fillet knives and can damage the delicate edge. Ceramic honing rods or leather strops are better options for maintaining the edge between sharpenings. When sharpening, the flexible blade requires a lighter touch and more consistent angle control than stiffer knives. Many professionals sharpen fillet knives on water stones using a trailing-edge stroke, where the blade is drawn away from the edge rather than pushed into it. This technique minimizes the risk of the flexible blade bending and creating an inconsistent bevel.
If you are processing your own meat, check our best knife bag for chefs to keep these sharp tips safe.
6. The Nakiri (The Vegetable Cleaver)
A rectangular Japanese blade with a flat edge. It looks like a cleaver but is thin and delicate. It eliminates the “accordion” effect when chopping veggies.
Best Uses: Mountains of onions, cabbage for slaw, precision vegetable cuts.
The Zen of Vegetable Cutting: Nakiri Knife Philosophy
The Nakiri knife embodies a distinctly Japanese approach to vegetable preparation that prioritizes precision, efficiency, and respect for ingredients. Unlike Western vegetable preparation, which often relies on the rocking-chopping technique of a chef’s knife, Japanese vegetable cutting emphasizes clean, straight cuts that minimize cell damage and preserve the vegetable’s texture and appearance. The Nakiri’s straight, flat blade profile is specifically designed for this purpose, allowing the entire cutting edge to make simultaneous contact with the cutting board. This eliminates the accordion effect where vegetables remain connected by thin uncut sections, a common frustration when using curved blades.
The rectangular shape of the Nakiri blade, with its straight edge and squared-off tip, serves multiple functional purposes beyond aesthetic tradition. The straight edge provides maximum cutting surface in contact with the board, making the Nakiri exceptionally efficient for processing large quantities of vegetables. A single downward stroke can cut through an entire row of green beans or a stack of cabbage leaves, tasks that would require multiple rocking motions with a chef’s knife. The squared tip also allows the Nakiri to be used for scooping and transferring cut vegetables, functioning similarly to a bench scraper. This dual functionality reduces the number of tool changes during vegetable prep, improving workflow efficiency.
The Nakiri’s thin blade geometry is another critical design feature that distinguishes it from Western vegetable knives and especially from heavy cleavers. While a meat cleaver relies on weight and momentum to chop through bones, the Nakiri relies on sharpness and precision to slice through vegetables with minimal effort. The thin blade reduces wedging, where thick blades force food apart rather than cutting through it. This is particularly important when cutting dense vegetables like carrots, potatoes, and winter squash, where wedging can cause the vegetable to crack unpredictably rather than slicing cleanly. The thin blade also reduces friction, allowing the knife to pass through food with less resistance and greater control.
Traditional Nakiri knives are single-beveled, meaning the blade is ground on only one side, creating an extremely acute cutting angle that produces exceptionally clean cuts. This single-bevel geometry is similar to that used in traditional Japanese woodworking tools and sushi knives, and it requires specialized sharpening techniques to maintain. Modern Nakiri knives for the Western market are more commonly double-beveled, with symmetrical grinding on both sides, making them easier to sharpen and more familiar to Western users. While a double-bevel Nakiri sacrifices some of the ultimate sharpness of a traditional single-bevel blade, it is more practical for most home cooks and still delivers superior vegetable-cutting performance compared to a Western chef’s knife.
- Usage Guide: What is a Nakiri Knife Used For?
- Comparison: Santoku vs. Nakiri
- Advanced: Nakiri vs. Usuba
7. The Meat Cleaver (The Heavyweight)
Often confused with the Nakiri, the Meat Cleaver is thick, heavy, and tough. It uses momentum to chop through hard materials. Do not use your delicate Japanese knives for this!
Best Uses: Chicken bones, pork ribs, lobster shells, pumpkin.
Choosing the Right Cleaver for Your Kitchen
The term “cleaver” is often applied generically to any large, rectangular knife, but there are actually several distinct types of cleavers designed for different purposes. The meat cleaver, also known as a bone cleaver or butcher’s cleaver, is the heaviest and most robust type, with a thick spine typically measuring 4 to 6 millimeters at the heel. This substantial thickness provides the weight and rigidity needed to chop through bones without the blade deflecting or chipping. A quality meat cleaver should weigh between 1.5 and 2.5 pounds, with the weight concentrated in the blade rather than the handle to maximize chopping efficiency.
The vegetable cleaver, often called a Chinese cleaver or cai dao, is an entirely different tool despite its similar appearance. Chinese vegetable cleavers are thin and lightweight, typically 2 to 3 millimeters thick at the spine, and are designed for slicing and chopping vegetables rather than breaking bones. The thin blade of a Chinese cleaver would be destroyed by the force required to chop through bone, and attempting to use one for this purpose is both dangerous and expensive. The Chinese cleaver actually shares more functional DNA with the Nakiri than with the Western meat cleaver, and many Chinese chefs use a single cai dao for virtually all kitchen tasks, demonstrating remarkable versatility with this single tool.
Between these extremes lies the all-purpose cleaver, a medium-weight knife that can handle light bone work while remaining agile enough for vegetable prep. These compromise cleavers typically have spines around 3 to 4 millimeters thick and weigh between 1 and 1.5 pounds. They can handle chicken bones and small pork bones but should not be used for heavy beef bones or frozen foods. For home cooks who want a cleaver but do not process large quantities of bone-in meat, an all-purpose cleaver represents a practical compromise that avoids the need for both a heavy meat cleaver and a separate vegetable cleaver.
Cleaver Safety and Technique
Using a meat cleaver safely requires respect for the tool and proper technique. The cleaver’s primary advantage—its weight and momentum—is also its primary danger, as the force that cleaves bone can also cleave flesh with devastating efficiency. The fundamental safety rule for cleaver use is to keep the non-dominant hand completely clear of the cutting path at all times. Unlike a chef’s knife, where the non-dominant hand guides the food and protects the fingertips with the “claw” grip, a cleaver requires the user to position the food and then move the guiding hand entirely away before striking.
The chopping motion for a cleaver is different from the controlled cutting of a chef’s knife. The cleaver is raised to a height proportional to the force needed—higher for large bones, lower for small ones—and then brought down with controlled force, allowing the weight of the blade to do most of the work. The user’s grip should be firm but not tense, with the handle held toward the end to maximize leverage. The cutting board used with a cleaver must be substantial and stable; a thin plastic board will bounce and potentially cause the cleaver to deflect. End-grain wooden boards or thick rubber boards provide the stability and shock absorption needed for safe cleaver work.
Cleaver maintenance differs from other knife maintenance because the edge geometry is different. A cleaver’s edge is sharpened at a more obtuse angle, typically 25 to 30 degrees per side, compared to the 15 to 20 degrees of a chef’s knife. This steeper angle provides the durability needed to withstand impact with bone without chipping. The edge should also be slightly convex rather than a simple V-grind, which provides additional material behind the cutting edge for strength. Sharpening a cleaver requires patience and a steady hand, as the large, heavy blade is more difficult to control on a sharpening stone than a smaller knife. Many butchers send their cleavers to professional sharpeners rather than attempting to maintain them at home.
- Comparison: Cleaver vs. Butcher Knife
- Critical Info: Meat Cleaver vs. Vegetable Cleaver
8. The Utility Knife (The Middle Child)
Larger than a paring knife, smaller than a chef’s knife. It is the “sandwich knife.” While not strictly essential if you have a good chef’s knife, it is great for small board tasks.
Best Uses: Slicing cheese, cutting citrus for cocktails, sandwiches.
Understanding the Utility Knife’s Role
The utility knife occupies an ambiguous position in the kitchen knife hierarchy. It is defined primarily by what it is not: not as large as a chef’s knife, not as small as a paring knife. This intermediate size, typically 4.5 to 6 inches, makes the utility knife the goldilocks of the knife block—sometimes just right, but often neither specialized enough for precision tasks nor large enough for efficient bulk prep. Understanding when a utility knife adds value and when it simply duplicates existing tools requires honest assessment of your cooking habits and the specific tasks where the utility knife excels.
The utility knife truly shines for tasks that are too large for comfortable paring knife work but too small to justify reaching for a full-sized chef’s knife. Slicing a single apple for a snack, cutting a sandwich in half, portioning a block of cheese, or segmenting citrus for a cocktail are all tasks perfectly suited to the utility knife’s dimensions. In these applications, the chef’s knife feels oversized and clumsy, while the paring knife lacks the blade length to make clean, single-stroke cuts. The utility knife fills this gap elegantly, providing enough blade for the task without the bulk of a larger knife.
For cooks who primarily prepare meals for one or two people, the utility knife can serve as a primary cutting tool, handling the majority of daily tasks that do not require the capacity of a chef’s knife. The lighter weight and smaller dimensions reduce fatigue and feel more proportional when processing small quantities of food. In a compact kitchen with limited counter space, the utility knife may be the largest knife that feels comfortable to use. For these users, the utility knife is not a redundant tool but a practical solution that better fits their cooking reality than a full-sized chef’s knife.
However, for cooks who regularly prepare meals for families or who batch-cook on weekends, the utility knife’s limitations become apparent quickly. The shorter blade requires more strokes to process the same amount of food, and the reduced weight provides less momentum for chopping. In these scenarios, the utility knife becomes a specialty tool reserved for the small tasks described above, while the chef’s knife handles the majority of prep work. Whether this justifies the expense and storage space of an additional knife depends on the individual cook’s tolerance for using an oversized tool for small tasks.
Some utility knives feature serrated edges, which expands their functionality to include tasks like slicing crusty rolls, cutting tomatoes, and portioning delicate pastries. A serrated utility knife can serve as a compact alternative to a full-sized bread knife for households that rarely cut large loaves. The serrated utility knife is also popular as a travel or picnic knife, providing serrated cutting capability in a portable package. Whether serrated or straight-edged, the utility knife’s value proposition ultimately depends on finding the specific tasks in your kitchen where it fills a genuine need rather than simply adding another knife to the block.
See how it fits into the lineup in our best knife set reviews.
9. The Slicing/Carving Knife
Long (10-12 inches), thin, and often featuring a granton edge (dimples). It is designed to slice meat in one long stroke for smooth presentation.
Best Uses: Thanksgiving turkey, smoked brisket, ham, smoked salmon.
The Lost Art of Tableside Carving
Before the era of pre-sliced supermarket meats and buffet-style serving, tableside carving was considered an essential social skill for any host. The carving knife and its companion, the carving fork, were prominent tools in formal dining, and the ability to produce thin, uniform slices of roast meat was a mark of refinement. While tableside carving has largely disappeared from everyday dining, the carving knife remains an essential tool for anyone who prepares whole roasts, poultry, or large cuts of meat for special occasions. Understanding how to select and use a carving knife properly elevates both the presentation and the eating experience of roasted meats.
The defining characteristic of a carving knife is its blade length, which allows for single-stroke slicing across large pieces of meat. When carving a turkey breast or a prime rib roast, each slice should be completed in one smooth draw stroke, with the knife moving backward toward the carver rather than sawing back and forth. This single-stroke technique minimizes the disruption of the meat’s surface, producing slices with clean edges and uniform thickness. The length of the blade, typically 10 to 14 inches, ensures that even the largest roasts can be sliced in a single stroke without the knife becoming trapped in the meat.
The granton edge, also known as a kullenschliff or scalloped edge, is a common feature on carving knives that serves a specific purpose beyond aesthetics. The oval depressions ground into the blade create air pockets between the steel and the meat, reducing friction and preventing slices from sticking to the blade. When carving a dozen slices of roast beef for a dinner party, the difference between a granton-edge knife and a smooth blade becomes apparent: the granton knife releases each slice cleanly, while the smooth blade requires constant intervention to remove stuck slices. This seemingly minor feature significantly improves the efficiency and enjoyment of the carving process.
The flexibility of a carving knife blade is another important design consideration. Slightly more flexible than a chef’s knife but stiffer than a fillet knife, the carving knife should bend just enough to follow the natural contours of a bone or the curve of a rib rack without being so flexible that it lacks control. This moderate flexibility allows the carver to maintain consistent slice thickness while navigating around bone structures, maximizing yield without sacrificing presentation quality. Premium carving knives achieve this balance through careful material selection and heat treatment, creating blades that are responsive without being flimsy.
Slicing Knife vs. Carving Knife: Understanding the Distinction
While the terms “slicing knife” and “carving knife” are often used interchangeably, there is a technical distinction that affects performance. A traditional carving knife is designed specifically for cutting hot, cooked meats at the table. It typically features a pointed tip for piercing and a slightly curved blade that facilitates the draw-cutting technique used for roasts. A slicing knife, in contrast, is designed for cold or room-temperature foods and often features a rounded tip and a more flexible blade. In practice, most modern knives marketed as carving knives are versatile enough to serve both roles, but the distinction matters for specialized applications like slicing smoked salmon or prosciutto, where a dedicated slicing knife with a long, thin, extremely flexible blade is preferred.
The granton edge is more commonly found on slicing knives than on traditional carving knives, reflecting the different use cases. Cold meats, cheeses, and smoked fish are more prone to sticking than hot roasted meats, making the air pockets of a granton edge more valuable. However, the granton edge should not be confused with a serrated edge; the scallops are ground into the blade above the cutting edge and do not affect the knife’s ability to make clean, smooth cuts. A granton-edge slicing knife still produces the pristine slices expected of a fine carving instrument, with the added benefit of effortless food release.
Read more: Carving Knife vs. Slicing Knife.
10. The Steak Knife (The Table Knife)
The only knife on this list designed for the dining room, not the prep counter. However, a good steak knife ensures the meat you cooked perfectly isn’t ruined on the plate.
Straight-Edge vs. Serrated Steak Knives: The Great Debate
Perhaps no knife type generates more disagreement among enthusiasts than the steak knife. The debate between straight-edge and serrated steak knives has passionate advocates on both sides, each arguing that their preferred style produces a superior dining experience. Understanding the merits of each style allows you to make an informed choice based on your priorities rather than simply following convention or marketing claims.
Straight-edge steak knives, with smooth, non-serrated blades, are the traditional choice in fine dining and are preferred by many chefs and steak enthusiasts. The argument for straight-edge steak knives is that they slice through meat cleanly without tearing the muscle fibers. When you use a serrated steak knife, the teeth saw through the meat, creating a rougher cut surface that allows juices to escape more readily. A properly sharpened straight-edge steak knife, in contrast, severs the meat fibers cleanly, preserving the steak’s juices and creating a more tender mouthfeel. The straight-edge also allows the diner to slice precisely and with control, producing uniform pieces that enhance the eating experience.
The counter-argument for serrated steak knives is purely practical: they stay sharp longer without maintenance. A quality serrated steak knife can go years or even decades without sharpening and still cut steak effectively, while a straight-edge steak knife requires regular sharpening to maintain its performance. For households that do not want to invest in steak knife maintenance, serrated knives offer a set-it-and-forget-it solution that works adequately for most dining situations. The serrations also help with cutting through any crust or char on the exterior of the steak, providing initial bite that a dull straight-edge knife would struggle to achieve.
Some premium steak knife manufacturers have attempted to split the difference with micro-serrated blades, which feature serrations so fine they are barely visible to the naked eye. These micro-serrations provide some of the self-sharpening benefits of full serrations while producing a cleaner cut that approaches straight-edge quality. While not a perfect solution, micro-serrated steak knives represent a reasonable compromise for those who want the convenience of serrations without sacrificing cut quality entirely.
The Steak Knife as a Dining Experience Enhancement
Beyond the cutting mechanics, the steak knife contributes to the overall dining experience in ways that are often overlooked. The weight and balance of a steak knife affect how it feels in the hand, and a well-made steak knife conveys a sense of quality that enhances the meal’s perceived value. The handle material—whether wood, synthetic, or metal—affects grip comfort and thermal sensation. A metal-handled steak knife in a cold dining room can be unpleasant to hold, while a wooden handle provides warmth and tactile comfort. These seemingly minor details accumulate to shape the overall impression of a meal.
The visual presentation of steak knives at the table also matters, particularly for those who entertain. A matched set of elegant steak knives, properly arranged at each place setting, signals attention to detail and respect for guests. The steak knife is often the most substantial piece of cutlery at the table, and its quality reflects on the host. Investing in quality steak knives, whether straight-edge or serrated, elevates both everyday family dinners and special occasion gatherings. The steak knife may be the last knife used in the sequence from kitchen to table, but it should not be an afterthought.
Recommendation: Look for best dishwasher safe steak knives for easy cleanup after dinner parties.
Beyond the Top 10: Specialty Knives Worth Knowing
While the ten knife types covered above represent the core arsenal that every serious home cook should understand, there exists a vast world of specialty knives designed for specific cuisines, ingredients, and techniques. These knives are not essential for every kitchen, but knowing about them expands your culinary vocabulary and may introduce you to tools that perfectly match your cooking interests. From the sushi chef’s yanagiba to the cheese monger’s skeleton knife, each specialty blade tells a story about the cuisine and culture that created it.
The Yanagiba: The Sushi Master’s Sword
The yanagiba, which translates to “willow leaf blade,” is the traditional Japanese knife used for slicing raw fish for sushi and sashimi. Its long, slender blade, typically 270mm to 330mm (10.6 to 13 inches), is designed to slice fish in a single, fluid drawing stroke that minimizes cellular damage and preserves the fish’s delicate texture. The yanagiba is always single-beveled, with the cutting edge ground on only one side, creating an extraordinarily acute angle that can achieve sharpness levels impossible with double-beveled knives. This single-bevel geometry requires specialized sharpening techniques that take years to master, and a properly sharpened yanagiba can slice through fish with almost no perceptible resistance.
The yanagiba’s design reflects centuries of Japanese culinary tradition and the cultural importance placed on raw fish preparation. In high-end sushi restaurants, the itamae (sushi chef) treats their yanagiba with reverence, sharpening it daily on a progression of water stones to maintain the precise edge geometry required for perfect sashimi slices. The knife is used exclusively for raw fish and is never used for cutting vegetables, cooked proteins, or anything that might compromise its edge or contaminate its surface. This specialization may seem extreme to Western cooks accustomed to multi-purpose knives, but it reflects a culinary philosophy where tools are optimized for specific tasks rather than general versatility.
The Deba: Heavy-Duty Japanese Fish Butchery
The deba is a thick, heavy Japanese knife designed for breaking down whole fish. Unlike the delicate yanagiba, which is used only for slicing, the deba is built to handle the rough work of removing heads, cutting through bones, and filleting fish. The blade is thick at the spine, typically 6 to 10 millimeters, providing the weight and strength needed for cutting through fish bones without chipping. Like the yanagiba, traditional deba knives are single-beveled, though double-beveled versions are available for the Western market. The deba’s heft makes it effective for poultry butchery as well, and many Japanese chefs use it as their primary protein knife for all types of meat and fish.
The Usuba: The Professional Vegetable Knife
The usuba is the professional Japanese vegetable knife, similar in shape to the Nakiri but thinner, harder, and traditionally single-beveled. The name means “thin blade,” and the usuba’s edge geometry is optimized for the precise vegetable cuts that form the foundation of Japanese cuisine. The single-bevel edge creates a flat surface on the back of the blade that serves as a reference plane, allowing the chef to make perfectly straight cuts by keeping the flat back against the vegetable. Professional Japanese chefs train for years to master the usuba, and the knife is generally not recommended for home cooks due to the difficulty of maintaining its complex edge geometry.
The Cheese Knife Family
Cheese knives constitute an entire category of specialized tools designed for different cheese types and serving situations. The open-work cheese knife, with its blade perforated by large holes, is designed to minimize surface contact and prevent soft cheeses from sticking. The cheese plane, resembling a wide spatula with a slot, produces thin, uniform slices of semi-hard cheeses like cheddar and gouda. The skeleton knife, with a narrow, forked blade, is used for breaking apart very hard aged cheeses like Parmigiano-Reggiano by applying leverage rather than cutting. The spreader, with a short, wide, blunt blade, is used for soft, spreadable cheeses and pâtés. While no home needs all of these specialized cheese tools, a good cheese plane and a soft cheese knife can significantly improve the cheese board experience.
The Oyster and Clam Knives
Shellfish knives represent extreme specialization, designed for the single task of opening bivalve shells without damaging the delicate meat inside. Oyster knives feature short, thick, pointed blades with pronounced guards to protect the user’s hand when prying open oyster shells. The blade is not sharp in the traditional sense; instead, it relies on leverage and the user’s skill to pop the hinge and separate the adductor muscle. Clam knives are thinner and more flexible than oyster knives, designed to slip between the tightly closed shells of hard-shell clams. Using either of these knives safely requires proper technique and practice, and they serve as a reminder that some kitchen tasks demand tools that bear little resemblance to conventional knives.
The Grapefruit Knife: Extreme Specialization
Perhaps the most specialized knife in the Western kitchen, the grapefruit knife features a curved, double-serrated blade designed to separate grapefruit segments from the membrane and rind. The blade is thin, flexible, and curved to match the contour of a grapefruit half, with serrations on both edges to cut through the membranes that separate segments. While a paring knife or spoon can accomplish the same task, the grapefruit knife does it more efficiently and with less damage to the delicate fruit segments. This extreme specialization illustrates how knife design adapts to specific food geometries, and while a grapefruit knife is far from essential, it demonstrates the principle that the right tool makes any task easier.
Developing Professional Knife Skills
Owning the right knives is only half the equation; knowing how to use them properly is what separates cooks who struggle from those who cook with confidence and efficiency. Professional knife skills are built on a foundation of proper grip, body positioning, and cutting board management, and these fundamentals can be learned by any home cook willing to invest time in deliberate practice.
The Pinch Grip: The Professional’s Secret
The single most important knife skill that separates professional cooks from amateurs is the pinch grip. Instead of wrapping all four fingers around the handle like a tennis racket, the professional cook pinches the blade between thumb and forefinger just in front of the handle, with the remaining three fingers wrapping loosely around the handle. This grip moves the point of control forward toward the blade’s center of mass, providing superior balance and allowing the cook to guide the knife with precision. The pinch grip feels awkward at first, but after a few weeks of practice, it becomes natural, and returning to a handle grip feels clumsy by comparison.
The pinch grip also provides important tactile feedback about the knife’s position relative to the food being cut. With the thumb and forefinger in direct contact with the blade, the cook can feel the knife’s angle and adjust it instinctively without looking away from the cutting board. This feedback loop, developed through practice, allows for faster and safer cutting because the cook’s attention can remain on the food and the guiding hand rather than on the knife itself. Professional chefs achieve remarkable speed not because they cut faster but because their technique eliminates wasted motion and uncertainty.
The Claw: Protecting Your Fingertips
The “claw” is the positioning of the non-dominant hand that protects the fingertips while guiding the knife. The fingertips are curled inward, with the nails resting against the food being cut and the knuckles forming a vertical surface against which the knife blade can rest. The knife slides up and down against the knuckles, which act as a guide that maintains consistent cut thickness while keeping the vulnerable fingertips safely behind the cutting edge. The thumb is tucked behind the fingers, away from the blade’s path. This hand position, when combined with the pinch grip, creates a system where the knife and the guiding hand work together in a coordinated, safe, and efficient manner.
Learning the claw technique requires conscious effort and patience. The natural instinct is to extend the fingertips to hold the food, which exposes them to the blade. Overcoming this instinct takes weeks of deliberate practice, but the result is worth the effort: once the claw becomes automatic, the cook can work faster and with greater confidence, knowing that their fingertips are protected. A good way to practice is to start slowly with easy-to-cut foods like mushrooms or zucchini, focusing on maintaining the claw position rather than on speed. As the muscle memory develops, speed will increase naturally without compromising safety.
Cutting Board Management: The Overlooked Skill
Professional cooks develop systematic approaches to cutting board management that improve both efficiency and safety. The cutting board should be positioned squarely in front of the cook, at a height that allows the elbows to bend at approximately 90 degrees when gripping the knife. A board that is too high forces the shoulders up and causes fatigue; too low forces the cook to hunch over, straining the back. The board should be stabilized with a damp towel or non-slip mat underneath to prevent movement during cutting.
Food organization on the cutting board follows a consistent pattern: unprocessed food on one side, a clear cutting zone in the center, and a “landing zone” for processed food on the other side. A bench scraper or the back of the knife is used to move cut food to the landing zone, keeping the cutting area clear for the next item. A “garbage bowl” positioned near the cutting board collects trimmings, peels, and other waste, reducing trips to the trash can and keeping the board clean. These organizational habits may seem trivial, but they compound over the course of a meal’s preparation, reducing both time and mental fatigue.
Comprehensive Guide to Knife Storage
How you store your knives affects their longevity, sharpness, and safety. Improper storage can dull edges, damage blades, and create hazardous situations when reaching into drawers. The ideal storage solution protects the knife edges, keeps the knives organized and accessible, and fits the available kitchen space. Each storage method has distinct advantages and disadvantages that should be weighed against your specific needs.
Magnetic Knife Strips: Professional and Practical
Magnetic knife strips have become increasingly popular in both professional and home kitchens, and for good reason. A wall-mounted magnetic strip keeps knives visible, accessible, and safely separated from one another. The absence of slots or sheaths means there is no risk of edge damage from inserting or removing knives, and the open design allows knives to dry completely after washing, preventing the moisture-related corrosion that can occur in enclosed storage. Magnetic strips also save valuable counter space, making them ideal for compact kitchens.
When selecting a magnetic knife strip, look for models with strong rare-earth magnets encased in wood or stainless steel. Weak magnets can allow knives to slip or fall, creating a dangerous situation. The strip should be mounted securely to the wall at a height that keeps the blades out of reach of children while remaining accessible for adults. One important safety note: always place knives on the strip with the edge facing upward and the spine against the strip. Removing a knife by pulling it straight off the strip (rather than sliding it) prevents the edge from dragging across the magnetic surface, which would cause dulling.
Knife Blocks: Traditional with Caveats
The traditional knife block remains the most common storage solution in home kitchens, but it has significant drawbacks that are often overlooked. The vertical slots of a knife block collect dust, debris, and moisture over time, creating an unhygienic environment where bacteria can flourish. Inserting a wet knife into a block slot traps moisture against the blade, potentially causing corrosion even on stainless steel knives. The slots also make contact with the blade edges each time the knife is inserted or removed, causing gradual dulling.
Modern knife block designs have addressed many of these concerns. Universal knife blocks with flexible bristle inserts accommodate knives of various sizes without edge contact, as the bristles part around the blade rather than scraping against the edge. Some blocks feature antimicrobial treatments or UV sterilization to address hygiene concerns. Others are made from materials like bamboo that naturally resist bacterial growth. When evaluating a knife block, consider not just its appearance but also its functionality: can it hold your specific knives securely? Is it heavy enough to remain stable when removing knives? Does it allow for air circulation to keep knives dry?
In-Drawer Storage: Protecting Knives and Fingers
In-drawer knife storage has evolved significantly beyond simply tossing knives into a utensil drawer, which is the worst possible storage method for both safety and blade preservation. Modern in-drawer solutions include cork-lined trays with individual slots, bamboo knife docks, and expandable organizers with flexible holding mechanisms. These solutions keep knives separated and edges protected while keeping blades out of sight when not in use, an advantage for households with children or limited counter space.
The key considerations for in-drawer storage are blade protection and organization. Each knife should have its own designated position where the edge does not contact any other object. The organizer should hold knives securely so they do not shift when the drawer is opened and closed. Blade guards or edge covers provide additional protection and are essential if knives must share a drawer with other utensils. Edge guards also make knives safe to transport in knife bags or luggage, which is important for traveling cooks or those who cook at friends’ homes.
The Complete Guide to Knife Sharpening
Sharpening is the most intimidating aspect of knife ownership for many home cooks, but it is a learnable skill that dramatically improves the cooking experience. A sharp knife is safer than a dull one because it requires less force to cut, reducing the likelihood of the blade slipping. Sharp knives also produce better culinary results, cutting cleanly through food without crushing cell walls or tearing fibers. Understanding the sharpening options available allows you to choose an approach that matches your budget, time commitment, and desired level of involvement.
Understanding Edge Geometry
Before discussing sharpening methods, it is important to understand what sharpening actually does. A knife edge is not a perfect point but rather a microscopic intersection of two angled surfaces. When viewed under magnification, a sharp edge appears as a clean, continuous line where the two bevel surfaces meet. A dull edge, in contrast, appears rounded, chipped, or folded over. Sharpening removes metal to re-establish this clean intersection at the desired angle.
The sharpening angle—the angle between the stone and the blade—determines both the sharpness and durability of the edge. Lower angles (12-15 degrees per side) produce sharper edges that are more delicate and prone to damage. Higher angles (20-25 degrees per side) produce more durable edges that are less sharp but more resistant to chipping and rolling. Japanese knives are typically sharpened at lower angles to maximize cutting performance, while Western knives use higher angles for durability. Matching the sharpening angle to the knife’s steel and intended use is essential for optimal performance.
Whetstone Sharpening: The Gold Standard
Whetstone sharpening, also called water stone sharpening, is the method preferred by professionals and serious enthusiasts because it offers the greatest control over the sharpening process. Whetstones are available in various grit ratings that correspond to the coarseness of the abrasive particles. Low-grit stones (200-400 grit) are used for repairing damaged edges and establishing new bevel angles. Medium-grit stones (800-2000 grit) are the workhorses of sharpening, removing enough material to create a sharp edge while leaving a finish suitable for most kitchen tasks. High-grit stones (3000-8000 grit) refine and polish the edge for maximum sharpness, and ultra-high-grit stones (10,000+ grit) produce mirror finishes that are more about aesthetics than practical cutting improvement.
The whetstone sharpening process begins with soaking the stone in water (for water stones) or applying oil (for oil stones) to create a slurry of abrasive particles. The knife is held at a consistent angle against the stone and drawn across it in smooth, controlled strokes, alternating sides to maintain symmetrical bevels. Maintaining a consistent angle throughout the stroke is the primary skill that must be developed; even small variations in angle round the edge rather than sharpening it. Learning to feel when the angle is correct, often described as finding the point where the existing bevel lies flat against the stone, takes practice but becomes intuitive over time.
Guided Sharpening Systems: Consistency for Beginners
Guided sharpening systems use mechanical guides to hold the knife at a consistent angle throughout the sharpening process, removing the primary variable that makes freehand sharpening difficult. Systems like the Edge Pro, Wicked Edge, and Lansky use clamps to secure the knife while guide rods maintain the stone at the set angle. These systems can produce edges as sharp as freehand whetstone sharpening with less skill required, making them popular among beginners and those who sharpen infrequently.
The trade-offs of guided systems include higher initial cost, slower setup time, and less flexibility in adapting to different blade geometries. Some systems are also limited in the blade lengths they can accommodate. However, for home cooks who want sharp knives without investing the time to master freehand sharpening, guided systems represent a practical compromise. Many users find that the consistency provided by guided systems produces better edges than their freehand attempts, and the reduced frustration encourages more frequent sharpening.
Electric Sharpeners: Speed and Convenience
Electric knife sharpeners use motorized abrasive wheels or belts to sharpen knives quickly with minimal user skill. The best electric sharpeners, such as those from Chef’sChoice, use precision-angle guides and multi-stage sharpening processes that replicate the progression of whetstone grits. These sharpeners can restore a dull knife to working sharpness in under a minute, making them ideal for busy cooks who prioritize speed over the meditative experience of stone sharpening.
The primary criticism of electric sharpeners is that they remove more metal than necessary, shortening the knife’s lifespan. The fixed angle guides may also not match the knife’s original edge geometry, particularly for Japanese knives with asymmetrical bevels. Electric sharpeners are generally not recommended for high-end Japanese knives or any knife with a particularly thin or delicate edge. However, for the Western knives that most home cooks own, a quality electric sharpener provides a practical and effective sharpening solution.
Honing vs. Sharpening: Understanding the Difference
One of the most common misunderstandings in knife maintenance is the difference between honing and sharpening. Sharpening removes metal to create a new edge; honing realigns the existing edge without removing significant material. A honing steel, also called a sharpening steel (confusingly), does not sharpen a dull knife. Instead, it straightens the microscopic edge that has folded over during use, restoring the knife’s cutting ability temporarily. Regular honing extends the time between sharpenings but cannot replace sharpening indefinitely.
The honing steel should be used frequently—some professionals hone their knives after every significant use—but with proper technique. The knife is drawn across the steel at the same angle used for sharpening, with light pressure and alternating sides. The steel should be held securely, either vertically with the tip pressed against a cutting board or horizontally in the air, depending on the user’s comfort and workspace. Ceramic honing rods provide a slightly more aggressive honing action that also removes a small amount of metal, blurring the line between honing and very light sharpening.
Advanced Guide to Knife Materials and Construction
The materials used in a knife’s construction fundamentally determine its performance, maintenance requirements, and longevity. While the casual knife buyer may focus primarily on appearance and brand reputation, understanding the properties of different steels and handle materials enables informed decisions that match knives to your specific needs and preferences.
Carbon Steel: The Traditionalist’s Choice
Carbon steel, an alloy of iron and carbon with minimal chromium content, has been used for knife-making for millennia and remains the preferred material for many professional chefs and traditional Japanese bladesmiths. The primary advantage of carbon steel is its ability to achieve and hold an exceptionally sharp edge. The carbon content, typically 0.5% to 1.5%, forms hard carbides that provide wear resistance, while the absence of chromium allows for a finer grain structure that takes a keener edge than most stainless steels.
The well-known disadvantage of carbon steel is its reactivity: carbon steel rusts when exposed to moisture and acids, developing a patina over time that some users appreciate for its character and others find unsightly. This reactivity requires diligent maintenance, including immediate washing and drying after use and periodic application of protective oil. Carbon steel can also react with acidic foods like tomatoes, citrus, and onions, potentially imparting a metallic taste and discoloring the food. These maintenance requirements make carbon steel impractical for many home cooks, but for those willing to embrace the patina and the care routine, carbon steel offers a connection to traditional knife-making and a level of sharpness that stainless steel cannot quite match.
Stainless Steel: Modern Versatility
Stainless steel, defined as steel containing at least 10.5% chromium, revolutionized kitchen cutlery when it became widely available in the mid-20th century. The chromium forms a passive layer of chromium oxide on the surface that resists corrosion, making stainless steel knives far more forgiving of the occasional lapse in cleaning diligence. Modern stainless steel formulations have narrowed the performance gap with carbon steel, and premium stainless steels like VG-10, SG2, and AEB-L can achieve sharpness and edge retention that rival mid-range carbon steels.
The trade-off with stainless steel is that the chromium carbides that provide corrosion resistance are larger than the iron carbides in carbon steel, resulting in a slightly coarser grain structure that cannot achieve quite the same ultimate sharpness. For practical kitchen use, this difference is often imperceptible, and the convenience of stainless steel’s corrosion resistance outweighs the marginal sharpness advantage of carbon steel for most users. The vast majority of Western kitchen knives and an increasing percentage of Japanese knives are made from stainless steel, and the material continues to improve as metallurgy advances.
Powder Metallurgy Steels: The Cutting Edge of Technology
Powder metallurgy (PM) steels represent the current state of the art in knife steel technology. Unlike conventional steel production, where alloying elements are mixed in a molten state, PM steels are produced by atomizing molten steel into fine particles that are then consolidated under heat and pressure. This process produces a steel with extremely fine, uniform carbide distribution, eliminating the carbide clumping and banding that can cause weak points in conventionally produced steels.
PM steels like CPM-S35VN, CPM-M4, and SG2 (also known as R2) offer exceptional combinations of hardness, toughness, and wear resistance that were impossible to achieve with conventional metallurgy. These steels can be hardened to 62-64 HRC while remaining tough enough to resist chipping, and they hold an edge significantly longer than conventional stainless or carbon steels. The downside is cost: PM steels are expensive to produce and difficult to grind and sharpen, requiring diamond abrasives for efficient sharpening. Knives made from PM steels command premium prices but offer performance that justifies the investment for serious users.
Damascus Steel: Beauty and Function
Modern Damascus steel, also called pattern-welded steel, is produced by forge-welding alternating layers of different steel alloys, then folding, twisting, and manipulating the billet to create intricate patterns. The resulting blade combines the functional properties of the constituent steels—typically a hard core steel for cutting performance with softer, tougher outer layers—with the aesthetic beauty of the pattern. Each Damascus knife is unique, with patterns ranging from random swirls to controlled geometric designs depending on the smith’s technique.
It is important to distinguish modern Damascus from historical Damascus steel, also known as wootz steel, which was produced using a different metallurgical process that has been lost to history. Modern Damascus is a recreation of the visual effect using contemporary materials and techniques. While the pattern does not directly improve cutting performance, the lamination of different steels can create a blade that combines the best properties of each layer: a hard, wear-resistant core for edge retention with softer, tougher cladding that absorbs shock and resists corrosion. Quality Damascus knives from reputable manufacturers are functional works of art, but buyers should be wary of inexpensive knives with surface-etched patterns that mimic Damascus but offer no functional benefit.
Handle Materials: Comfort Meets Durability
The handle material of a knife affects grip comfort, durability, and maintenance requirements. Traditional wood handles, made from dense hardwoods like rosewood, ebony, or pakkawood, provide warmth and natural beauty but require periodic maintenance with mineral oil to prevent drying and cracking. Wood handles should never be soaked in water or placed in a dishwasher, as the heat and moisture will cause the wood to swell and crack.
Synthetic handle materials have largely supplanted wood in professional kitchens due to their superior durability and hygiene. Polyoxymethylene (POM), also known by brand names like Delrin, is a dense, stable polymer that resists moisture, chemicals, and bacterial growth. Linen and canvas micarta, made from layers of fabric impregnated with resin, provides excellent grip even when wet and develops a comfortable patina over time. G10, a fiberglass-reinforced epoxy laminate, is extremely durable and available in a wide range of colors. These synthetic materials are dishwasher-safe and require no maintenance beyond regular cleaning, making them the practical choice for busy kitchens.
Building Your Collection: Brand Battles
Now that you know the types, who makes the best ones? We have pitted the biggest names against each other:
Wusthof: Two Centuries of Solingen Steel
Wusthof, founded in 1814 in Solingen, Germany, represents the gold standard of Western knife manufacturing. The company has remained family-owned for seven generations, a remarkable achievement in an industry characterized by consolidation and corporate acquisition. Wusthof knives are precision-forged from a single piece of chromium-molybdenum-vanadium steel, a proprietary alloy designated X50CrMoV15. This steel is hardened to 58 HRC, a deliberate choice that balances edge retention with ease of maintenance. The result is a knife that takes a good edge, holds it reasonably well, and can be maintained with regular honing and occasional sharpening—a practical formula that has made Wusthof the choice of countless professional kitchens.
The Wusthof Classic line, with its distinctive black synthetic handle and triple rivets, is the company’s most recognizable product and a benchmark against which other Western knives are measured. The Classic Ikon line upgrades the handle design with a more ergonomic shape and a rear bolster that allows full edge sharpening. The Classic Ikon creme line adds a visually striking white handle that stands out in the knife block. Across all lines, Wusthof maintains consistent quality control and a 58 HRC hardness that ensures predictable performance. For cooks who value tradition, durability, and the reassuring heft of a German knife, Wusthof remains a benchmark choice.
Shun: Bringing Japanese Tradition to Western Kitchens
Shun, the premium kitchen knife brand of KAI Group, has been instrumental in introducing Japanese knife design to Western home cooks. Based in Seki City, Japan—a center of bladesmithing for over 800 years—Shun combines traditional Japanese aesthetics with modern materials and manufacturing techniques. The signature Shun look, with its layered Damascus cladding and distinctive D-shaped pakkawood handle, is immediately recognizable and has influenced countless imitators. More importantly, Shun’s VG-MAX steel, a proprietary refinement of VG-10, offers edge retention and sharpness that Western stainless steel cannot match.
The Shun Classic line features 34 layers of Damascus cladding on each side of the VG-MAX core, creating a blade that is both beautiful and functional. The cladding layers provide corrosion resistance and shock absorption while the hard core maintains the cutting edge. Shun knives are hardened to 60-61 HRC, significantly harder than German knives, and are sharpened to a 16-degree angle per side. This combination produces a knife that slices with noticeably less effort than Western alternatives, though the harder, thinner edge requires more careful use and specialized sharpening. Shun offers free lifetime sharpening, a significant value-add that addresses the maintenance concerns that might otherwise deter buyers from Japanese knives.
Victorinox: The Value Champion
Victorinox, the Swiss company famous for the Swiss Army Knife, produces kitchen knives that consistently outperform their modest price point. The Victorinox Fibrox line, with its textured thermoplastic handle and stamped stainless steel blade, is the knife found in more professional kitchens than any other single model. The reason is simple: Fibrox knives offer 90% of the performance of premium forged knives at roughly 20% of the price. For culinary schools, budget-conscious restaurants, and home cooks who want professional-quality tools without professional prices, Victorinox is the default recommendation.
The secret to Victorinox’s value is high-quality steel and efficient manufacturing. The X50CrMoV15 steel used in Fibrox knives is essentially the same alloy used by Wusthof, and Victorinox’s Swiss manufacturing produces consistent, well-made blades. The stamped construction and thermoplastic handle lack the aesthetic appeal of forged knives with wooden handles, but they are dishwasher-safe, virtually indestructible, and comfortable to use for extended periods. Victorinox also produces forged lines like the Swiss Modern and Grand Maitre for buyers who want more refined aesthetics, but the Fibrox line remains the brand’s core strength and the benchmark for value in kitchen cutlery.
Materials: What Matters?
Before you buy, understand what the knife is made of.
- Stamped vs. Forged: Forged is heavier and has a bolster; stamped is lighter. (Read Guide).
- Carbon vs. Stainless: Carbon gets sharper but rusts. Stainless is easier. (Read Guide).
- Ceramic: Stays sharp forever but shatters if dropped. (Read Guide).
- Super Steels: Advanced alloys like VG10 vs AUS-10. (Read Guide).
Ceramic Knives: The Complete Picture
Ceramic knives, made from zirconium dioxide (zirconia), offer a fundamentally different cutting experience than steel knives. The extreme hardness of ceramic—significantly harder than any steel—means that ceramic knives can maintain a sharp edge for months or even years of regular use without sharpening. This edge retention is the primary selling point of ceramic knives and the reason many home cooks find them appealing. However, the hardness that provides this advantage also creates significant limitations that potential buyers must understand before purchasing.
The brittleness of ceramic is the knife’s Achilles’ heel. Unlike steel, which deforms before it breaks, ceramic has virtually no elasticity. When a ceramic knife is subjected to lateral force—such as twisting the blade while it is embedded in food, prying, or even dropping it onto a hard floor—it does not bend; it shatters. This brittleness restricts ceramic knives to straight cutting motions on soft to medium-hard foods. Attempting to cut through bones, frozen foods, or hard rinds with a ceramic knife invites catastrophic blade failure. The knife cannot be used for any task that involves leverage, such as separating chicken joints or prying open containers.
Sharpening ceramic knives presents another challenge. The extreme hardness that provides edge retention also means that conventional sharpening stones and steels are ineffective. Ceramic can only be sharpened with diamond abrasives, and the process requires specialized equipment and skill. Most manufacturers offer factory sharpening services, but shipping knives for sharpening is inconvenient and leaves the owner without their knives during the process. For practical purposes, ceramic knives should be considered semi-disposable: they will eventually dull, and when they do, replacement is often more practical than sharpening.
Despite these limitations, ceramic knives have legitimate applications that make them worthwhile for some users. They are excellent for slicing fruits and vegetables, particularly those that cause steel knives to discolor or react chemically. Ceramic is completely inert and will not transfer any metallic taste to food, making it ideal for slicing apples, pears, and citrus fruits that are prone to oxidation. The non-stick properties of ceramic also make it useful for slicing cheese and other soft, sticky foods. For a home cook who understands the knife’s limitations and uses it only for appropriate tasks, a ceramic knife can be a valuable addition to the kitchen arsenal.
Care and Maintenance: Keep Them Sharp
Owning 10 knives means maintaining 10 edges.
- Sharpening: Use a whetstone or electric sharpener. (Comparison: Whetstone vs Electric).
- Honing: Use a steel or strop daily. (Comparison: Stone vs Steel and Strop vs Steel).
- Storage: Use a drawer organizer, magnet, or block alternative.
- Rust: If you mess up, learn how to remove rust.
Professional Knife Maintenance Routines
Professional chefs develop knife maintenance routines that become as automatic as mise en place. The daily ritual typically begins with inspection: checking each knife’s edge under good light for visible damage, feeling the edge with a fingertip for consistency, and testing sharpness on a piece of paper or a ripe tomato. Any knife that fails these tests is set aside for sharpening or honing before being returned to service. This daily discipline prevents the accumulation of dull knives and ensures that every knife in the kit is ready for immediate use.
The weekly maintenance routine typically involves a more thorough edge assessment and touch-up sharpening on a fine-grit stone. Even knives that are performing adequately benefit from this regular attention, as it maintains the edge geometry and prevents the need for more aggressive sharpening later. Many professionals dedicate a specific time each week—Sunday evening, for example—to knife maintenance, treating it as a meditative practice rather than a chore. This regular investment of time pays dividends in faster, safer, and more enjoyable cooking throughout the week.
Preventing Knife Damage Before It Happens
The best knife maintenance is preventing damage before it occurs. Many common knife-damaging behaviors can be eliminated through awareness and habit change. Never use a kitchen knife to cut on surfaces other than proper cutting boards; glass, marble, ceramic, and metal surfaces will instantly dull any blade. Never scrape food across the cutting board with the knife’s edge; use the spine instead or, better yet, use a bench scraper. Never use kitchen knives as improvised tools for opening packages, prying lids, or cutting string or twine; keep a utility knife or scissors handy for these tasks.
Proper washing technique is equally important for preventing damage. Knives should be washed individually, never submerged in a sink full of soapy water where they can bang against other utensils and where reaching into the water can result in injury. Wash the blade with a soft sponge or cloth, wiping from the spine toward the edge to avoid cutting yourself. Dry immediately with a soft towel, again wiping from spine to edge. Even stainless steel can develop water spots and corrosion if left to air-dry, and wooden handles will deteriorate rapidly if exposed to prolonged moisture. The entire washing and drying process should take less than 30 seconds per knife and should become an automatic part of your cleanup routine.
The Economics of Knife Maintenance
Understanding the economics of knife ownership helps rationalize the investment in quality knives and proper maintenance. A $150 chef’s knife that is properly maintained will last a lifetime and provide daily value for decades. When amortized over 20 years of regular use, the cost per use is fractions of a cent. A $30 knife that is treated as disposable and replaced every few years may seem cheaper initially but costs more over the long term while providing an inferior user experience throughout. Quality knives also retain significant resale value, particularly if they are from respected manufacturers and have been well maintained.
Professional sharpening services represent an ongoing cost that should be factored into knife ownership. Depending on location and the sharpener’s expertise, professional sharpening costs $5 to $20 per knife and should be performed once or twice per year for knives in regular home use. This $100 to $200 annual investment maintains the performance of a collection worth several times that amount. For those who learn to sharpen their own knives, the whetstone and accessories represent a one-time investment that pays for itself within the first year or two of use. Either approach is economically rational; the only mistake is allowing knives to become and remain dull, which degrades the cooking experience and increases the risk of injury.
Frequently Asked Questions (FAQ)
The “Holy Trinity” of kitchen knives includes the Chef’s Knife (for 90% of tasks), the Paring Knife (for small detail work), and the Bread Knife (for serrated tasks). See our guide on Knives Every Chef Should Own.
Knife sets are convenient but often include filler items you won’t use. Buying individual knives allows you to pick the best brand for each task (e.g., a Wusthof Chef Knife and a Mercer Bread Knife). However, high-quality sets do exist—check our best knife set reviews.
We highly recommend Victorinox or Mercer Culinary. They offer professional performance, high durability, and affordable pricing, making them perfect for learning knife skills.
Generally, no. High heat and harsh detergents damage handles and dull blades. Even dishwasher safe knives last longer when hand-washed. Always wash and dry immediately.
For home cooks using their knives several times per week, sharpening once or twice per year is typically sufficient when combined with regular honing. Professional chefs who use their knives for hours daily may sharpen monthly or even weekly. The best indicator that sharpening is needed is performance: if honing no longer restores the knife’s cutting ability, it is time to sharpen. Test your knife by slicing through a ripe tomato; if the blade slides across the skin without biting in, your knife needs sharpening regardless of when it was last done.
Japanese knives offer superior sharpness, edge retention, and often beautiful aesthetics that justify their price for enthusiasts and professionals. However, they also require more careful handling and specialized maintenance. For cooks who are willing to learn proper technique and invest in whetstone sharpening, a quality Japanese knife provides a cutting experience that transforms cooking from a chore into a pleasure. For cooks who prioritize durability and ease of maintenance, a quality German knife may be the better investment. The “right” choice depends on your priorities, not your budget.
End-grain wooden cutting boards, made from maple, walnut, or cherry, are the gold standard for knife preservation. The wood fibers in end-grain boards part around the knife edge rather than resisting it, minimizing dulling. Edge-grain wooden boards are a good second choice. High-quality rubber boards, such as those from Hasegawa or Sani-Tuff, are also knife-friendly and have the advantage of being dishwasher-safe. Avoid glass, marble, granite, and bamboo boards: glass and stone will immediately dull any knife, while bamboo contains silica particles that accelerate wear on knife edges.
A chef’s knife can handle small, soft bones like chicken ribs or the back of a chicken when used properly, but it should never be used to cut through large, dense bones like beef femurs or pork shoulder bones. For these tasks, a meat cleaver or a bone saw is the appropriate tool. When cutting through chicken bones with a chef’s knife, use the heel of the blade where it is thickest, and apply force straight down rather than twisting or prying. If you frequently break down whole chickens or other bone-in proteins, consider adding a dedicated boning knife or cleaver to your collection rather than risking damage to your primary chef’s knife.
Conclusion: Building Your Personal Knife Arsenal
Understanding the 10 types of knives and their uses transforms you from a cook who hacks at food into a chef who prepares it. You don’t need to buy all ten today. Start with the essentials—a Chef’s knife, Paring knife, and Bread knife—and expand your collection as your skills grow. Each knife you add should serve a specific purpose that your existing tools cannot adequately fulfill, and the best knife collection is one where every piece earns its place through regular use.
Whether you choose the artistic flair of Dalstrong or the traditional reliability of Wusthof, investing in the right tool for the job is an investment in your culinary joy. The knife you reach for every day should feel like an extension of your hand—balanced, sharp, and perfectly suited to the task at hand. Take the time to hold different knives, feel their weight and balance, and choose the ones that speak to your cooking style and aesthetic preferences. A knife that inspires you to cook is worth far more than its price tag, and the right knife can transform meal preparation from a daily obligation into a daily pleasure.
Remember that the journey of building a knife collection is as rewarding as the destination. Each new knife teaches you something about your cooking preferences and skills. The first time you use a truly sharp Japanese gyuto to slice through a ripe tomato, or the satisfaction of cleaving cleanly through a chicken with a well-balanced cleaver, are experiences that connect you to centuries of culinary tradition. Your knives are more than tools; they are the bridge between your hands and the food that nourishes your loved ones. Treat them with respect, maintain them diligently, and they will serve you faithfully for a lifetime.