Whetstone vs. Electric Sharpener: The Battle for the Perfect Edge
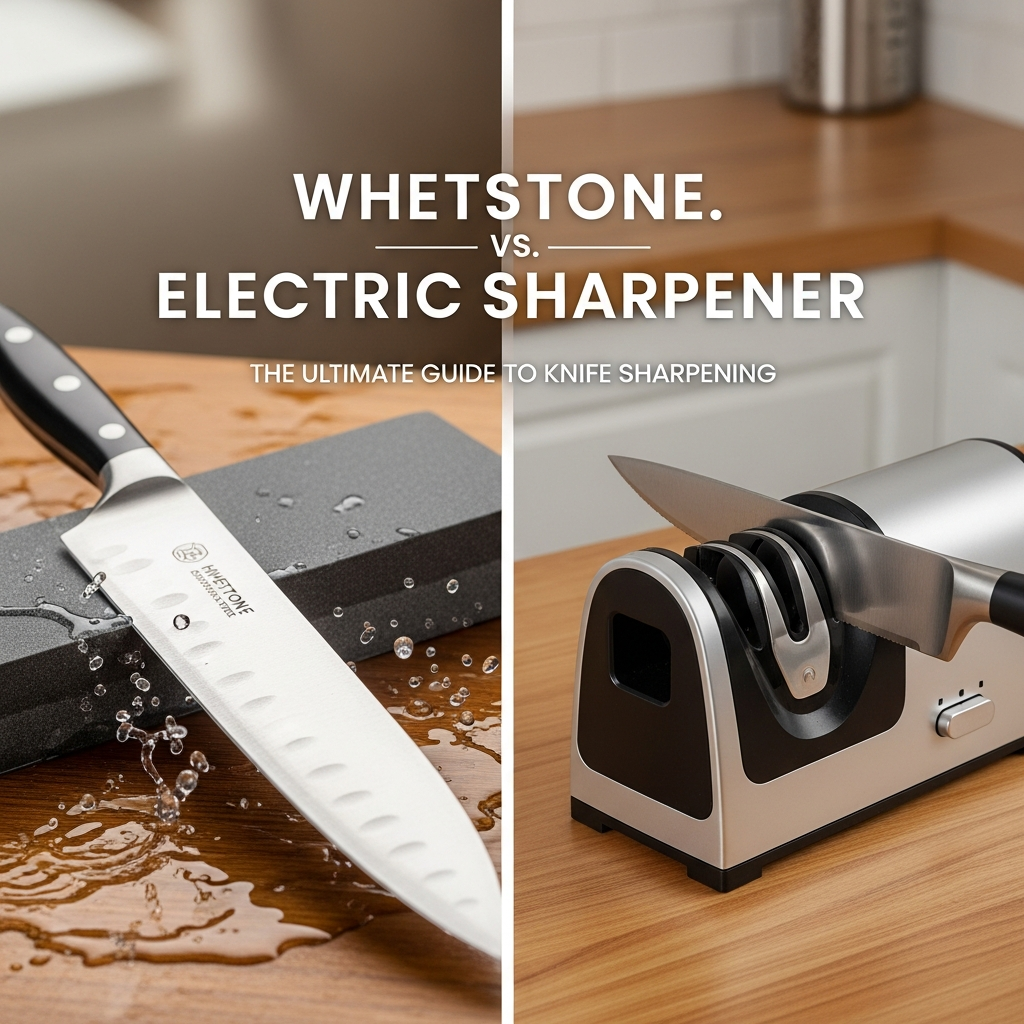
There is a moment in every cook’s life when they realize their knife isn’t cutting—it’s crushing. The tomato skin resists, the onion slips, and prep time becomes a chore. You need to restore that edge. But how? Do you turn to the ancient, meditative art of the Whetstone, or the modern, plug-and-play convenience of the Electric Sharpener?
If you are browsing knifeindex.com/ looking for the best knives sharpener, you know this choice defines your relationship with your tools. Are you a craftsman who enjoys the process? Or a busy parent who needs a sharp blade in 60 seconds?
In this comprehensive guide, we will analyze the mechanics, the costs, the risks, and the rewards of both methods. Whether you own high-end Japanese knives or reliable German steel, this guide will help you choose the right path.
We will also dive deep into the science of edge geometry, explore the complete ecosystem of sharpening tools including oil stones and diamond stones, examine professional sharpening services versus DIY approaches, and uncover the techniques that separate a serviceable edge from a truly exceptional one. By the time you finish reading, you will understand exactly which sharpening method aligns with your cooking style, your knife collection, and your lifestyle.
1. The Whetstone: The Zen of Sharpening
A whetstone (or water stone) is a rectangular block of abrasive material. It is the method of choice for professional sushi chefs and knife enthusiasts. You soak the stone, hold the knife at a precise angle, and slide it across the surface. The word “whet” actually means “to sharpen”—it has nothing to do with water, though most modern whetstones do require water or oil as a lubricant.
The Rich History of Whetstone Sharpening
The practice of using stones to sharpen blades stretches back thousands of years, to the very dawn of metallurgy. Ancient civilizations discovered that certain rocks, when ground against metal edges, could restore sharpness to tools and weapons. The Japanese took this craft to extraordinary heights, developing natural water stones quarried from specific regions like Kyoto. These stones, composed of microscopic silicate particles suspended in a clay matrix, would release fresh abrasive particles as they were used—a self-renewing sharpening surface that produced edges of legendary sharpness.
Today, while natural Japanese water stones remain prized by purists and collectors, most whetstones available to home cooks are synthetic. These manufactured stones combine precisely graded abrasive particles with binding agents to create consistent, predictable sharpening surfaces. The best synthetic stones from brands like Naniwa, Shapton, and Suehiro rival or even surpass natural stones in performance, offering consistent grit ratings and faster cutting action.
Understanding Whetstone Types: Water Stones, Oil Stones, and Diamond Stones
Within the category of manual stones, there exists significant diversity. Understanding these variations helps you select the optimal tool for your specific knives and skill level.
Water Stones (Japanese-Style)
Water stones are the most popular choice among knife enthusiasts. They use water as a lubricant and cutting fluid, which carries away the metal swarf (debris) and prevents the stone from loading up or glazing over. Water stones cut quickly and produce excellent feedback—you can feel the knife biting into the stone as the edge develops. The trade-off is that water stones wear down faster than other types and require periodic flattening with a flattening stone or diamond lapping plate. For anyone serious about achieving the sharpest possible edge, the water stone remains the gold standard.
Oil Stones (Arkansas Stones)
Oil stones represent an older tradition, particularly popular in Western woodworking and butchery. Natural Arkansas stones, quarried from the Ouachita Mountains, come in various grades from soft (coarse) to hard (fine) and translucent (extra fine). They use honing oil rather than water as a lubricant. Oil stones cut more slowly than water stones, but they wear down very slowly and maintain their flatness for years. If you are sharpening tough Western knives like your cleaver or butcher knife, an oil stone provides a durable, long-lasting sharpening solution that requires minimal maintenance.
Diamond Stones
Diamond sharpening stones feature industrial diamonds bonded to a flat metal or plastic plate. They represent the fastest-cutting manual sharpening option and excel at sharpening extremely hard steels, including high-vanadium powder metallurgy steels found in premium pocket knives and some high-end kitchen cutlery. Diamond stones do not require flattening, work with water or dry, and last for years with proper care. They are an excellent choice if you sharpen frequently and value speed above all else. For ceramic knives, diamond abrasives are essentially the only effective manual sharpening method.
Why Enthusiasts Love It
The whetstone offers total control. You decide the angle. You decide how much metal to remove. You can polish the edge to a mirror finish that electric sharpeners simply cannot replicate. For delicate blades like those in our Miyabi vs Shun comparison, a stone is often the only safe option.
Beyond mere functionality, whetstone sharpening offers something deeper: a meditative ritual that connects you directly to your tools. The rhythmic sound of steel sliding across stone, the gradual development of a burr, the satisfaction of watching your knife transform from dull to deadly sharp—these sensory experiences create a bond between cook and blade that no electric machine can replicate. Many professional chefs describe their sharpening sessions as a form of active meditation, a quiet moment of focus before the chaos of dinner service begins.
The Learning Curve
It takes practice. Holding a consistent 15-degree angle (for Asian knives) or 20-degree angle (for Western knives) requires muscle memory. However, mastering this skill is incredibly rewarding and allows you to sharpen anything from a Paring Knife to a Cleaver.
For beginners, we recommend starting with an angle guide—a small plastic clip that attaches to the spine of your knife and ensures consistent contact with the stone. These inexpensive accessories accelerate the learning process dramatically. After sharpening a dozen knives with the guide, most people develop sufficient muscle memory to transition to freehand sharpening. Another helpful training technique is the “sharpie trick”: color the edge bevel with a permanent marker, then make a few passes on the stone. The marker will wear away exactly where the stone contacts the blade, revealing any inconsistencies in your angle.
Pro Tip: Building Your Stone Collection
If you decide to pursue whetstone sharpening seriously, you will eventually want multiple stones. A complete progression typically includes: a coarse stone (220-400 grit) for repairing chips and establishing new bevels, a medium stone (800-2000 grit) for general sharpening, and a fine stone (3000-8000 grit) for polishing and refining the edge. For those chasing the ultimate mirror polish, stones up to 12000 grit exist, though these are primarily for aesthetics and specialized tasks like sushi preparation.
Common Whetstone Mistakes Beginners Make
Learning to sharpen on a stone comes with predictable pitfalls. Understanding these common errors helps you avoid frustration and damaged knives:
- Inconsistent Angle: The most common beginner mistake is allowing the angle to drift during the stroke. This rounds the edge and prevents formation of a clean apex. Using an angle guide eliminates this problem entirely.
- Excessive Pressure: Many novices press too hard, thinking more pressure equals faster sharpening. In reality, excessive pressure causes the stone to dish (develop a concave surface), creates deep scratches that are difficult to remove, and can actually fold over the delicate edge you are trying to create.
- Neglecting to Flatten: A dished stone produces inconsistent bevels. Invest in a flattening stone or diamond lapping plate, and use it before every sharpening session. A flat stone is non-negotiable for precise results.
- Skipping Grits: Jumping from a 400-grit stone directly to a 3000-grit stone leaves deep scratches that the fine stone cannot efficiently remove. Follow a logical progression, roughly doubling the grit with each step.
- Soaking Issues: Some stones require soaking (magnesia-bonded stones), while others are splash-and-go (resin-bonded stones). Soaking a splash-and-go stone can cause it to crack. Always read the manufacturer’s instructions.
2. The Electric Sharpener: The Modern Miracle
Electric sharpeners use motorized abrasive wheels (often diamond-coated) to grind a new edge. They typically have guides/slots that hold the knife at the correct angle for you. These machines have revolutionized home knife maintenance, making sharp knives accessible to everyone regardless of skill level or available time.
The Evolution of Electric Sharpening Technology
Electric knife sharpeners emerged in the mid-20th century as a consumer appliance, but early models were crude devices that removed excessive metal and left rough, uneven edges. The technology has advanced dramatically since those early days. Modern premium electric sharpeners from brands like Chef’sChoice, Work Sharp, and Presto incorporate sophisticated engineering: precision angle guides, multi-stage sharpening systems with progressively finer abrasives, and flexible stropping disks that polish and align the final edge.
The key innovation in contemporary electric sharpeners is the use of diamond abrasives. Industrial-grade diamond particles, bonded to metal or plastic wheels, cut quickly and maintain their shape for thousands of sharpenings. Unlike the natural stones used in manual sharpening, diamond abrasives show virtually no wear over time, ensuring consistent performance from the first knife to the thousandth.
How Electric Sharpeners Actually Work
Understanding the internal mechanics of an electric sharpener helps you use it correctly and appreciate its limitations. When you insert your knife into the sharpening slot, spring-loaded guides press the blade against a spinning abrasive wheel. The angle of these guides determines the bevel angle applied to your knife—typically 15 degrees for Asian-style edges or 20 degrees for Western-style edges. As you draw the knife through the slot, the abrasive wheel removes metal from both sides simultaneously, creating a new edge in a fraction of the time required by manual methods.
Most quality electric sharpeners feature multiple stages. Stage one uses coarse abrasives to reshape dull or damaged edges. Stage two employs medium abrasives to refine the edge and remove the coarse scratches. Stage three, often a stropping or honing stage, uses fine abrasives or flexible disks to polish and align the edge, removing any remaining burr and creating a sharp, durable cutting surface. The best models even include specialized slots for serrated knives, solving a sharpening challenge that frustrates even experienced whetstone users.
Why Busy Cooks Love It
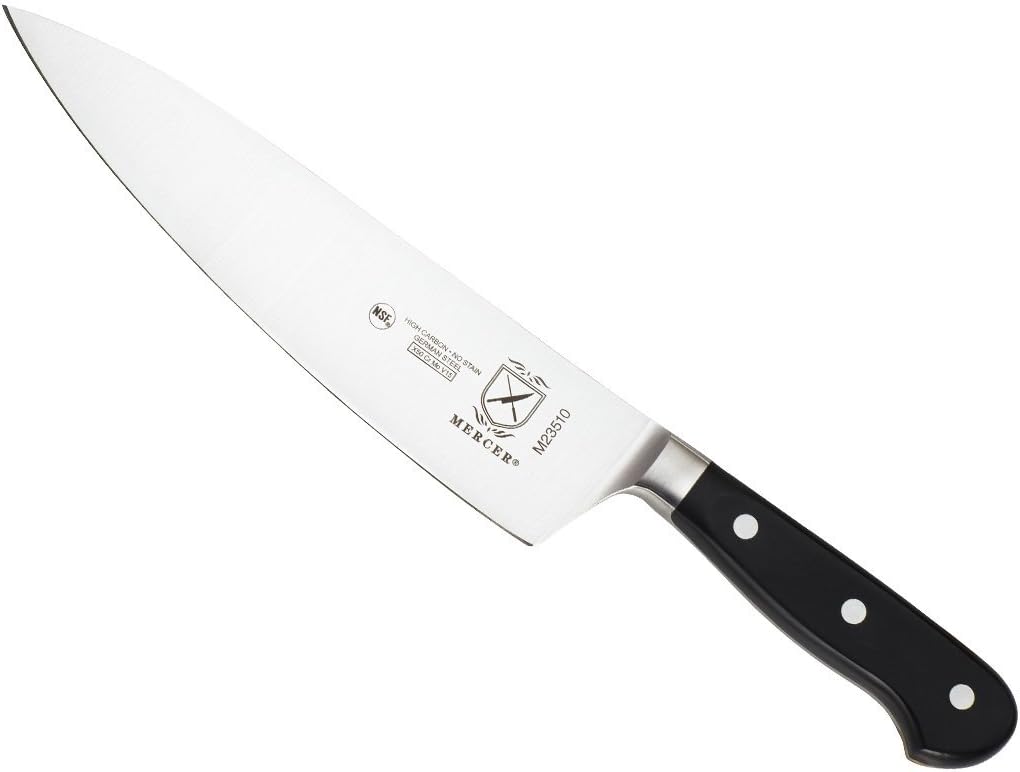
It is fast. We are talking “dull to razor-sharp in 2 minutes” fast. If you have a set of workhorse knives like Mercer or Victorinox, an electric sharpener is a godsend. It eliminates the guesswork of angles.
For busy parents juggling meal preparation with work and family obligations, the electric sharpener represents freedom. No need to set aside 30 minutes of quiet focus. No need to clear the counter, soak stones, or concentrate on maintaining a precise angle. Just plug in the machine, draw the knife through the slots, and return to cooking with a sharp blade. The convenience factor cannot be overstated, and for many home cooks, this convenience is the difference between regularly sharp knives and perpetually dull ones.
⚠️ The Risk Factor
Electric sharpeners are aggressive. They remove significantly more metal than a stone. If you use them weekly, you will wear your knife down to a toothpick in a few years. They can also heat up the blade, potentially affecting the temper of high-carbon steel. (See Stainless vs Carbon Steel).
To mitigate these risks, follow the manufacturer’s instructions carefully. Use light, steady pressure—never force the knife through the slots. Allow the abrasive wheels to do the work. And most importantly, limit electric sharpening to once or twice per year for knives that see regular home use. Between sharpenings, maintain your edges with a honing steel or ceramic rod.
The Overheating Problem Explained
One of the most serious concerns with electric sharpeners is the potential to overheat the blade edge during sharpening. Here is why this matters: knife blades achieve their hardness through heat treatment, a carefully controlled process that involves heating the steel to a specific temperature and then cooling it rapidly (quenching) to create a specific crystalline structure. This structure gives the steel its hardness and edge-holding ability. If the edge of your knife overheats during sharpening—even just the microscopic layer of metal at the very apex—the crystalline structure can change, effectively “un-hardening” the steel right where it matters most.
The risk of overheating is highest with high-carbon steels and powder metallurgy steels, which are more sensitive to temperature changes than the softer stainless steels used in most Western kitchen knives. Premium Japanese blades made from steels like Aogami (Blue Steel) or Shirogami (White Steel) are particularly vulnerable. If you own these knives, either stick to whetstones or choose an electric sharpener with a slow-speed motor and built-in cooling features.
3. The Third Path: Manual Pull-Through Sharpeners and Guided Systems
Between the fully manual whetstone and the fully automatic electric sharpener lies a middle ground: the manual pull-through sharpener and the guided rod system. These tools deserve serious consideration in any comprehensive sharpening discussion, as they offer unique combinations of convenience and control.
Manual Pull-Through Sharpeners
Pull-through sharpeners consist of a plastic or metal housing containing pre-set abrasive elements—typically tungsten carbide blades for coarse sharpening and ceramic rods for fine honing. You simply place the sharpener on a counter, insert the knife into the V-shaped slot, and pull the blade through with moderate pressure. The entire process takes seconds, requires no electricity, and demands virtually no skill.
The advantages are obvious: pull-through sharpeners are inexpensive (typically $10-$30), extremely portable, and foolproof to use. They work adequately for inexpensive kitchen knives and are perfect for situations where a quick touch-up is needed and a full sharpening session is impractical. However, the disadvantages are significant. The carbide cutters are extremely aggressive, removing metal rapidly and leaving a rough, micro-serrated edge that may feel sharp initially but dulls quickly. More critically, the fixed-angle design may not match your knife’s existing bevel, leading to uneven wear and a blade that never achieves its full potential. For your best chef knives, a pull-through sharpener is generally not recommended.
Guided Rod Systems
Guided rod sharpeners, popularized by brands like Lansky, Spyderco, and Wicked Edge, represent a sophisticated compromise between freehand stones and electric machines. The knife is clamped securely in a fixture, and sharpening stones mounted on guide rods ensure a consistent, repeatable angle with every stroke. The operator controls the pressure and number of strokes, but the system eliminates angle inconsistency—the single biggest challenge of freehand sharpening.
Guided systems produce edges that rival or exceed those from freehand whetstones, with the added benefit of perfect angle repeatability. They can maintain extremely precise angles, even down to fractions of a degree, making them ideal for sharpening the complex geometry of premium Japanese knives. The trade-off is setup time: clamping the knife, selecting stones, and working through the progression takes longer than an electric sharpener, though typically less time than developing the skill for freehand whetstone sharpening. For knife enthusiasts who want professional-quality edges without the years of practice required for freehand mastery, a guided rod system represents an excellent investment.
4. Professional Sharpening Services: The Outsourcing Option
Before committing to any at-home sharpening method, consider an alternative that many home cooks overlook: professional sharpening services. Knife sharpening professionals use commercial-grade equipment—often large belt grinders or water-cooled wheel systems—to restore edges quickly and precisely. Understanding when and why to use a professional helps you make informed decisions about your knife maintenance strategy.
When to Choose Professional Sharpening
Professional sharpening makes particularly good sense in several scenarios. If your knife has significant damage—chips in the blade, a broken tip, or a severely rolled edge—a professional has the tools and expertise to repair the damage without removing excessive metal. If you have invested in extremely expensive knives, such as hand-forged Japanese blades from renowned makers, the cost of professional sharpening (typically $5-$15 per knife) provides peace of mind and ensures your investment is protected. And if you simply lack the time or inclination to learn sharpening skills, dropping your knives off at a reputable sharpening service once or twice a year keeps them in excellent condition with zero effort on your part.
Finding a Quality Sharpening Service
Not all sharpening services are created equal. A poor sharpener can ruin a knife faster than the most aggressive electric sharpener. Look for professionals who ask detailed questions about your knives and how you use them, who sharpen by hand or with water-cooled systems rather than high-speed dry grinders, and who have verifiable experience with the type of knives you own. Kitchen supply stores, farmers market vendors, and dedicated sharpening shops are all potential sources, but always check reviews and ask about their process before entrusting them with your Dalstrong or Wusthof blades.
5. Head-to-Head: The Complete Specs Breakdown
| Feature | Whetstone | Electric Sharpener | Guided Rod System |
|---|---|---|---|
| Edge Quality | Superior (Mirror Polish) | Good (Micro-serrated) | Excellent (Near-Mirror) |
| Speed | Slow (15-30 mins) | Fast (2-5 mins) | Moderate (10-20 mins) |
| Metal Removal | Minimal (Controlled) | High (Aggressive) | Minimal (Controlled) |
| Versatility | High (Any angle/tool) | Low (Fixed angles) | High (Adjustable angles) |
| Skill Required | High | Low | Low-Medium |
| Initial Cost | $30-$150 | $50-$250 | $40-$300+ |
| Long-Term Cost | Low (stones last years) | Low (abrasives last years) | Medium (replacement stones) |
| Learning Curve | Steep (weeks to months) | Minimal (minutes) | Gentle (hours to days) |
| Portability | Excellent | Poor (requires power) | Good |
6. The Science of Edge Geometry and Sharpness
To truly understand the difference between sharpening methods, we must examine what “sharpness” actually means at a microscopic level. A sharp edge is simply the intersection of two planes of metal at a very fine angle. The finer the intersection—meaning the smaller the radius at the very tip of the edge—the sharper the blade. Under an electron microscope, a truly sharp knife edge appears as a vanishingly thin line where the two sides of the blade meet, with a tip radius measured in microns rather than millimeters.
Understanding Bevel Angles
The angle at which these two planes meet profoundly affects knife performance. Japanese knives typically feature acute 15-degree (or even 12-degree) edge angles, which slice through food with minimal resistance but are more fragile and prone to chipping. Western knives traditionally use 20-degree angles, which are slightly less sharp but significantly more durable—better suited to the rock-chopping technique common in Western cuisine. Some modern hybrid knives, including many premium European models, now ship with 15-degree edges that balance sharpness and durability.
Your sharpening method must respect these angle requirements. A whetstone allows you to sharpen at any angle you choose, from an ultra-acute 10 degrees to a robust 25 degrees. A quality electric sharpener with dedicated Asian and Western slots gives you two options, which covers the vast majority of kitchen knives. A pull-through sharpener with a single fixed angle may not match either common standard, resulting in a compromised edge geometry that performs poorly regardless of how “sharp” it feels.
Burr Formation and Removal
Regardless of which sharpening method you choose, understanding the concept of a burr is essential to achieving a truly sharp edge. As you grind metal from one side of the blade, the very edge becomes thin and begins to bend away from the abrasive. Eventually, this thin flap of metal—the burr—breaks off or folds over, revealing fresh steel beneath. Detecting and managing the burr is the key skill that separates effective sharpeners from those who struggle.
On a whetstone, you feel the burr develop as a slight roughness on the opposite side of the blade from the stone. Experienced sharpeners can detect the burr by running their finger gently across the blade face (never along the edge). Once a burr has formed along the entire length of the blade, you flip the knife and sharpen the other side, forming a new burr. The final steps involve progressively finer stones that minimize the burr, followed by stropping to remove it entirely. An electric sharpener handles burr formation internally—the alternating stages grind both sides of the blade, with the final honing stage designed to strip away any remaining burr.
7. Which Tool for Which Knife?
Not all knives should be treated equally. Your sharpening method should match the blade’s DNA.
Japanese Knives (Shun, Miyabi, Tojiro)
Knives made of hard, brittle steel (VG10, SG2) require delicate care. (See AUS-10 vs VG10).
Verdict: Whetstone. Electric sharpeners can chip these hard blades. If you must go electric, ensure you buy a model specifically designed for 15-degree Asian edges. (Check our best electric sharpeners guide for safe options).
The hardness of Japanese steel—often reaching 60-65 on the Rockwell hardness scale—makes these knives hold an edge exceptionally well, but also makes them brittle. The aggressive diamond wheels in an electric sharpener create micro-vibrations and impact forces that can cause microscopic chips along the edge. These chips then propagate with use, leading to visible damage. If you have invested in a collection of Japanese kitchen knives, the whetstone is not just the best choice—it is essentially the only safe choice for long-term maintenance.
German Knives (Wusthof, Zwilling)
These use softer, tougher steel. They are designed to take a beating. (See Wusthof vs Victorinox).
Verdict: Electric or Stone. Because the steel is softer, electric sharpeners work beautifully on them. Just don’t overdo it.
German knives typically use X50CrMoV15 steel hardened to 56-58 HRC—significantly softer than Japanese cutlery steel. This toughness means the blades resist chipping and can withstand the aggressive metal removal of an electric sharpener. The factory edge angle on most German knives is 20 degrees per side, which matches the standard slots on most electric sharpeners. For busy home cooks relying on German knives, an electric sharpener combined with regular honing provides an ideal balance of performance and convenience.
Specialty Knives (Serrated, Single Bevel)
Serrated: You generally cannot use a flat stone. Some electric sharpeners have a stropping stage for serrated blades. (See Bread vs Serrated Knife).
Single Bevel (Usuba/Yanagiba): You MUST use a stone. Electric sharpeners will ruin the geometry of a single-bevel knife like a Usuba or Kamikoto.
Outdoor and EDC Knives
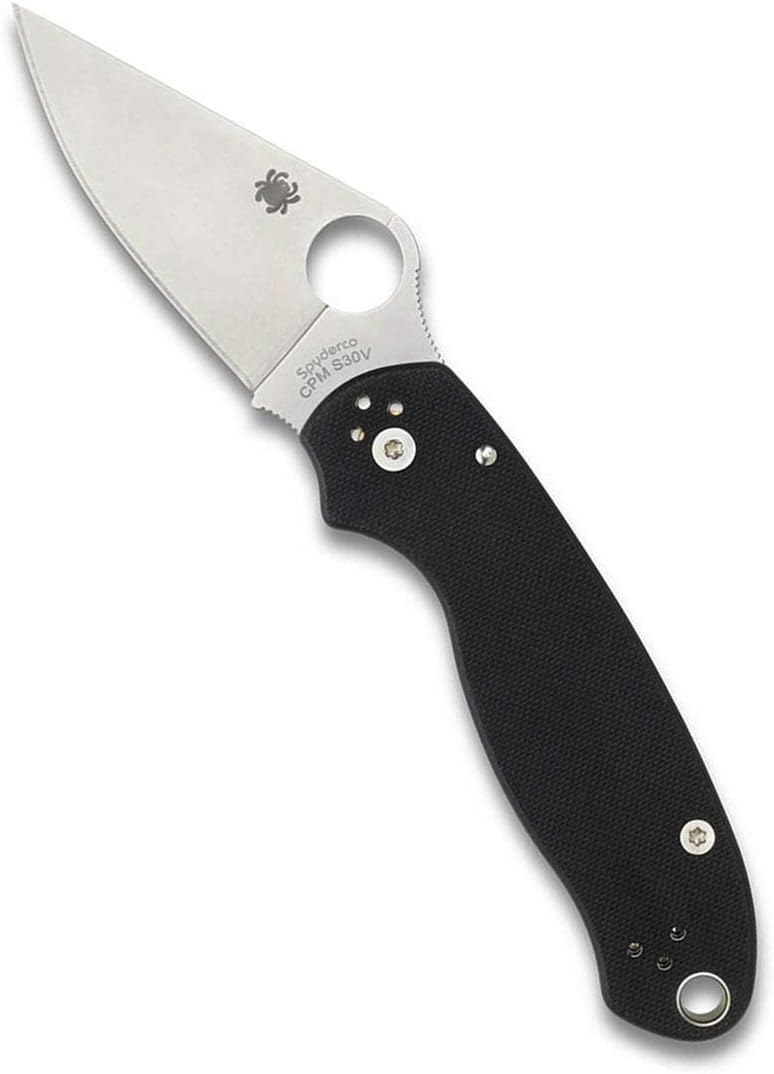
If your knife collection extends beyond the kitchen to include pocket knives, hunting knives, or camping blades, your sharpening considerations shift. These knives typically use thicker blade stock and more obtuse edge angles (20-30 degrees), optimized for durability rather than delicate slicing. Many premium pocket knives feature “super steels” like CPM-S30V, CPM-M4, or M390—powder metallurgy steels with extremely high vanadium carbide content that resist sharpening by conventional abrasives. For these blades, diamond stones or diamond-equipped electric sharpeners are often the only practical home sharpening options. The same whetstone that works beautifully on your Santoku may skate uselessly across a high-vanadium pocket knife steel, removing virtually no metal.
8. Maintenance: The Critical Distinction Between Sharpening, Honing, and Stropping
Don’t confuse sharpening with honing or stropping!
Sharpening removes metal to create a new edge.
Honing realigns the existing edge.
Stropping polishes the edge and removes microscopic burr remnants.
You should hone your knife before every use with a honing steel. You should only sharpen (stone or electric) once or twice a year. Read our guide on Sharpening Stone vs. Honing Steel to master this distinction.
The Honing Steel: Your Daily Edge Maintenance Tool
A honing steel does not sharpen—this is the most persistent misconception in kitchen knife care. The honing steel’s surface, whether it is the traditional ridged steel, a smooth ceramic rod, or a diamond-coated rod, realigns the microscopic edge that bends and folds with use. Picture the edge of your knife under a microscope: it looks like a very thin sheet of metal that has been bent slightly to one side. The honing steel gently straightens this bent edge, restoring the knife’s cutting ability without removing any metal.
For daily maintenance, nothing beats a few quick passes on a honing steel. Professional chefs hone their knives dozens of times during a single shift—a quick swipe before every major task keeps the edge performing at its peak. Home cooks should aim to hone before each use of the knife, a habit that takes literally five seconds and can extend the time between actual sharpenings from months to a full year or more.
Ceramic Honing Rods vs. Steel Honing Rods
Traditional steel honing rods work well for softer Western knives but may struggle with harder Japanese blades. Ceramic honing rods offer a harder surface that works effectively on any steel, and they have the added benefit of removing a microscopic amount of metal—essentially performing a very light sharpening while aligning the edge. For owners of Japanese kitchen knives, a ceramic honing rod is the superior choice for daily maintenance between whetstone sharpening sessions.
The Art of Stropping
Stropping represents the final frontier of edge refinement. A strop—typically a piece of leather mounted on a flat surface and charged with a fine abrasive compound—polishes the very apex of the edge, removing any remaining burr and aligning the edge at a near-molecular level. After sharpening on a fine whetstone, a few dozen passes on a loaded strop can transform a very sharp edge into a truly exceptional one. Professional barbers have used strops for centuries to maintain their straight razors, and the same principles apply to kitchen knives.
You can purchase purpose-made strops from sharpening supply companies, or you can make your own by mounting a piece of smooth leather to a flat board and applying a fine polishing compound (green chromium oxide is a popular choice). Even a few passes on an unloaded leather belt will improve an edge noticeably. For those pursuing the ultimate sharpness from their whetstone work, stropping is not optional—it is the essential final step that elevates your edge from sharp to sublime.
9. Top Product Recommendations
We have tested the market to find the best tools for your best chef knives.
 King Whetstone 1000/6000 Grit
The classic starter stone made in Japan. The 1000 grit sharpens, and the 6000 grit polishes. Perfect for learning the craft on your Santoku.
Check Price on Amazon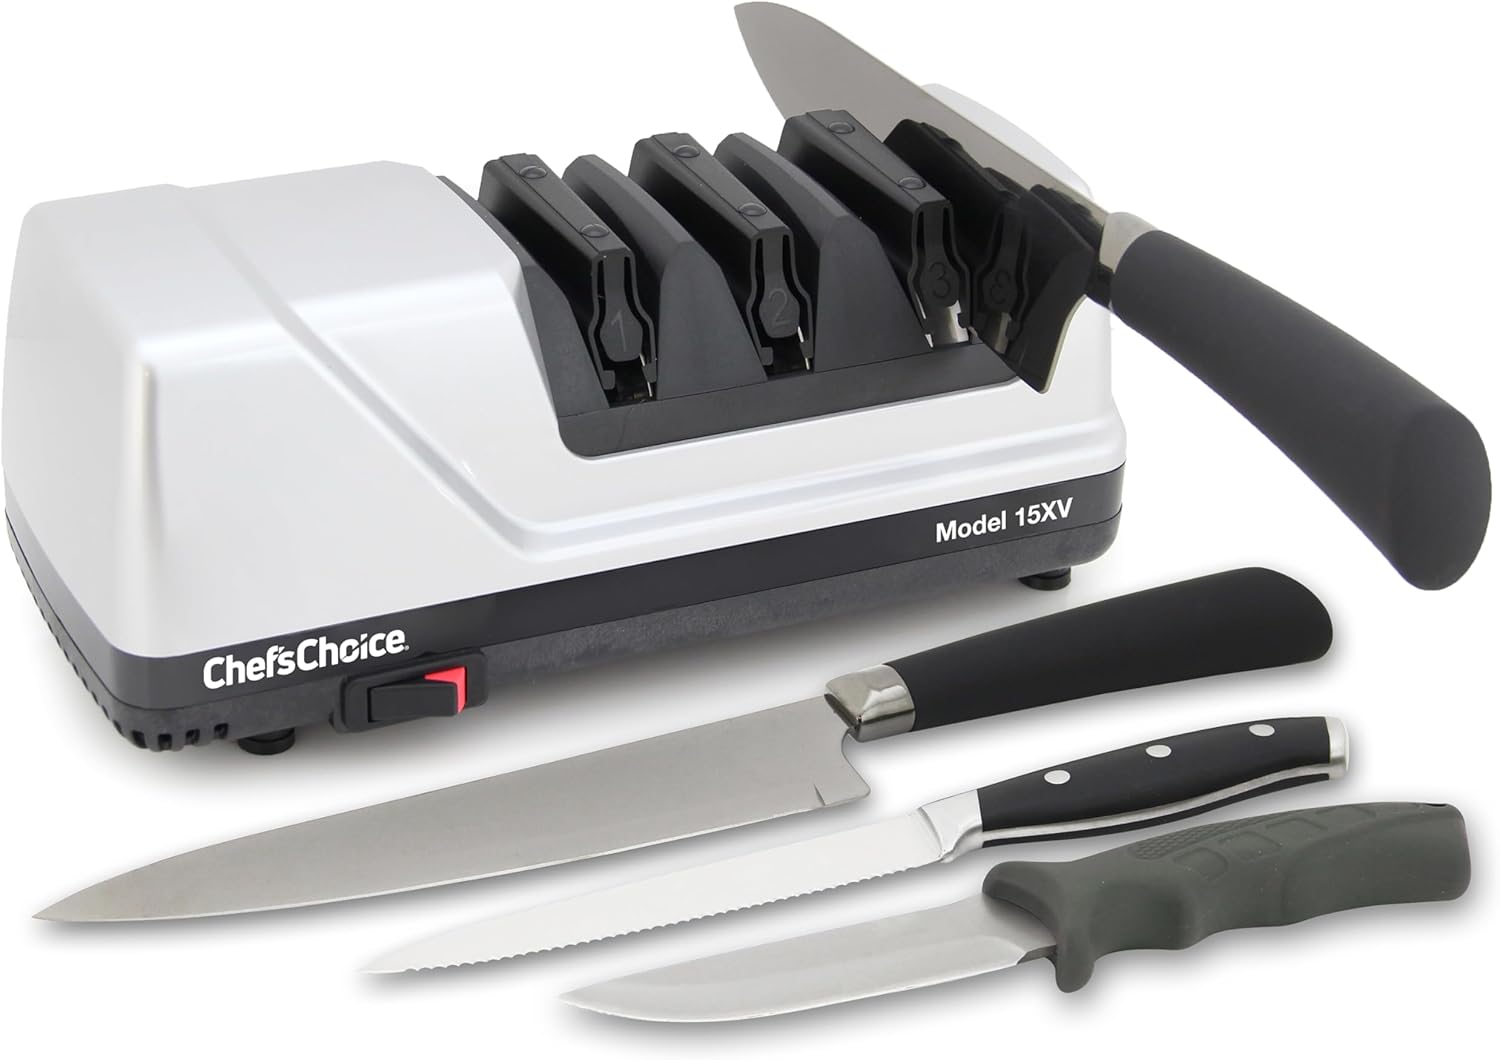 Chef’sChoice Trizor XV
The gold standard of electrics. It converts standard 20-degree edges to high-performance 15-degree edges. Safe for Global and Wusthof alike.
Check Price on AmazonAdditional Product Recommendations by Category
For the Budget-Conscious Beginner
If you want to explore whetstone sharpening without a significant investment, the Sharp Pebble 1000/6000 combo stone offers surprisingly good performance at an entry-level price point. It requires soaking and wears faster than premium stones, but it teaches the fundamentals effectively. Pair it with a cheap angle guide and a flattening stone, and you have a complete starter kit for under $50.
For the Serious Enthusiast
The Naniwa Professional (formerly Chosera) stones represent the pinnacle of synthetic water stone technology. These splash-and-go stones cut faster and wear slower than competing brands, with exceptional feedback that makes the sharpening process intuitive and satisfying. A progression of Naniwa Professional 400, 1000, and 3000 grit stones covers every sharpening need from repair to mirror polish, and the stones will last for years even with frequent use.
For the No-Compromise Electric User
Beyond the Chef’sChoice Trizor XV, the Work Sharp Ken Onion Edition Knife and Tool Sharpener deserves consideration for those who want maximum versatility. This belt-based system handles everything from kitchen knives to garden shears, with adjustable speed control and angle guides. It requires more skill than a slot-based electric sharpener but offers dramatically more capability for the confident user.
Video Tutorial
Still unsure? Watch this video to see the workflow of both methods side-by-side.
10. Cost Analysis: Long-Term Economics of Sharpening Methods
Whetstones are cheap upfront ($30-$60 for a combo stone) and last for years. However, they cost you time.
Electric Sharpeners are expensive ($100-$200 for a good one like the Trizor XV). They save you time, but they cost you metal. Your expensive Dalstrong or Wusthof will wear out faster.
Let us break down the economics in greater detail over a 10-year period, assuming you own a typical set of 6 kitchen knives that require sharpening twice per year:
| Cost Factor | Whetstone Setup | Electric Sharpener | Professional Service |
|---|---|---|---|
| Initial Equipment | $50-$150 | $100-$250 | $0 |
| Supplies (10 years) | $30 (flattening stone) | $0 | $0 |
| Service Costs (10 years) | $0 | $0 | $600-$1200 |
| Time Investment (10 years) | 60-120 hours | 6-12 hours | 3-6 hours (drop-off/pickup) |
| Knife Lifespan Impact | Minimal reduction | Moderate reduction | Minimal reduction (quality service) |
| 10-Year Total Cost | $80-$180 | $100-$250 | $600-$1200 |
The financial analysis clearly favors DIY methods over professional services, but the “hidden cost” of time invested varies dramatically. If you value your free time at $30 per hour, the whetstone’s time investment adds $1,800-$3,600 in opportunity cost over a decade—far exceeding the cost of professional sharpening. Of course, many enthusiasts consider sharpening time as leisure rather than labor, a meditative hobby rather than a chore. The economic calculation ultimately depends on how you personally value your time and whether you find the sharpening process enjoyable or burdensome.
11. Knife Storage and Care After Sharpening
Your freshly sharpened edge represents an investment of time and effort. Protecting that edge between uses ensures you sharpen less frequently and enjoy peak performance longer. Proper storage is not merely about organization—it directly impacts edge longevity.
- Storage: Keep your sharp knives safe. Use a knife block or magnetic strip. Never toss sharp knives loose in a drawer where they can knock against other utensils, dulling their edges and posing a safety hazard.
- Cutting Surfaces: The surface you cut on affects edge retention as much as your sharpening method. End-grain wood and soft plastic boards are gentle on edges. Glass, marble, and bamboo boards are edge destroyers, dulling knives rapidly regardless of how well they were sharpened.
- Rust: If using water stones on carbon steel, dry immediately. See how to remove rust. Carbon steel knives require immediate drying after any exposure to water, including the water from your whetstone.
- Ceramic Knives: Standard stones won’t work. You need diamond abrasives. See Ceramic vs Steel. Ceramic blades require specialized diamond sharpening equipment—attempting to sharpen them on conventional stones will simply glaze the stone and leave the knife dull.
- Dishwasher Warning: Never put quality kitchen knives in the dishwasher. The high heat, aggressive detergents, and contact with other items will dull, corrode, and potentially damage your knives. Hand wash, dry immediately, and store properly.
12. Troubleshooting Common Sharpening Problems
Even experienced sharpeners encounter issues. Here are solutions to the most common sharpening frustrations:
Problem: “My knife feels sharp but doesn’t cut well”
This typically indicates a burr that has not been fully removed. The folded-over metal at the edge apex creates a false sensation of sharpness when you run your finger across the blade (always perpendicular, never along the edge), but the burr folds over when you attempt to cut, resulting in poor performance. Solution: Return to your finest stone and make several very light alternating passes, then strop thoroughly. If using an electric sharpener, run the knife through the final honing stage several more times with very light pressure.
Problem: “My whetstone has developed a dip in the middle”
This is normal wear called “dishing.” A dished stone cannot produce a flat bevel, compromising edge geometry. Solution: Flatten the stone using a flattening stone, diamond lapping plate, or a sheet of wet/dry sandpaper on a known flat surface (like a piece of plate glass). Draw a grid pattern on the stone with a pencil before flattening—when the pencil marks are gone, the stone is flat. Flatten before every sharpening session for best results.
Problem: “My electric sharpener leaves a rough, toothy edge”
The coarse sharpening stage creates a deliberately toothy edge, which is actually desirable for many cutting tasks—a micro-serrated edge cuts through tomato skins and pepper skins more effectively than a polished edge. However, if you prefer a smoother edge, ensure you are using all the stages of your sharpener in sequence, and spend extra time in the final polishing/honing stage. Some electric sharpeners allow multiple passes through the fine stage; consult your manual.
Problem: “One side of my knife is sharper than the other”
This asymmetry usually results from spending more time or applying more pressure to one side of the blade during sharpening. On a whetstone, count your strokes and apply even pressure. On an electric sharpener, alternate which hand holds the knife to ensure even contact in the slots. Some knives are intentionally asymmetric (traditional Japanese single-bevel knives), so confirm your knife’s expected geometry before assuming a problem.
Frequently Asked Questions (FAQ)
It is difficult to ruin a knife on a stone, but you can scratch the surface or create an uneven edge if your angle wavers. It takes patience. Electric sharpeners can ruin a knife quickly if you press too hard or use the wrong slot.
For most home cooks, a 1000 grit stone is the workhorse for sharpening. A 6000 grit stone is used for polishing (finishing). Start with a combo 1000/6000 stone.
Electric: Once or twice a year.
Whetstone: Every 2-4 months, or whenever the knife stops slicing paper cleanly.
Honing: Every single time you use the knife.
Yes. The Chef’sChoice Trizor XV is specifically designed to put a 15-degree (Asian style) edge on knives. It is one of the few electric sharpeners safe for brands like Mac and Shun.
Some diamond stones can be used dry, but most traditional whetstones require a lubricant. Using a water stone dry causes the stone to load up with metal particles, dramatically reducing cutting speed and potentially damaging the stone. Always follow the manufacturer’s instructions. Oil stones must use honing oil—water will not provide adequate lubrication and may damage the stone.
The classic test is the paper test: hold a sheet of printer paper by one edge and try to slice through it from the free edge. A sharp knife cuts smoothly and quietly. A dull knife tears the paper or catches. For a more demanding test, try slicing a ripe tomato with no downward pressure beyond the weight of the knife itself—a truly sharp blade will glide through the skin effortlessly. Professional sharpeners often use the “three-finger test” (running fingertips gently across the edge to feel for the burr and assess bite), but this requires experience and should be learned from an expert in person.
For beginners, a combo stone with two grits (typically 1000/6000) offers the best value and covers both sharpening and basic polishing needs. As your skills develop, you may want to add a coarse stone (220-400 grit) for repairing damaged edges and a very fine stone (3000-8000 grit) for high-polish finishing. Single-grit stones tend to be thicker and last longer than their equivalent grit on a combo stone, making them the preferred choice for professionals who sharpen frequently.
Serrated knives present a unique challenge. The scalloped edge cannot be sharpened on a flat stone except for the flat reverse side (if present). Specialized tapered sharpening rods, available in ceramic or diamond, can address individual serrations. Some electric sharpeners include a dedicated serrated blade stage. However, the reality is that most serrated knives—especially inexpensive ones—are designed to be replaced rather than resharpened. Quality serrated bread knives from reputable manufacturers can be professionally sharpened, but the process is time-consuming and costly relative to the knife’s value.
For most home cooks with mid-range knives, professional sharpening once or twice a year offers an excellent balance of cost and convenience. At $5-$15 per knife, you will spend $30-$90 annually to maintain a basic knife set—often less than the cost of quality sharpening equipment amortized over a year, and certainly less than the value of the time you would spend learning and performing DIY sharpening. For premium knife owners, the calculation shifts: the investment in learning whetstone skills pays dividends in superior edge quality and the satisfaction of self-reliance.
Most common kitchen knife steels (VG10, AUS-10, X50CrMoV15, 440C) respond well to standard aluminum oxide or silicon carbide water stones. Extremely hard, high-vanadium steels found in some premium pocket knives and custom kitchen blades require diamond or CBN (cubic boron nitride) abrasives, as conventional stones skate over the hard vanadium carbides without cutting them. For the vast majority of kitchen knives, standard quality water stones work perfectly.
13. The Environmental Perspective
In an era of increasing environmental awareness, the sustainability of your sharpening choices deserves consideration. Whetstones represent a remarkably sustainable option: a quality stone lasts for years or decades, requires no electricity, and produces no waste beyond a small amount of metal swarf and stone slurry that is essentially sand and water. When a whetstone eventually wears out, it returns to the earth as inert mineral material.
Electric sharpeners consume electricity and contain electronic components, motors, and plastic housings that will eventually require disposal. However, their long lifespan (decades for quality models) and the fact that they extend the useful life of knives—preventing premature replacement—offset some of this environmental impact. The most environmentally damaging sharpening choice is actually neglecting to sharpen at all, leading to the premature disposal and replacement of knives that could have served for decades with proper maintenance.
If environmental considerations factor into your decisions, the whetstone emerges as the clear winner, followed by a quality electric sharpener used sparingly and maintained for maximum lifespan.
14. Sharpening for Specific Culinary Tasks
Different cooking styles and cuisines place different demands on knife edges, and your sharpening approach should reflect how you actually use your knives.
Precision Vegetable Work
If your cooking involves delicate vegetable preparation—fine julienne, precise brunoise, or decorative cutting—a highly polished edge from a fine whetstone (6000+ grit) provides the clean cuts that preserve cell structure and prevent browning. The mirror-polished edge reduces friction, allowing the knife to glide through vegetables with minimal pressure and maximum control. This type of edge is best achieved on a whetstone progression ending with a high-grit finishing stone, followed by thorough stropping.
Butchery and Heavy Prep
For breaking down proteins, cutting through joints, or processing large quantities of dense vegetables, a toothier edge (1000-2000 grit) actually performs better than a mirror polish. The micro-serrations left by a medium-grit stone or the coarse stage of an electric sharpener act like tiny teeth, gripping slippery protein surfaces and cutting efficiently. Many professional butchers deliberately finish their knives on medium-grit stones for this reason. An electric sharpener’s standard edge, with its inherent micro-serration pattern, often excels at these tasks.
Sushi and Sashimi
Raw fish preparation demands the ultimate in edge refinement. The cellular structure of raw fish is delicate, and a rough edge tears cells rather than cutting them cleanly, affecting both texture and appearance. For sushi chefs, the pursuit of the perfect edge—achieved through a progression of increasingly fine water stones followed by extensive stropping—is a professional requirement, not an aesthetic preference. If you prepare sushi or sashimi at home, the whetstone is your only viable option; no electric sharpener can produce the polished edge that raw fish requires.
15. Building a Sharpening Routine: Practical Schedules
The most important factor in maintaining sharp knives is consistency. Here are practical sharpening routines tailored to different lifestyles:
The Busy Home Cook (Electric Sharpener Route)
- Daily: Hone knives on a steel before each use (5 seconds per knife)
- Monthly: Quick touch-up in the fine/honing stage of electric sharpener (1 minute per knife)
- Annually: Full sharpening progression through all stages of electric sharpener (3 minutes per knife)
The Enthusiast Home Cook (Whetstone Route)
- Daily: Hone on ceramic rod before each use; strop on leather after cleaning and drying
- Monthly: Light sharpening on 3000+ grit stone to refresh the edge without significant metal removal
- Quarterly: Full sharpening progression starting from 1000 grit
- Annually: Complete edge assessment; coarse stone work only if needed for repair
The Minimalist (Professional Service Route)
- Daily: Hone on steel before use
- Semi-Annually: Drop knives off at trusted professional sharpener
16. Sharpening Myths Debunked
The world of knife sharpening is filled with persistent myths and misconceptions. Let us address some of the most common ones:
Myth: “A sharp knife is more dangerous than a dull one.”
Reality: This is dangerously wrong. A sharp knife requires less force to cut, giving you more control. Dull knives slip and require excessive force, leading to accidents. A sharp knife goes exactly where you direct it; a dull knife goes where physics takes it.
Myth: “You need to sharpen your knives weekly.”
Reality: With proper honing and care, most home cooks need to sharpen only once or twice per year. Over-sharpening wastes metal and shortens your knife’s lifespan. If you find yourself sharpening monthly, you are likely confusing the need for honing with the need for sharpening.
Myth: “Electric sharpeners always ruin knives.”
Reality: Quality electric sharpeners, used correctly and sparingly, maintain knives effectively. The problem arises when users over-sharpen, apply excessive pressure, or use cheap, poorly designed machines. A premium electric sharpener used once or twice annually will not meaningfully shorten your knife’s lifespan.
Myth: “All whetstones are basically the same.”
Reality: Whetstones vary enormously in abrasive type, bonding agent, hardness, cutting speed, and feedback. A $20 Amazon stone and a $100 Naniwa Professional stone are as different as a department store knife and a hand-forged Japanese blade. The stone matters as much as the technique.
Myth: “Soaking your stone longer makes it work better.”
Reality: Stones requiring soaking need only enough time to saturate with water—typically 10-15 minutes until bubbles stop emerging. Over-soaking can weaken the binding agent in some stones. Splash-and-go stones should never be soaked. Follow manufacturer instructions precisely.
17. The Future of Knife Sharpening
The knife sharpening industry continues to evolve. Recent innovations include precision angle-finding tools that use lasers or digital inclinometers to measure edge angles, enabling perfect consistency. Robotic sharpening systems, currently found primarily in commercial settings, may eventually trickle down to the consumer market. And new abrasive technologies, including cubic boron nitride and polycrystalline diamond formulations, promise faster cutting and longer abrasive life than ever before.
Yet for all this technological advancement, the fundamental principles of sharpening remain unchanged since our ancestors first rubbed a bronze blade against a rock. Creating a sharp edge means forming a clean intersection of two planes at a controlled angle. The tools evolve, but the physics endures. Whether you choose a whetstone, an electric sharpener, or a professional service, understanding these fundamentals empowers you to make informed decisions about your knife maintenance.
Conclusion: The Verdict
The battle of Whetstone vs. Electric Sharpener comes down to your personality, your knives, and your relationship with cooking.
Choose a Whetstone If: You view cooking as a craft. You want the sharpest possible edge, you own expensive Japanese cutlery, and you find satisfaction in maintaining your tools manually. You are willing to invest time in developing a skill that will serve you for a lifetime. The process of sharpening—the sound, the rhythm, the gradual transformation of a dull blade into a precision cutting instrument—brings you genuine enjoyment.
Choose an Electric Sharpener If: You view cooking as a daily task that needs to be completed efficiently. You want consistent results quickly, you have Western-style knives, and you are willing to sacrifice a little bit of knife lifespan for a lot of convenience. Your priority is getting back to cooking with a sharp blade, not spending time learning a new skill.
Choose Professional Sharpening If: You want excellent results with zero time investment, your knives are extremely expensive or damaged, and you prefer to support a local craftsperson. The cost is higher over time, but the convenience and quality can be worth it.
Choose a Guided Rod System If: You fall between the whetstone purist and electric convenience camps. You want precise, repeatable results without the steep learning curve of freehand sharpening. The setup takes longer than an electric sharpener, but the results rival freehand whetstone work.
Whatever you choose, remember: A sharp knife is a safe knife. Don’t let your blades go dull. The most dangerous tool in any kitchen is not the razor-sharp chef’s knife—it is the neglected, dull blade that requires excessive force and slips unpredictably. Check out our best knife sharpener guide to find the perfect model for your kitchen.
Your knives are among the most personal tools you own. They connect your hands to your ingredients, transforming raw food into nourishment. Treat them with respect, keep them sharp, and they will serve you faithfully for decades. The choice between whetstone and electric sharpener is ultimately a choice about what kind of cook you want to be—and there is no wrong answer, only the answer that fits your life.