Sharpening Stone vs. Honing Steel: The Ultimate Guide to Knife Care
There is a tragedy playing out in kitchens everywhere. A home cook buys a premium knife—perhaps a Wusthof or a Shun—and for the first six months, it cuts like a dream. But slowly, the edge fades. Tomatoes get squashed. Onions slip.
The cook grabs the long metal rod that came with the knife set, swipes the blade a few times, and… nothing happens. The knife is still dull.
The confusion lies in the fundamental difference between Sharpening and Honing. They are not the same thing. If you are browsing knifeindex.com/ looking to restore your edge, you need to know which tool to use and when.
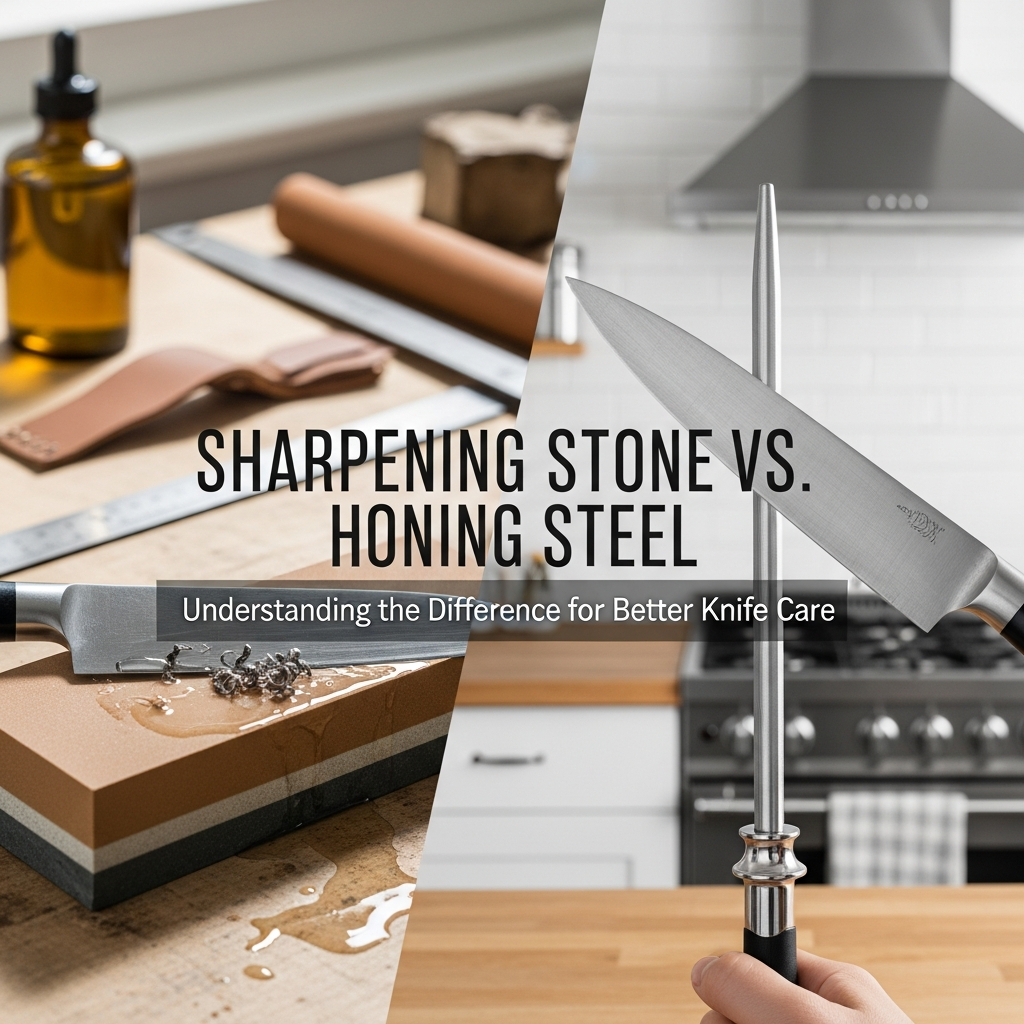
In this comprehensive guide, we will break down the mechanics of the Sharpening Stone vs. Honing Steel, explain the metallurgy behind them, and help you build a maintenance routine that keeps your blades razor-sharp forever.
1. The Core Difference: Alignment vs. Removal
To understand these tools, you must understand what happens to a knife edge.
The Honing Steel (The Realignment Tool)
When you use a knife, the microscopic edge doesn’t always break; it bends. Imagine a piece of paper standing on its edge. If you push down, it curls over. A Honing Steel (or rod) pushes that curled metal back to center. It realigns the edge. It does not remove metal (or removes very little).
The Sharpening Stone (The Repair Tool)
Eventually, the edge gets so worn and rounded that no amount of honing can fix it. The metal is gone or fatigued. A Sharpening Stone (Whetstone) acts like sandpaper. It grinds away old steel to create a brand new edge. It removes metal to form a new burr.
Video Demonstration
Watch this visual explanation to see the microscopic difference between honing and sharpening in action.
2. Deep Dive: The Honing Steel
The honing steel is your daily maintenance crew. It extends the time between sharpenings.
Types of Rods
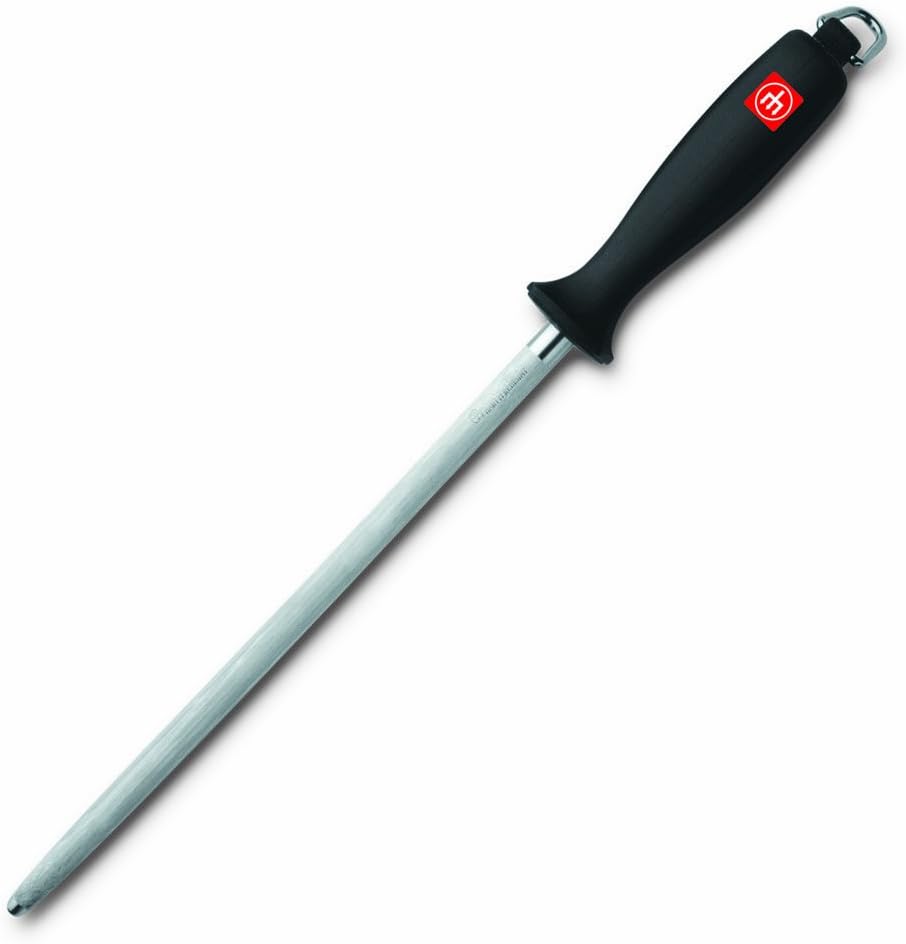
- Steel Rods: Best for softer German knives (like Zwilling or Mercer). They have ridges that straighten the edge.
- Ceramic Rods: These are harder and smoother. They act as a very fine abrasive. They are excellent for harder steels found in Japanese knives like Miyabi or Global. (See Ceramic vs Steel for material info).
- Diamond Rods: These are actually sharpeners, not just honers. They remove metal aggressively. Use with caution.
When to Use It?
Ideally, every time you cook. A few swipes before you start prep keeps the edge straight. It is essential for heavy-duty tools like boning knives or butcher knives that hit hard surfaces.
3. Deep Dive: The Sharpening Stone (Whetstone)
The whetstone is the surgeon’s table. It is where you bring a dead knife back to life.
Understanding Grits
- Coarse (400-1000 grit): For repairing chips or establishing a new edge on a very dull knife. Essential if you have neglected your budget knives.
- Medium (1000-3000 grit): The standard sharpening grit. It gives a sharp, toothy edge perfect for tomatoes and meat.
- Fine (3000-8000+ grit): For polishing. This creates the mirror finish seen on Dalstrong or Shun knives.
Water vs. Oil
Most modern stones are “Water Stones” (soak them in water). Oil stones are older tech. We recommend water stones for kitchen cutlery as they cut faster and are cleaner.
Not ready for stones? Check out our guide to the best knife electric sharpeners for an automated alternative.
4. Head-to-Head: The Specs Breakdown
| Feature | Honing Steel | Sharpening Stone |
|---|---|---|
| Primary Function | Realignment (Maintenance) | Grinding (Repair/Creation) |
| Frequency | Daily / Weekly | Every 3-6 Months |
| Metal Removal | Minimal to None | Significant |
| Skill Level | Easy to Learn | Moderate Learning Curve |
| Time Required | 10 Seconds | 15-30 Minutes |
5. Steel Hardness Matters (HRC)
The type of knife you own dictates the tool you need.
Soft Steel (German/Western)
Knives from Wusthof, Victorinox, or Mercer are typically 55-58 HRC. They are tough but the edge rolls easily.
Requirement: You need a standard steel honing rod. Use it often.
Hard Steel (Japanese)
Knives from Tojiro, Shun, or Miyabi (VG10, SG2, AUS-10) are 60-63 HRC. They are hard and brittle.
Requirement: Do NOT use a coarse steel rod; it can chip the blade. Use a fine ceramic rod for maintenance and high-grit whetstones for sharpening. See our best knives sharpener guide for stone recommendations.
6. Top Product Recommendations
We have tested the best accessories to keep your kit in top shape.
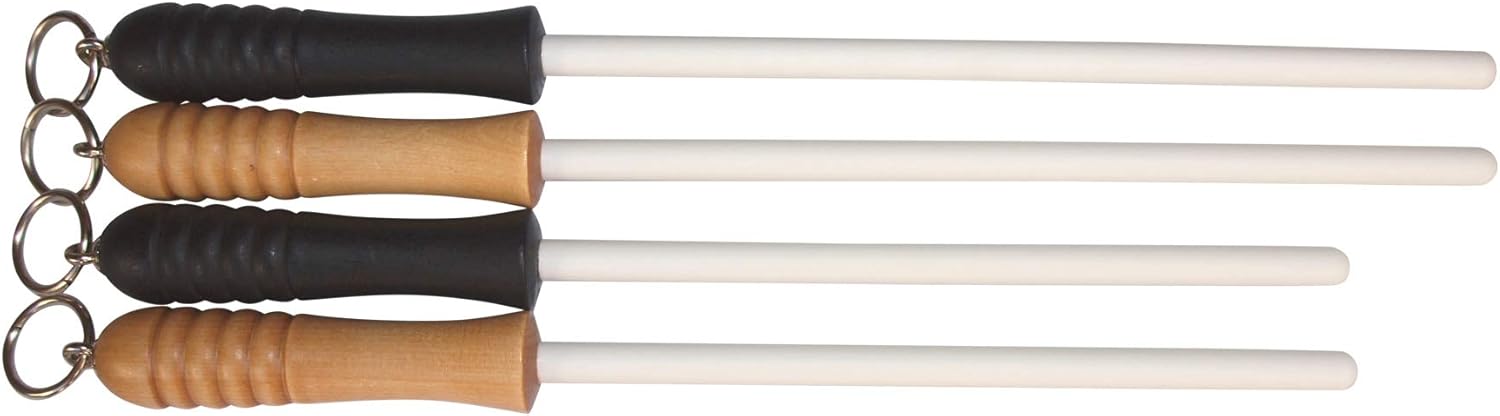 Idahone Fine Ceramic Rod (12″)
The universal choice. Gentle enough for Japanese steel but effective on German knives. It aligns and lightly polishes the edge. A kitchen essential.
Check Price on Amazon King Whetstone 1000/6000 Grit
The classic starter stone. The 1000 side sharpens, and the 6000 side polishes. Made in Japan. Perfect for restoring Chef Knives.
Check Price on Amazon7. The Science of the Burr: Why Sharpening Stones Actually Work
To truly master the sharpening stone, you must understand the concept of the burr. The burr is a microscopic curl of metal that forms at the very apex of the edge when you grind one side of the blade. It is the tangible evidence that you have reached the edge. Without forming a burr, you are simply wasting steel and time, polishing the sides of the bevel without ever creating a true intersection of the two planes. The process of sharpening is essentially a controlled, systematic removal of metal to create this burr, and then a refined process of removing that burr without damaging the newly formed edge. When you are working on a coarse stone, the burr is large and can often be felt with your fingertip as a rough, catching sensation on the opposite side of the blade from which you were grinding. As you progress through medium and fine grits, this burr becomes progressively smaller, finer, and ultimately microscopic, until it is entirely stripped away on a leather strop or a high-grit polishing stone, leaving behind a crisp, clean apex of pure steel. The inability to detect and manage the burr is the single greatest point of failure for beginners. Many people rub their knife on a stone without a clear objective, creating a shiny bevel but a dull edge. They are essentially “polishing a turd,” refining a rounded, blunt apex rather than creating a new one. The burr tells you when you have done enough work on one side and it is time to flip the knife. A consistent burr along the entire length of the blade indicates that you have maintained a perfect angle and reached the cutting edge from heel to tip. This is why sharpening is often described as a meditative practice; it requires tactile sensitivity, listening to the sound of steel on stone, and feeling for that subtle wire edge that spells the difference between a knife that tears and a knife that severs effortlessly. The burr is your compass in the landscape of sharpening stones, and learning to read it will elevate your knife maintenance from a guessing game to a predictable science. The relationship between the stone’s abrasive particles and the steel’s carbide structure dictates how easily this burr forms and how cleanly it can be removed, which is why matching the stone to your specific knife steel is a critical, yet often overlooked, aspect of the craft.
8. Honing Rod Ergonomics and Safety: Protecting Your Edge and Your Hands
Honing might seem like a simple, almost casual task, but poor technique is a primary cause of chipped edges and lacerated fingers. The classic method of holding the honing steel vertically, tip planted firmly on a non-slip cutting board, is far safer and more effective than the theatrical, mid-air swiping often portrayed in movies. When the tip is anchored, you eliminate a dangerous variable. Your hand holding the steel is stable and far away from the path of the blade. The blade, in turn, is drawn downwards and backwards towards your own body, but the angle is controlled. The key is to visualize the correct angle—typically 15 to 20 degrees, depending on your knife—and to lock your wrist. The tendency for novices is to lift the heel of the blade or to tilt the rod, creating an inconsistent angle that rounds the edge apex rather than straightening it. A rounded apex is a dull apex. Effective honing requires confidence and fluid motion, but not aggression. You are not trying to grind the steel; you are gently guiding the bent edge back to its upright, centered position. The pressure applied should be no more than the weight of the knife itself. Another common safety failure is the grip on the honing steel’s handle. A handle without a substantial guard is an invitation for the blade to skip off the rod and ride straight down into your knuckles. Always invest in a honing rod with a large, pronounced handguard. Furthermore, rod length matters. A short, 8-inch rod is inadequate for a 10-inch chef’s knife because you cannot draw the entire blade across the rod in a single, smooth stroke without the tip slipping off. You need a rod that is at least as long as the blade you are honing, preferably longer. The 12-inch Idahone ceramic rod we recommended is a prime example of a tool that balances length, ergonomic safety, and surface abrasiveness. Pay attention to the angle of the rod relative to your body. Keep it vertical and steady. Visualize dividing the knife’s bevel angle in half. If you are honing a Wusthof with a 20-degree edge, hold the knife at 20 degrees to the rod, which means you are effectively straightening the very tip of that edge. The sound and feel of a properly honed edge on a ceramic rod is a smooth, whisper-quiet glide, indicating perfect contact with minimal resistance.
9. Advanced Stone Techniques: Pressure Control and Slurry Management
Sharpening on a whetstone is not just about rubbing steel on rock. It is about managing a dynamic fluid of abrasive particles, water, and metal swarf known as slurry. As you sharpen, the binder of the water stone breaks down, releasing fresh, sharp abrasive particles. These particles mix with the water and the metal you have removed to create a muddy suspension. This slurry is not waste; it is the active sharpening agent. A common beginner mistake is constantly washing the stone clean to see the surface. By doing this, they are throwing away the very cutting power they need. You want to build a nice, thick slurry. This mud acts as a lubricant and a buffer, preventing deep, random scratches and allowing the abrasive to cut more uniformly. Expert sharpeners often use a small “nagura” stone to intentionally raise a slurry on harder, less friable stones like the Shapton Pro series. This technique speeds up the sharpening process dramatically. Alongside slurry management is pressure control. During the initial phase of sharpening on a coarse stone, you can apply firm, deliberate pressure to remove steel efficiently and form that critical burr. Imagine you are trying to slice a thin layer of cheese off the surface of the stone. However, as you move up in grit, you must reduce pressure significantly. On a 6000-grit polishing stone, the pressure should be barely more than the weight of the blade itself. Heavy pressure at high grit ruins the edge you just created. It builds a new, finer burr that is difficult to detect and remove, or it simply flexes the delicate apex sideways, forming what is known as a “wire edge” or “foil edge.” This wire edge will feel razor-sharp for the first few cuts, but it is unsupported and will immediately roll over and dull the instant it hits a cutting board. The transition from coarse to fine is a transition from aggression to finesse. De-burring is the final art. After polishing, many sharpeners “strop” the edge by drawing the knife through a block of soft wood or cork. This gentle, perpendicular force strips off the microscopic wire edge without rounding the apex. Alternatively, edge-leading strokes on a clean, fine stone can cut the burr clean off. Mastering these nuances—slurry density, diminishing pressure, and final burr removal—is what separates a functional kitchen edge from a hair-whittling, competition-level sharpness that transforms your food preparation experience.
10. Understanding Edge Geometry: The Invisible Blueprint of Sharpness
Beyond the simple mechanics of honing and sharpening lies the fundamental blueprint of the blade: edge geometry. The choice between a sharpening stone and a honing steel is ultimately about maintaining a specific geometric profile. A knife’s sharpness is defined by the angle at which the two sides of the blade meet, the thickness of the metal directly behind that apex (the shoulder), and the overall grind of the blade. A Western-style chef’s knife, often made from softer, tougher steel, relies on a thicker shoulder and a wider edge angle (20-25 degrees inclusive) to provide durability. This thick geometry is exactly why these knives can benefit from a grooved steel honing rod. The steel rod works by physically pushing that relatively soft, acute apex back into alignment because the steel has “memory” and the edge is thick enough to withstand the lateral stress without snapping. In contrast, a traditional Japanese Yanagiba or a modern Gyuto made from high-hardness carbon or VG-10 steel features a much more acute edge angle, often 15 degrees or less inclusive. This fine geometry is what gives these knives their legendary cutting ability, allowing them to pass through proteins and vegetables with almost no resistance. However, this finely ground apex is too fragile for a grooved steel rod. The ridges on a standard steel rod concentrate stress on the microscopic edge, and because the hard steel lacks the malleability to bend, it fractures. The edge micro-chips, creating a “toothy” edge that feels sharp on some materials but tears delicate tissue. This is why Japanese knives demand water stones for sharpening and smooth ceramic or boron carbide rods for maintenance. A water stone allows you to precisely refine that delicate, acute bevel, while a smooth ceramic rod—which acts as an ultra-fine abrasive, not a steel—gently polishes the apex and removes microscopic fatigue without chipping. The angle itself is a variable you must control. Whether you are using a honing rod or a sharpening stone, consistency is king. A 1-degree fluctuation on a honing rod adds a micro-bevel, effectively thickening the edge. Over time, inconsistent honing actually reshapes the edge, making it convex and blunt, requiring a trip back to the coarse stone to reset the geometry. This is the “sharpener’s trap”—the knife dulls slowly not because the steel is wearing away, but because bad maintenance has changed its shape. Understanding that the honing steel is a “geometry preserver” and the whetstone is a “geometry restorer” clarifies the role of each tool in the lifecycle of your blade.
11. The Role of Carbides and Alloys in Knife Sharpening
The discussion of sharpening stones versus honing steels cannot be complete without a deep dive into the metallurgy of cutlery steel. Modern premium kitchen knives are not made of simple carbon steel; they are complex alloys featuring chromium, vanadium, molybdenum, and tungsten, which form microscopic, incredibly hard particles known as carbides. These carbides are the teeth of the blade. They provide wear resistance and edge retention. The size, type, and volume of carbides fundamentally dictate how a knife interacts with an abrasive. A simple carbon steel, like White Steel #2 (Shirogami) used in high-end Japanese knives, has relatively few carbides. The steel matrix is consistent, and the edge takes a very fine, clean apex easily on any decent water stone. It is forgiving to sharpen. However, modern “super steels” like SG2 (R2), ZDP-189, or even the ubiquitous VG-10 and VG-MAX found in Shun and Tojiro lines, contain massive amounts of hard chromium and vanadium carbides. These carbides are often harder than the abrasive particles in cheap aluminum oxide stones. If you try to sharpen an SG2 blade on a low-quality, hard-bonded stone, you are effectively rubbing soft abrasive against hard carbide. The abrasive particles disintegrate on contact without ever cutting the steel. The knife glazes the stone, rendering the sharpener ineffective and frustrating the user. This is why investing in a high-quality water stone, such as a Naniwa Chosera or Shapton Glass stone, is critical for modern Japanese knives. These premium stones use ceramic abrasives that are specifically designed to fracture and release fresh cutting surfaces, capable of shaping vanadium carbides efficiently. For honing, this carbide structure explains why diamond or ceramic rods are essential for high-alloy steels. A traditional metal steel rod, which is often around 60-65 HRC itself, simply cannot abrade or effectively realign a steel filled with 70+ HRC vanadium carbides. Instead, it skates over the carbides, potentially ripping them out of the softer matrix and leaving a weakened, jagged edge. A diamond honing rod, however, because diamond is the hardest substance known, plows through the matrix and the carbides with equal ease, effectively micro-sharpening the blade every time you use it. This means that for a home cook using a knife with high-carbide steel, the “honing” rod is actually a “touch-up” stone. This blurs the lines between honing and sharpening, but the principle remains: the tool must be harder than the carbide content of the steel to have a predictable, positive effect on the cutting edge.
12. Soaking vs. Splash-and-Go: Choosing Your Stone’s Lifestyle
Water stones are divided into two primary camps: soaking stones and splash-and-go stones. This distinction dramatically affects your sharpening workflow and the frequency with which you are willing to maintain your knives. A classic soaking stone, like the King 1000/6000 we recommended, is a magnesia-based binder that is relatively soft and porous. To work correctly, these stones must be fully submerged in water for 10 to 20 minutes before use. You will see bubbles streaming from the stone as water displaces the air in the pores. Skipping the soaking phase is a critical error. A dry core will instantly suck the water from the surface slurry, causing the stone to clog and overheat the edge. Furthermore, soaking stones must be dried carefully after use; they cannot be left in direct sunlight or a hot environment, as they will crack. They require a bit of ceremony and patience, making them ideal for the weekend warrior who sets aside dedicated time to tend to their entire knife block. Splash-and-go stones, on the other hand, are manufactured with a harder, often resin-based binder that is virtually non-porous. Brands like Shapton Glass or Naniwa Professional require only a light spray of water on the surface to activate. They cut incredibly fast, do not warp, and can be stored on a shelf immediately after drying with a towel. This convenience comes at a slightly higher price point, but for professional cooks or busy home users, the speed of deployment is a game-changer. The tactile feedback differs immensely between the two. Soaking stones are softer, providing a smooth, creamy sensation that is very forgiving for angle control. Splash-and-go stones are harder, providing a more “glassy” feel with intense tactile feedback; you can feel every error in your angle control instantly. This makes them excellent teachers but potentially frustrating for absolute beginners. There is also the consideration of “perma-soaking.” Some hard-core enthusiasts keep their stones in a bucket of water permanently. This is only safe for specific stones formulated to resist breakdown. A King stone left in water for a week will turn into a crumbly mess of grit. Understanding the lifestyle of your stone—soaker versus splasher—ensures that your tool is ready when you need it and lasts for years of reliable service, rather than becoming a cracked, dished relic of a forgotten hobby.
13. Honing Exceptions: The Single-Bevel and Asymmetric Edge
While we have discussed standard Western and Japanese double-bevel knives, there exists an entire category of blades that break the rules: single-bevel knives. These are traditional Japanese knives like the Yanagiba (sashimi slicer), Deba (heavy fish butcher), and Usuba (vegetable knife). They are forged with a distinct geometry: the front face (Shinogi) is ground flat or slightly hollow, and the back side (Uraoshi) is flat with a concave recess. The edge is formed entirely on the front face. This geometry allows for incredibly precise, clean cuts and releases food effortlessly. Can you hone a single-bevel knife with a standard honing steel? The answer is a firm and unequivocal “No.” Attempting to hone a Yanagiba on a rod will ruin the delicate, flat back side and instantly destroy the knife’s performance. Maintenance of a single-bevel knife requires specific water stones and a deep understanding of the geometry. The front bevel is sharpened aggressively to create a burr that is felt along the entire flat back. Then, the back is laid perfectly flat on a fine stone to cut that burr off, creating a zero-degree flat plane. The role of the “honing” or maintenance phase for these knives is often performed by a leather strop loaded with an abrasive compound, or very lightly on a high-grit ceramic rod, and only on the bevel side, never the flat side. The asymmetry also applies to many premium double-bevel Japanese Gyutos, which are not a 50/50 V-grind but an asymmetrical grind, often 70/30 or even 90/10. This means the cutting edge is off-center. A honing rod applied equally to both sides of an asymmetric knife will slowly center the edge, undoing the precision engineering of the bladesmith. If you are honing a knife like a Ryusen or a Masakage, you must apply more strokes and slightly steeper pressure to the dominant bevel side. This is an advanced skill. Using a leather strop charged with diamond spray can often be a safer, more geometry-neutral form of daily maintenance for these high-performance asymmetric blades, keeping the apex aligned and polished without the risk of mechanically bending the entire edge profile sideways through improper rod use.
14. The Electric Sharpener Conundrum: When Machine Beats Man
We have established the purist’s approach: stones for sharpening, rods for honing. However, the electric knife sharpener occupies a significant and controversial space in the kitchen. It is the appliance that traditionalists love to hate, but its utility for specific users cannot be dismissed. The primary criticism of electric sharpeners is their aggression. Motorized abrasive belts or discs remove metal at a rate far exceeding a manual stone. This means every trip through an electric sharpener significantly reduces the lifespan of your knife. Furthermore, many low-end electric sharpeners use preset, fixed-angle slots that do not match the specific geometry of your premium Japanese or German blades. They create a “blunt” V-grind that thickens the shoulder, making the knife feel “sticky” in dense foods even though the apex might be sharp. However, for certain tasks, a high-quality electric sharpener like a Chef’sChoice model with flexible belts and multiple stages can be a savior. For home cooks with compromised dexterity, arthritis, or simply a chaotic lifestyle that prevents 30 minutes of meditative stone work, an electric sharpener keeps knives functional. They are also effective for restoring extremely neglected and heavily damaged knives. If you find a rusty, chipped knife at a thrift store, an aggressive electric sharpener can re-profile the edge in minutes—a job that would take an hour on a coarse stone. For serrated knives, which are a nightmare to sharpen manually, a specific electric sharpener with a contoured wheel is often the only practical solution for a home user. The key is to treat the electric sharpener as an emergency room, not a daily doctor. Use it to fix catastrophic damage, then immediately move to a ceramic honing rod for daily maintenance to preserve that freshly machined edge. Do not use the “fine” or “polishing” stage of an electric sharpener and then immediately go back for a touch-up a week later; instead, hone. The synthesis of the two worlds—machine sharpening and manual honing—can be a pragmatic, albeit not purist, approach to maintaining a working kitchen’s tools. Just remember that once the edge is re-ground by a machine, the steel remembers, and the geometry is altered. Over years of machine sharpening, you are trading long-term blade quality for short-term convenience.
15. Prolonging Edge Life: Cutting Boards and Storage Synergy
The sharpest edge, fresh off a 6000-grit stone and aligned with a ceramic rod, can be destroyed in a single minute of cutting on a hard surface. The cutting board is not a passive accessory; it is the third partner in the knife maintenance trinity, alongside the honing steel and the sharpening stone. There is a hierarchy of board materials that directly dictates how long your edge will last. Glass, granite, marble, and composite resin boards are edge killers. They are harder than the steel matrix of your knife, and every single cut creates microscopic rolling and chipping of the apex. If you use a glass cutting board, you might as well be honing your knife on a sidewalk. You will need to sharpen the knife dramatically more often, removing years of life from the blade. Wooden boards, specifically end-grain hardwood (walnut, maple, cherry), are the gold standard. End-grain construction means the knife edge slides between the fibers of the wood rather than smashing into a flat surface. This is gentle on the edge and naturally anti-microbial. Edge-grain wooden boards are a good, more affordable alternative, but they show wear faster and are slightly harder on the knife. Plastic boards (HDPE) are widely used in professional kitchens for sanitation. They are softer than glass, but they score deeply over time. These scores create a network of micro-grooves that trap bacteria and, more importantly for our topic, can catch the fragile apex of a freshly sharpened knife, creating micro-chips. If your plastic board looks like a Jackson Pollock painting of white scratches, it is time to replace it or plane it down. Beyond the board, storage is the silent executioner of edges. Rattling around in a drawer, banging against other metal utensils, is a death sentence for your honed apex. A wooden knife block is a classic solution, but it must be kept clean and dry to prevent bacterial growth and tip dulling. The optimal solution for edge retention is a magnetic wall strip. The blade hangs freely, not touching anything, drying instantly. Every time you simply slide your knife into a drawer slot, you are effectively un-honing it. The synergy of a soft cutting board and a non-contact storage solution creates an environment where a bi-weekly hone and a tri-annual sharpening are all you need to keep a knife performing at 95% of its out-of-box condition indefinitely.
16. Sharpening High-Carbon vs. Stainless: Corrosion and Care
The material composition of your blade dictates not only how you sharpen it, but how you care for the edge after the session. Stainless steel knives, common in Western kitchens, contain at least 13% chromium. This chromium reacts with oxygen to form a thin, invisible, self-healing passive layer of chromium oxide that prevents rust. This is why you can leave a Wusthof in the sink for a few minutes without catastrophic damage. However, this high alloy content makes stainless steel inherently “sticky” on stones; the carbides resist cutting, and the steel loads up the stone surface quickly. High-carbon steel, whether in a traditional Kurouchi-finished Japanese blade or a classic French Sabatier, contains little to no chromium. It rusts. This is not a flaw; it is a trade-off for a superior edge. High-carbon steel sharpens beautifully. The abrasive bites into the clean matrix, producing a crisp, aggressive burr very quickly. The edge takes a keenness that is difficult to match with stainless. However, the maintenance routine for a carbon steel knife changes everything about honing and sharpening. You cannot use a water stone and then simply dry the blade casually. The micro-scratches left by a 1000-grit stone are landing pads for oxidation. After sharpening a carbon steel knife, you must wash it with mild soap, dry it instantly and thoroughly, and often apply a micro-coat of food-grade mineral oil (like Camellia oil). For daily honing, a metal rod must be absolutely clean and oil-free, as any transfer of rust onto the rod can contaminate other knives. Furthermore, the steel itself reacts to food. Cutting acidic ingredients like lemons or tomatoes will force a patina (a controlled layer of oxidation) or, if left too long, destructive red rust. A patina is good; it protects the steel. A ceramic honing rod is actually superior for carbon steel maintenance because it does not contain ferrous metal that can inter-react galvanically. Learning to read the patina is a skill. A rainbow, blue-grey patina is a trophy. Orange, dusty spots are a call for a rust eraser and a re-evaluation of your drying habits. Choosing between a stainless and a carbon steel knife is not just a choice of edge retention; it is a choice of commitment to an entire ritual of sharpening, honing, and immediate post-use care that begins the moment the knife leaves the stone.
17. Sharpening Stone Maintenance: Flattening Your Foundation
A sharpening stone is a consumable item. Every time you use it, you wear it down. Because most sharpening is done in the center of the stone, and because small knives concentrate wear, stones inevitably develop a “dish” or a hollow. Sharpening a straight, flat knife edge on a dished, curved stone is mathematically impossible. You are trying to create a flat plane with a curved surface, resulting in a rounded, convex bevel that will never reach peak sharpness. This is the single most common oversight among home cooks who own stones. A stone must be periodically flattened to remain effective. The tool for this is a lapping plate or a flattening stone. Silicon carbide powder sprinkled on a flat sheet of glass is the most cost-effective method. You simply rub the wet stone on the glass until the pencil grid you drew on the stone’s surface is gone. Alternatively, a diamond lapping plate, like an Atoma 140, is the professional’s choice. It is a coarse diamond plate that aggressively cuts the stone binder, leaving a perfectly flat, fresh abrasive surface. Flattening is not just about geometric correctness; it revitalizes the stone. A glazed, loaded stone surface stops cutting. Lapping removes that layer of compacted metal swarf and exposes fresh abrasive particles. This is particularly crucial for splash-and-go stones that have a harder binder and are prone to glazing. How often should you flatten? A purist flattens every single session, or even mid-session, to ensure a constant working surface. A pragmatic cook flattens whenever they can see the tell-tale dark swarf marks building up or can feel a hollow with their eye level. Neglecting stone maintenance is analogous to buying a premium sports car and never changing the oil. You are destroying an expensive tool by failing to maintain its most fundamental attribute: flatness. A properly lapped stone also provides suction. When you place a flat stone on a wet, flat holder, it creates a vacuum that holds it securely in place, preventing dangerous slipping while you work. This is the foundation of safe and effective sharpening. Without it, the entire conversation about grits and angles is moot because the physical interface between the blade and the abrasive is fundamentally flawed.
18. Building the Complete Sharpening Kit on a Budget
You do not need a suite of $200 stones to achieve a scary-sharp edge. A functional, budget-conscious sharpening kit can be assembled for less than the cost of a mid-range department store knife, and it will keep your entire set performing for a decade. The key is understanding the minimum viable system. The core is a combination stone. The King KDS 1000/6000 remains our top budget recommendation because it teaches you everything: soaking, slurry management, and the transition from a toothy working edge (1000 grit) to a refined, polished edge (6000 grit). It is the Honda Civic of whetstones—unpretentious and endlessly capable. To this, you must add a flattening solution. A single coarse diamond plate, around 140-400 grit, serves a dual purpose. It flattens your King stone, but it also acts as your coarse stone for major repairs. With a diamond plate, you can fix chips, thin a thick blade, or re-profile a bevel without buying a separate 400-grit water stone. The third component is your honing rod. A budget ceramic rod, often available for under $30, handles daily maintenance for both German and Japanese steel without the risk of chipping associated with cheap ribbed steel. The fourth component is storage. A simple bamboo sink bridge or a stone holder that elevates the stone over your counter is essential for ergonomic comfort and keeping the stone stable during use. Finally, a simple leather strop, which you can make yourself by gluing a strip of denim or leather to a flat piece of wood, replaces the need for an expensive 8000+ grit polishing stone for most kitchen needs. Charged with a cheap green chromium oxide compound, the strop refines the edge, removes the final burr, and brings the edge to a mirror finish without the steep investment in a high-grit stone. This kit—combination stone, diamond flattening plate, ceramic rod, stone holder, and strop—is the complete system. It closes the gap between the sharpening stone and the honing steel, providing a continuum of edge care from heavy repair to daily realignment, all under the budget of a typical family dinner out. Mastering this kit will place your knife sharpness in the top 1% of home kitchens worldwide.
19. Interpreting the Language of the Edge: Visual and Tactile Feedback
Sharpening and honing are conversations with the knife, and the knife talks back. It provides constant feedback through sight, sound, and touch. The mark of an expert is the ability to read this feedback instantly and adjust technique accordingly. Visually, you are searching for the burr, but under good lighting, you are also evaluating the scratch pattern. As you move from a 1000-grit stone to a 6000-grit stone, the scratch marks on the bevel should change from a hazy, matte grey to a hazy, reflective mirror. If you see a bright, mirror-polished patch right next to the edge, but a dull matte line directly at the apex, your angle was too low; you were polishing the shoulder, not the edge. Auditory feedback is equally vital. A dull, muted scraping sound on a water stone often indicates that the stone has loaded up with metal and needs to be lapped. A high-pitched, screeching sound can indicate that the blade is not sitting flat, and you are grinding the edge at too high an angle. You want a consistent, crisp “shhh-shhh” sound—the sound of abrasive particles cutting steel uniformly. Tactile feedback is the final verification. The three-finger test (carefully feeling the edge with the pads of your fingers) allows you to feel for the burr and the apex’s “bite.” A truly sharp edge feels sticky; it grips the fingerprint ridges instantly. The paper test is the classic. A clean, push-cut through phonebook paper or newsprint, with no tearing and a quiet zip, tells you the burr is gone and the apex is clean. If the knife snags on the paper, there is a burr or a chip. But the ultimate test is the tomato test. A ripe, soft tomato requires a true, toothless edge to break the skin with the weight of the blade alone. If you can place the knife on top of a cherry tomato and pull it through horizontally, without sawing and without holding the tomato, your sharpening stone and honing rod partnership has reached its zenith. Conversely, a knife that honks on a tomato skin but shaves paper tells a different story; it means the edge is “toothy” or coarse. It has micro-serrations from a low-grit finish that grab hair but struggle with tight, smooth skins. This is a call to polish further on the 6000-grit side or to refine with a ceramic rod. Learning to diagnose these specific failure modes—the paper tear, the tomato slip, the sticky three-finger feel—allows you to return to the right tool, whether it’s the ceramic rod for a quick alignment or the fine stone for a polishing sweep, effectively closing the feedback loop in your knife care routine.
20. The Serrated and Scalloped Edge Challenge: Specialized Sharpening Solutions
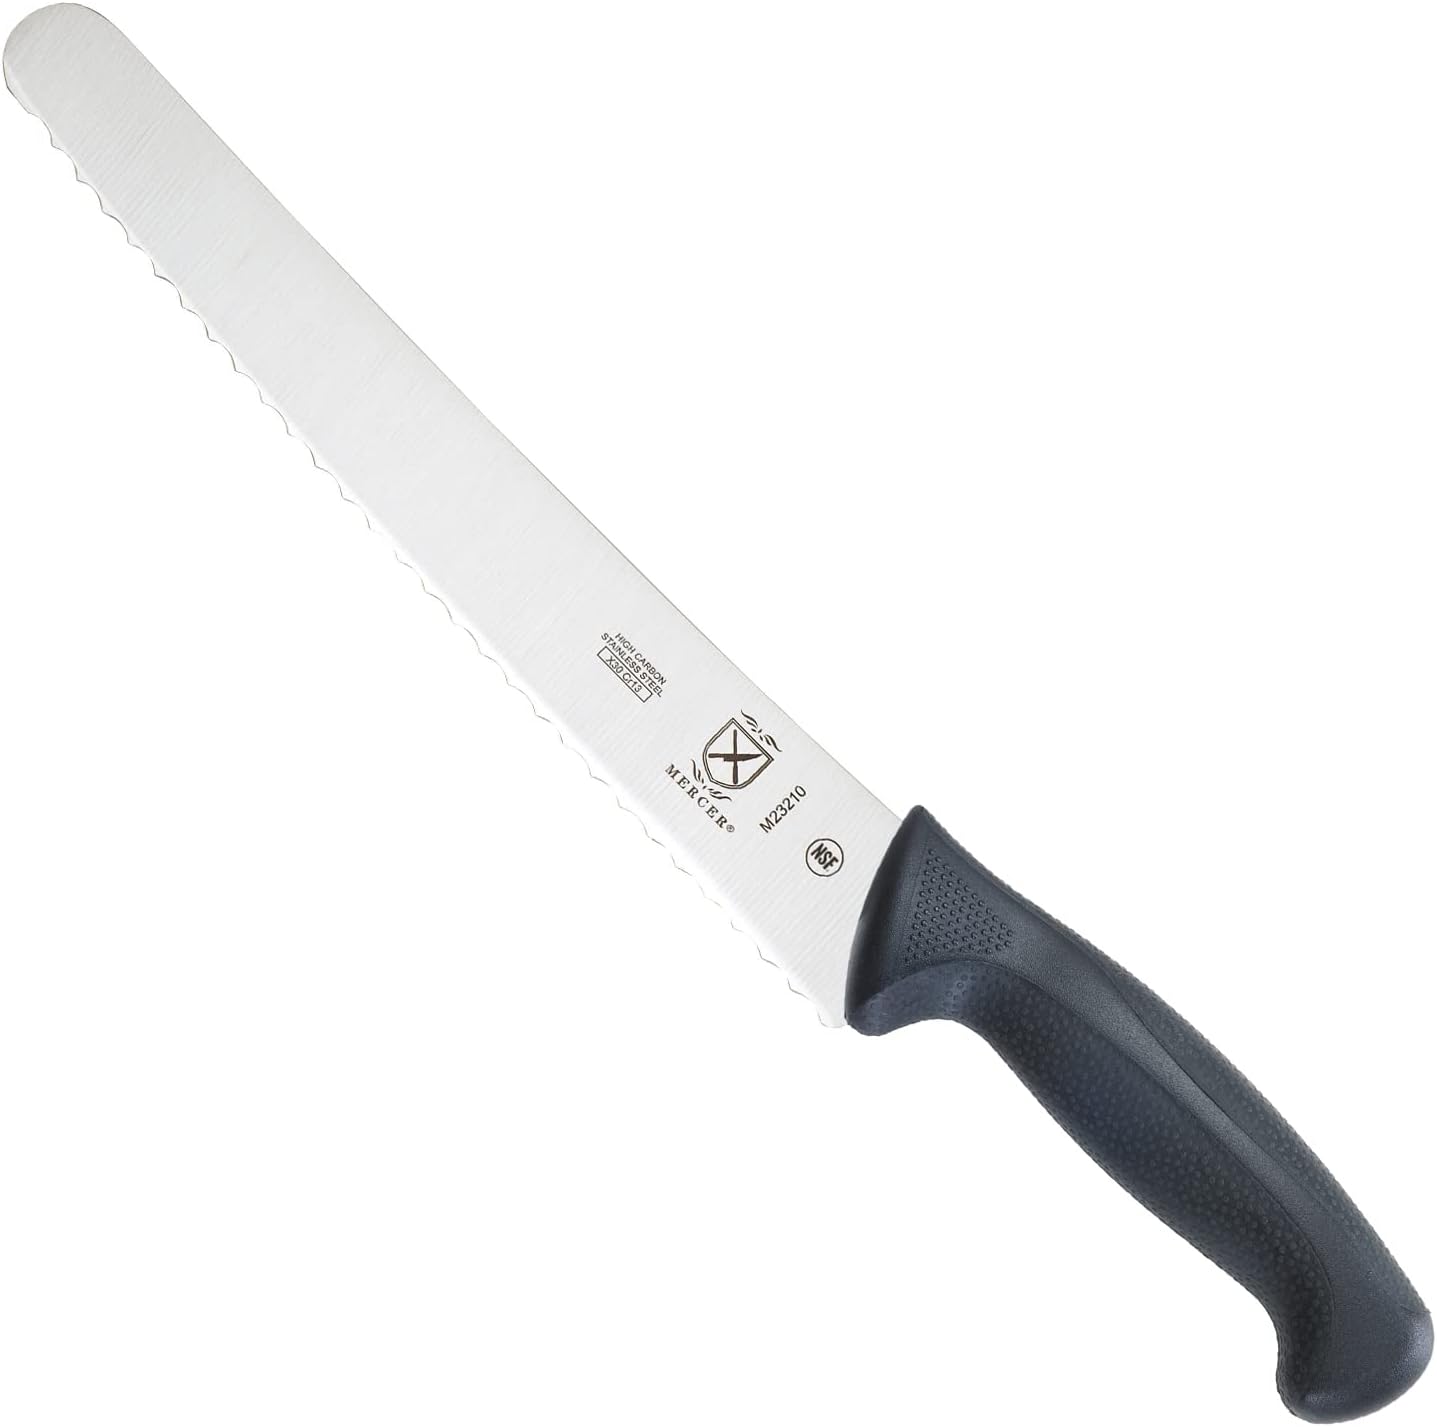
We briefly touched on serrated knives, but they deserve a dedicated deep dive in the context of the sharpening stone vs. honing steel debate. A serrated knife, like a high-quality bread knife or a tomato knife, operates on a completely different principle than a straight edge. The pointed “teeth” protect the recessed “gullets.” The teeth hit the hard crust or skin first, creating points of entry, while the gullets rarely touch the cutting board. This means a serrated knife can feel “sharp” for years without any maintenance, simply because the primary cutting surface is protected. However, eventually, the points wear down, or the metal fatigues. A standard flat whetstone cannot sharpen the recessed curves without destroying the scalloped profile. Honing a serrated knife with a standard rod is even more disastrous; it simply grinds down the tips of the teeth, turning your bread knife into a blunt club. Maintenance of serrated edges requires abandoning the flat stone paradigm for a tapered rod. A ceramic or diamond sharpening rod that tapers to a fine point allows you to sharpen each individual gullet. You match the rod’s diameter to the curve of the scallop, usually working on the beveled side (often the flat side is left untouched, just like a single-bevel knife), and gently draw the burr. This process is tedious, but necessary. For many home cooks, the pragmatic solution is to accept that serrated knives are semi-disposable. The cost of a quality replacement bread knife often rivals the cost of a dedicated serrated sharpening kit. The exception is for premium serrated knives like those from Shun or MAC, which are expensive enough to justify the purchase of a specific tapered ceramic rod. There is also the electric sharpener route, as mentioned, but this irreversibly changes the scallop geometry over time. For the vast majority of home kitchens, the serrated knife is the outlier. It sits in the block, largely ignored by the honing steel, and sharpened only when it has become a glorified saw. The key takeaway is to never use your flat stones or standard rod on a serrated edge. The tools are simply incompatible with the geometry. Treat the serrated knife as a special case, requiring special tools, and your sharpening stone and honing steel routine will remain pure and effective for your primary chef and paring knives.
21. Professional Techniques: The Butcher’s Steel and the Chef’s Choreography
In a high-volume professional kitchen, the relationship between the sharpening stone and the honing steel is a choreographed dance of efficiency. A prep cook or butcher might hone their blade on a steel rod literally every few minutes during heavy task work. This is because they are cutting hundreds of pounds of produce or meat against dense plastic boards, and edge deflection happens at an industrial rate. The professional honing technique is not the slow, careful method we teach beginners, but a rapid, rhythmic “tap-tap-tap” that maintains the edge’s alignment without thinking. The steel is held with the tip up, often braced against a shoulder, and the knife is swept downwards and across in a fluid, two-directional motion that covers the entire blade length in a single stroke. This is an acquired skill born from muscle memory. For these professionals, the sharpening stone is a weekly ritual, not a monthly one. They often use a single medium-grit stone (around 1000 grit) and a leather strop, maintaining a supremely functional, toothy edge that bites into produce, rather than a polished, mirror-polished edge that is more suited to presentation sushi. The butcher’s steel itself is different; it is often a longer, heavier, magnetic steel that collects metal dust, providing visual proof of the knife’s wear. The partnership is seamless: the stone establishes a precise, sharp bevel, and the steel preserves that exact bevel geometry through high-volume stress. If a professional misses a steel session and feels the edge degrade, they often don’t return to the stone immediately. Instead, they use a “touch-up” sequence on a fine diamond rod, which removes the minimal metal required to refresh the edge, bridging the gap between the daily hone and the weekly stone session. This three-tier system—weekly stone, daily steel, and diamond touch-up as needed—is the unsung secret behind the blinding speed of professional knife work. It is a system based entirely on proactive maintenance, never letting the edge degrade to the point where a coarse stone is needed. The honing steel is not an afterthought; it is the primary tool, and the stone is the foundation. Replicating this mindset, even in a home kitchen, transforms knife maintenance from a chore into a seamless part of the cooking process.
22. The Psychology of Sharpness: Why We Chase the Perfect Edge
Beyond the metallurgy, the grits, and the angles, there lies a psychological dimension to the sharpening stone and honing steel. The act of sharpening is a tactile, almost therapeutic ritual. The sound of the stone, the smell of the wet slurry, the focus required to hold an angle—it creates a state of mindfulness that is rare in the modern digital world. This is why many home cooks find themselves collecting stones and chasing the “perfect” edge that can push-cut a free-standing hair. There is a deep, primal satisfaction in restoring a tool to its lethal, functional state. The honing steel, on the other hand, is the instant gratification tool. The quick zip-zip before chopping an onion provides a micro-dose of preparedness and competence. It’s the chef’s equivalent of a sharpening pencil before writing. This psychological interplay between the long-form, restorative meditation of the stone and the instant, pre-action ritual of the steel is part of the craft of cooking. Knife maintenance is not just about the knife; it’s about the cook. A dull knife makes cooking feel clumsy, dangerous, and frustrating. It turns a joy into a chore. A sharp knife glides through food, amplifying the sensory experience—the crack of a crisp apple, the silent squash of a ripe tomato, the clean separation of a protein. This sensory feedback loop is addictive. The knife becomes an extension of the hand. The honing steel and the sharpening stone are simply the tools that maintain this seamless interface between the chef and the food. They are instruments of empowerment. Investing time in mastering them is investing in a deeper connection to the culinary arts. The keyword gap between the two tools is not just mechanical; it is experiential. One restores, the other maintains. One requires patience, the other becomes instinct. Together, they complete the kitchen experience, ensuring that the tool never becomes a barrier to the creative process. The ultimate guide to knife care is not just a set of instructions; it is an invitation to a more tactile, present, and satisfying way of cooking. The sharpening stone and the honing steel are your gateway to that world, where a simple slice becomes a silent, effortless masterpiece, and the kitchen becomes a place of quiet, focused mastery.
What About Serrated Knives?
This ruleset changes for bread knives.
Honing: You cannot hone a serrated knife on a standard rod.
Sharpening: You cannot use a standard flat stone. You need a tapered rod to sharpen each gullet individually. Read our guide on what is a serrated knife used for and how to maintain it, or check out electric sharpeners that have specific serrated slots.
Maintenance and Storage
Once your knife is sharp, keep it that way.
- Clean: Metal particles (swarf) build up on rods and stones. Clean your ceramic rod with an eraser or scouring pad. Flatten your stones regularly.
- Rust: If you use water stones on high-carbon knives (like Kamikoto or Tojiro), dry the knife instantly to prevent rust. Learn how to remove rust.
- Storage: Don’t throw sharp knives in a drawer. They will dull instantly. Use a drawer organizer or magnetic strip.
Frequently Asked Questions (FAQ)
Technically, no. It realigns the edge, making it feel sharper and cut better. However, it does not create a new edge. Only a stone or abrasive removes metal to create true sharpness.
Be careful. Traditional steel rods with ridges can chip hard Japanese steel (VG10, SG2). We recommend a Ceramic Honing Rod for Japanese knives as it is smoother and harder.
4 to 6 strokes per side is usually enough. If the knife doesn’t feel sharp after that, honing won’t help—it’s time to use a stone.
Electric sharpeners are faster and easier but remove more metal, shortening the life of the knife. Stones offer better control and a superior edge but require skill. See our electric sharpener guide for top picks.
Conclusion: The Verdict
The battle of Sharpening Stone vs. Honing Steel is not a competition; it is a partnership.
You need a Honing Steel for daily maintenance. It keeps your Santoku or Chef’s knife performing well between deep sessions.
You need a Sharpening Stone (or a professional service) for actual repair. When the hone stops working, the stone takes over.
To keep your kitchen running smoothly, equip yourself with both. A simple ceramic rod and a combination water stone (1000/6000) will cover 99% of your needs, ensuring your affordable knives cut like premium ones.