Quick Answer: What Does Making a Knife Block Actually Involve?
Making a knife block is a satisfying weekend woodworking project that requires only basic tools, a few board-feet of hardwood, and a bit of patience. At its core, the process involves cutting identical wood planks, routing or sawing slots into them, gluing everything together into a solid block, sanding until smooth, and applying a food-safe finish. The result is a custom piece that fits your specific knives perfectly — no more forcing a Japanese gyuto into a slot built for a German-style blade, and no more wasting space on a 14-slot commercial block when you own five knives.
The techniques range from dead simple (gluing planks around a template) to genuinely challenging (dovetail joinery, angled slots, inlaid hardwood accents). Most beginners complete a perfectly functional five-to-seven-slot block in a single weekend with a circular saw, a router, and basic hand tools.
Why Make Your Own Knife Block Instead of Buying One?
Walk into any kitchen store and you’ll find dozens of knife blocks at every price point. So why bother building one? The honest answer is that commercial blocks are designed around generic knife sets — not around your collection. If you’ve spent time curating a set of quality knives, those knives deserve storage that’s sized and designed specifically for them.
The Custom Fit Argument
Standard commercial blocks typically include slots for a chef’s knife, a bread knife, a carving knife, steak knives, and a pair of scissors. That’s a fine lineup for a boxed set — but if your collection includes a tall Japanese gyuto, a wide nakiri, a slender sujihiki, and a handful of paring knives, none of those standard slots will fit correctly. You’ll either be forcing knives into slots that are too short, too narrow, or too wide — all of which puts stress on the blade, the handle, and the block itself.
Cost Comparison
A decent commercial wooden knife block costs anywhere from $30 to $200. For the same $40–$60 spent on a few board-feet of good hardwood and some basic hardware, you can build something that looks custom, fits your knives perfectly, and will last decades. If you already own woodworking tools, the material cost is even lower.
✅ Pros of DIY
- Custom dimensions for your actual knives
- Choose premium wood species
- Control the finish and food safety
- Satisfaction and pride of ownership
- Easily repair or modify later
- Unique piece no one else has
⚠️ Cons of DIY
- Requires time investment
- Needs basic woodworking tools
- Mistakes mean starting over
- Finish curing adds wait time
The Aesthetic Case
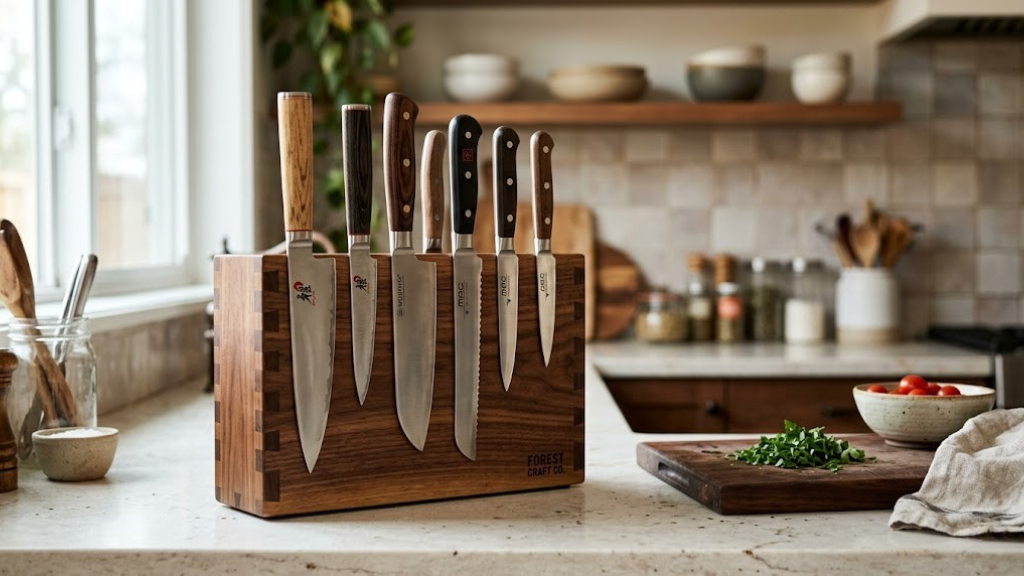
A handmade walnut or cherry knife block with hand-rubbed oil finish simply looks better than virtually any mass-produced alternative at the same price point. The grain matching, the warm patina, and the craftsmanship show. It becomes a conversation piece in the kitchen rather than just a utilitarian holder.
Knife Block Design Types: Which Style Is Right for You?
Before you buy wood or pick up a saw, you need to decide on a design. Each approach has different tool requirements, difficulty levels, and final aesthetics. Here’s a clear breakdown of the main options.
1. The Classic Laminated Block (Recommended for Beginners)
This is the most popular DIY approach for good reason. You cut multiple identical planks, rout or saw slots into each mating face, then glue everything together. When the glue dries, you have a solid block with hidden internal slots. The construction is logical, forgiving, and requires only a router or table saw for the slots. Most commercial wooden blocks use a version of this technique internally.
2. The “Rod” or “Universal” Block
Instead of fixed slots, this design fills a box with dozens of wooden dowels, bamboo skewers, or plastic rods that flex to accept any knife shape. It’s wonderfully simple to build — basically just a box with a grid of holes drilled in a top panel — and it solves the universal fit problem completely. The downside is that it can be harder to clean and doesn’t have the same visual elegance as a solid wood design.
3. The Angled Slot Block
A refinement of the laminated block, this design orients slots at a roughly 20–25 degree angle toward the back of the block. Knives slide in spine-first with the edge hanging free, which is the safest possible configuration for your blade geometry. It’s slightly more complex to build because you need to account for the angle when planning slot depth and board thickness.
4. The Through-Slot Block
Rather than hidden internal channels, the slots run completely through from top to bottom (or front to back) and are visible. This is the easiest design to cut but the least elegant-looking. It does allow the block to drain moisture easily, which is a hygiene advantage.
5. The Wall-Mounted or Magnetic Block
This isn’t a freestanding block in the traditional sense but rather a wooden backing panel with embedded magnets or routed channels that mount to a wall. It saves counter space entirely. The construction requires embedding rare-earth magnets into a wood backing, which is a slightly different skill set but still very achievable.
Design Comparison at a Glance
| Design Type | Difficulty | Tools Needed | Edge Protection | Aesthetics |
|---|---|---|---|---|
| Laminated Block | Beginner–Intermediate | Saw, router or table saw, clamps | Good | Excellent |
| Rod/Universal Block | Beginner | Drill press or hand drill | Excellent | Moderate |
| Angled Slot Block | Intermediate | Saw, router, angle jig | Excellent | Excellent |
| Through-Slot Block | Beginner | Saw only | Moderate | Basic |
| Magnetic Wall Panel | Intermediate | Router, drill, magnets | Excellent | Excellent |
Choosing Your Wood: Species, Grain, and What to Avoid
Wood choice is one of the most important decisions you’ll make, affecting durability, workability, appearance, and how the block responds to kitchen moisture over years of use. The key criteria are hardness, grain stability, moisture resistance, and food safety.
The Best Woods for Knife Blocks
Hard Maple
Dense, pale, close-grained. Highly resistant to nicks and dents. Takes finishes beautifully. The industry standard for cutting boards and knife blocks for good reason.
Black Walnut
Rich chocolate tones with stunning grain. Slightly softer than maple but still very durable. Premium appearance. More expensive but worth every penny for a showpiece block.
Cherry
Warm reddish-brown that deepens beautifully with age. Medium hardness. Works and sands easily. Excellent for beginners who want a premium-looking result without walnut prices.
Red or White Oak
Hard, affordable, and widely available. Open grain requires a sealing step before final finish. Slightly more porous than maple but very practical for a first build.
Teak
High natural oil content makes it extremely moisture-resistant. Beautiful golden color. Can be harder to glue due to oil content — wipe faces with solvent before gluing.
Pine / Cedar / Softwoods
Too soft. They dent, scratch, and absorb moisture rapidly. The slots will widen over time, allowing knives to rattle and potentially chip. Save softwoods for other projects.
Board Thickness and Quantity
For a standard laminated block design, you’ll need boards that are 3/4 inch thick (the most common dimensional hardwood thickness available at lumber yards). Plan for approximately 8–12 planks of identical dimensions, depending on your total block width. A typical finished block is 3–5 inches wide, 10–12 inches long, and 6–9 inches tall. Do the math in advance: if your block will be 4 inches wide and each plank is 3/4 inch, you need approximately 5–6 planks before cutting for the slots.
Lumber Purchasing Tips
Buy from a hardwood lumber dealer rather than a big-box home improvement store for the best selection, quality, and price per board-foot. Look for boards that are flat, straight (no bow or twist), and have consistent coloring if you want the final block to look uniform. Buying slightly more than you need is always wise — have one spare board for test cuts and mistakes.
Tools and Materials You’ll Need
One of the great things about this project is that you don’t need an elaborate workshop. A basic set of hand and power tools is entirely sufficient for a beginner build. Here’s exactly what you’ll need, organized by category.
Essential Materials
Essential Tools
Optional but Helpful
- Drill press — invaluable for the rod-style block design and for drilling uniform pilot holes
- Router table — makes cutting repeating slots far more accurate and consistent than a handheld router
- Hand plane — for final surface cleanup and flattening after glue-up
- Pocket hole jig — useful for adding a base or bottom panel without visible fasteners
- Card scraper — excellent for achieving a glass-smooth surface on hardwood without over-sanding
Measuring and Planning: The Step Everyone Skips (Don’t)
The planning phase is where your knife block goes from “roughly right” to “perfectly suited.” Spend an hour here and you’ll save yourself enormous frustration later. Rushing this step is the number one reason DIY knife blocks end up with slots that don’t fit the intended knives.
How to Measure Your Knives
Lay each knife flat on a piece of paper and trace its blade profile. You need three critical measurements per knife:
- Blade height — the distance from the spine to the cutting edge at the heel (widest point). This determines minimum slot depth.
- Blade length — tip to heel. This determines minimum slot length. Add at least 1/2 inch of clearance.
- Spine thickness — the thickest dimension at the spine. This is your minimum slot width. Add 1/16″ to 1/8″ for comfortable insertion and removal.
📏 Real-World Knife Measurements (Reference)
| Knife Type | Blade Height | Spine Thickness | Suggested Slot Width |
|---|---|---|---|
| 8″ German Chef’s Knife | 1.9″–2.1″ | 2.5–3.5mm | 5/16″–3/8″ |
| Japanese Gyuto 240mm | 1.7″–2.0″ | 2.0–3.0mm | 5/16″ |
| Bread Knife 10″ | 1.2″–1.5″ | 2.5–3mm | 3/8″ |
| Nakiri/Vegetable | 1.8″–2.1″ | 1.5–2.5mm | 5/16″ |
| Paring Knife | 0.8″–1.1″ | 2.0–2.8mm | 1/4″–5/16″ |
| Cleaver | 3.5″–4.5″ | 3.5–5mm | 1/2″ |
Planning the Block Dimensions
Once you have your knife measurements, work out the overall block dimensions. A standard knife block is typically:
- Height: The tallest blade height in your set, plus 1.5–2 inches at the top (so the handle sits above the block).
- Length: The longest blade in your set, plus 1 inch clearance at the tip end.
- Width: Determined by the number of knives × (slot width + minimum wood wall between slots). For most collections, this works out to 3.5–5 inches.
Draw this out on paper. Sketch in where each slot will sit, noting the wood wall thickness between adjacent slots. A minimum of 1/4 inch of solid wood between slots is needed for structural integrity — 3/8 inch or more is better.
Cutting the Wood: Getting Clean, Consistent Pieces
Now the physical work begins. Clean, square cuts are the foundation of everything that follows — if your planks aren’t uniform and their edges aren’t square, the glue-up will be misaligned and the slots won’t be consistent. Take your time here.
Step-by-Step Cutting Process
-
Joint or flatten one face of each board Before cutting to final dimension, ensure at least one face of each board is flat and true. Run it over a jointer if you have one, or use a hand plane. A flat face gives you a reliable reference surface for all subsequent cuts.
-
Rip boards to final width Using your table saw or circular saw with a fence, cut all planks to identical width. This is the dimension that becomes your block’s height. A rip fence (or a straight-edge clamped to the board as a guide for a circular saw) is essential for straight, consistent cuts.
-
Crosscut boards to final length Cut all planks to the same length — this becomes your block’s depth (front to back). Use a miter gauge, miter saw, or a crosscut sled on the table saw. Stack and compare all pieces: they should be interchangeable, with no gaps when laid flat against each other.
-
Mark and pair the slot-bearing boards Not every board needs a routed slot. Identify which boards will carry the slot channels (typically every other board, or every board except the two outermost ones). Mark these with a pencil and keep them oriented consistently.
-
Label every board’s orientation Number the boards from 1 to whatever your total is, and mark which face will face inward (toward the slots). This prevents confusion during glue-up when you’re working under time pressure with wet glue.
Grain Matching for Aesthetics
If appearance matters to you, take time to arrange boards so their grain patterns flow continuously across the assembled block. This is called grain matching and it transforms a functional object into a beautiful one. Lay all boards face up on a flat surface and shuffle them until the grain patterns create a pleasing flow, then number them in that order.
Cutting the Knife Slots: The Heart of the Project
This is the most technically demanding part of the build, and it’s worth going slowly. Slots that are too narrow will grip blades too tight; too wide and your knives will rattle and potentially chip against the wood. The goal is a slot that allows the knife to slide in and out with light, even friction.
Method 1: Router with Straight Bit (Recommended)
This is the most reliable method for clean, consistent slots. Set up your router with a straight bit equal to your desired slot width (typically 3/8″ for most chef knives — see your earlier measurements). Use a router fence or a straight-edge clamped to the board as a guide.
Set the cut depth to slightly more than half the plank thickness. When you glue two slot-bearing boards together face-to-face, the two grooves combine to create the full slot channel. For 3/4″ boards, a groove depth of 5/16″ to 3/8″ is ideal.
-
Set up your router fence or guide Position the fence so the bit cuts at the correct distance from the board’s edge. Mark the slot start and end positions on the board with a pencil before routing.
-
Make a test cut in scrap wood first Rout a slot in an offcut of the same wood, then test your actual knife in it. Adjust the bit depth or width before cutting your final boards.
-
Rout all slots in the same pass setup Don’t change your fence setting until all matching slots are cut. Consistency is more important than perfection — if all boards are cut identically, the assembled block will be correct even if individual measurements are slightly off.
-
Clean out the slot floors Router bits leave slightly rounded corners. Use a sharp chisel to square up the slot ends if needed, and a folded piece of sandpaper to smooth the slot floor. A smooth slot interior prevents edge damage.
Method 2: Table Saw with Dado Stack
If you have a table saw and a dado stack (a multi-blade configuration that cuts wide grooves in a single pass), this is faster and even more precise than routing. Set the dado width to your slot dimension, set the cut height to your groove depth, and run each board across the blade using the miter gauge as a guide. Multiple passes can widen a slot if needed.
Method 3: Hand Saw and Chisel
If power tools aren’t available, you can cut slots by hand. Mark your slot width with a marking gauge, then make two parallel saw cuts down to your depth mark. Remove the waste between them with a chisel, working in small increments from both ends toward the center. It’s time-consuming but achievable. Clean the floor with a router plane or a wide, sharp chisel held flat.
Slot Spacing and Layout
Space slots from the center of one to the center of the next with consistent gaps. The gap determines the wood wall thickness between adjacent knife positions. Measure from edge of slot to edge of next slot — this should be at minimum 3/8 inch. If you’re making an angled-slot block, remember that the apparent slot spacing at the top will be wider than the actual slot channel because of the angle — factor this into your layout math.
Proper knife storage goes beyond just protecting the tools themselves — it’s also worth understanding the full picture of what makes a quality blade worth protecting. If you’re curating a serious knife collection, exploring resources like a guide to the best knife holders can help you benchmark your DIY build against commercial alternatives and inform smart design decisions.
Assembly and Glue-Up: Bringing It All Together
The glue-up is one of the most stressful moments of any woodworking project — you’re working with wet glue that sets in minutes, trying to align multiple pieces under clamping pressure. Being organized and prepared makes all the difference.
Preparing for the Glue-Up
Before applying a single drop of glue, do a complete dry run. Assemble all boards in their final order with no glue, apply clamps, and check everything is aligned and square. Note any adjustments needed. Have all your clamps set to roughly the right size, your glue applicator ready, and a damp cloth for squeeze-out cleanup.
-
Lay out boards in sequence on a flat surface Confirm every slot-bearing face is oriented correctly inward. The outer faces (boards 1 and the last board) have no slots.
-
Apply glue to one face at a time Spread Titebond II or III in a thin, even layer using a small brush, roller, or your finger. Cover the entire face — don’t leave dry spots, but don’t glob it on either. Good contact coverage prevents weak joints.
-
Press faces together and tap aligned Slide boards together with a slight back-and-forth motion to distribute the glue. Tap with a mallet if needed. Work quickly but methodically through all boards.
-
Apply clamps — alternating top and bottom Position bar clamps roughly every 4–6 inches along the block’s length. Alternate clamps from the top and bottom of the block to prevent bowing. Tighten gradually and evenly, not one clamp to maximum before moving to the next.
-
Check for square and flatness immediately Before the glue starts to set, check the top face of the block with a straightedge and the corners with a square. If it’s out of alignment, you have about 10–15 minutes to adjust before the glue grabs.
-
Wipe excess glue squeeze-out Use a damp cloth to wipe squeeze-out from exterior surfaces while it’s still wet. Leave it completely alone inside the slots — it’s difficult to remove wet glue from inside a slot, and dried glue chips out cleanly later.
-
Let cure for minimum 6 hours (overnight preferred) Don’t rush this. Titebond II reaches full strength in 24 hours. Keep the block horizontal and undisturbed. Resist the urge to test the joints early.
Attaching a Base
Once the main block has cured, you can add a solid base for stability. A simple approach is to glue and clamp a piece of the same hardwood to the bottom, oriented perpendicular to the main block planks (this cross-grain arrangement adds stability). Alternatively, use pocket hole joinery for a strong mechanical connection. The base should extend about 1/2 inch beyond the block on all sides for better stability.
Sanding and Smoothing: The Step That Defines the Final Quality
After the glue has fully cured, remove the clamps and do an honest assessment of the block. You’ll likely see dried glue squeeze-out on the exterior, slight misalignment at some joints, and rough surfaces throughout. Sanding brings all of this together and creates the smooth, refined surface that makes a handmade block look truly professional.
Progressive Sanding Steps
Step 1: Remove Dried Glue (80 Grit)
Start with 80-grit on a random orbit sander for large flat surfaces. For joints that are slightly proud, use a card scraper or hand plane first, then sand. Work the top, sides, and any visible faces. Don’t force grit marks perpendicular to the grain — always finish each grit parallel to the grain to minimize scratches.
Step 2: Establish Flatness (120 Grit)
Swap to 120-grit and continue building flatness across all surfaces. Pay special attention to the top of the block where slot openings are — this is the most visually prominent surface. Any unevenness here will be immediately obvious. Spend extra time getting this face truly flat and smooth.
Step 3: Refine the Surface (180 Grit)
By 180-grit, the work transitions from material removal to surface refinement. Sand all faces thoroughly, including edges and corners. Gently round over all sharp external edges with sandpaper — a router with a 1/8″ roundover bit is even faster and more consistent for this step.
Step 4: Final Prep (220 Grit)
220-grit is your final sanding before finish. The surface should feel silky under your hand — no visible scratches, no rough patches, no glue residue. On hardwoods like maple or walnut, you can even go to 320-grit for a glass-smooth surface that will drink in oil finish beautifully.
Sanding the Interior Slots
The inside of the slots needs attention too. Fold a piece of 180-grit sandpaper into a narrow strip and run it through each slot. Then follow up with 220-grit. If you plan to use felt liners, a less-perfect interior is acceptable — but if you’re relying on bare wood, these surfaces need to be smooth enough not to catch or score blade edges.
Dust Removal
Before applying any finish, vacuum the entire block thoroughly, including inside all slots. Follow this with a tack cloth or a lint-free cloth dampened with mineral spirits to pick up any remaining dust. Dust particles under a finish create an unpleasant texture — this step is worth the extra five minutes.
Finishing and Food Safety: Protecting Your Block the Right Way
Finish selection is critically important for a knife block. Unlike furniture that sits in a dry room, a knife block lives in the kitchen — it will be exposed to cooking steam, wet hands, occasional spills, and the mechanical stress of knives being inserted and removed daily. Your finish needs to handle all of this while remaining safe to contact food-contaminated surfaces.
Food-Safe Finish Options
1. Pure Mineral Oil (Best Starting Point)
Pharmaceutical-grade mineral oil (not petroleum-based oils with additives) is completely food-safe, inexpensive, and widely available at pharmacies. It penetrates the wood well and provides good moisture resistance. The downside is that it never fully cures — it remains a liquid absorbed in the wood fibers — so it needs periodic reapplication. Apply 3–4 coats at 24-hour intervals, wiping off excess each time. It’s the same product used on wooden cutting boards.
2. Pure Tung Oil (Best All-Around Choice)
Once fully cured, pure tung oil (not “tung oil finish,” which contains solvents and varnish) is food-safe and provides a harder, more durable surface than mineral oil. It gives the wood a rich, slightly warm appearance that deepens over time. Apply 2–3 thin coats, allowing 24 hours between applications. Wipe off all excess — oil finishes should be absorbed, not filmed on the surface.
3. Beeswax and Carnauba Blends
Board Butter and similar beeswax/mineral oil blends are food-safe and incredibly easy to apply — just rub in with a cloth and buff. They’re best as a topping coat over mineral oil or as a maintenance finish rather than a primary protective finish on bare wood.
4. Hard Wax Oil (Rubio Monocoat, etc.)
These water-based hardening wax oils are considered food-safe once fully cured (typically 5–7 days for full hardness). They offer excellent durability and a beautiful matte or satin sheen. More expensive than oil, but worth it for a showpiece block. Follow manufacturer instructions carefully for these products.
Finishes to Avoid
- Polyurethane — Not food-safe when fresh; once cured it’s technically inert but chips badly under mechanical stress and doesn’t re-adhere to itself for touch-ups.
- Lacquer — Film finishes in general are not ideal for knife blocks. They peel and chip, which is both unsightly and potentially a food safety concern.
- Danish Oil / “Tung Oil Finish” — These products typically contain metallic driers and varnish resins that are not truly food-safe.
- Cooking oils (olive, vegetable, etc.) — These oxidize, go rancid inside the wood, and can cause mold. Use only non-drying food-safe oils.
Application Process
-
Apply first coat generously Use a lint-free cloth to apply oil in the direction of the grain. Work the oil into the slot interiors using a narrow cloth strip or cotton swab.
-
Wait 20–30 minutes, wipe off all excess Oil that pools on the surface rather than soaking in will dry sticky and cloudy. Wipe firmly until no wet film remains.
-
Allow to cure between coats 24 hours minimum between coats for mineral oil; longer for tung oil. The wood is ready for a second coat when the surface no longer feels damp or tacky.
-
Light sanding between coats (optional) A light pass with 320-grit or 400-grit between oil coats raises the grain, then knocks it back down, creating an increasingly smooth surface. Skip this with mineral oil.
-
Apply 3–4 total coats The wood will stop readily absorbing oil after 3–4 coats, which tells you the wood fibers are adequately saturated. Final coat: apply, wait 20 minutes, wipe aggressively dry, buff with a clean cloth.
Advanced Variations and Upgrades for Your Knife Block
Once you’ve completed a basic laminated block, you’ll have the skills and confidence to try more sophisticated designs. These variations significantly elevate both the aesthetics and the functionality of your knife storage.
Angled Slot Block with Jig
As mentioned in the design overview, angled slots are better for edge protection. Building them requires a simple angled jig — a wedge-shaped piece of scrap wood that you attach to your router base or table saw fence to tilt the cut at 20–25 degrees. The math: for a 25-degree angle with a slot depth of 2 inches, the horizontal run at the surface is 2 × tan(25°) = 0.93 inches. Account for this in your layout so the slot entrance doesn’t collide with the block’s edge.
Mixed Wood Laminations
Instead of using a single wood species throughout, alternate contrasting species — walnut and maple is a classic combination, as is cherry and hard maple. This creates dramatic visual stripes running the length of the block. Plan your wood purchases and cuts so the laminate faces will be visible on the top and sides of the assembled block.
Built-In Sharpener Slot
Add a wider slot at one end of the block sized to hold a honing rod or ceramic sharpening rod vertically. Simply make this one slot wider and deeper than the knife slots, and size it to your specific rod. It keeps everything in one place and looks intentional rather than improvised. Pairing your block with a quality honing tool is an excellent idea — it complements the regular edge maintenance habits every knife owner should develop.
Herb or Tool Storage Integration
Add a small compartment or pull-out drawer in the base of the block for storing extra items — a thermometer, a peeler, a bread clip. This requires building the base as a hollow box with a simple sliding drawer. It’s a significant addition to the project scope but produces a truly custom kitchen tool.
Magnetic Knife Block Hybrid
Route a channel in the back face of the block and embed strong rare-earth magnets (neodymium, N52 grade) in epoxy. The magnets allow you to hang lighter knives or kitchen shears flat against the block face instead of in slots. This is elegant and useful — particularly good for delicate Japanese knives where slot insertion carries more edge risk.
Personalization and Monogramming
A wood-burning pen (pyrography tool) allows you to add initials, patterns, or decorative borders to the block face. A CNC router or laser engraver (if you have access to one) can create precise lettering or intricate patterns. Personalization elevates a kitchen item into a heirloom. Keep designs on the end grain face or the wide side face — not in the slot area.
Understanding What Makes Knives Worth Storing Well
Part of the reason a well-built knife block matters so much comes down to the quality of the knives inside it. If you’re investing in a handmade storage solution, it’s worth understanding what distinguishes great knives — whether that’s exploring how blade hardness affects edge retention in German steel comparisons or understanding the edge geometry differences between Japanese and Western styles. Great storage and great knives go hand in hand.
Care and Maintenance: Keeping Your Knife Block in Top Condition
A well-built wooden knife block will last decades with minimal care. The main enemies are excess moisture, bacteria trapped in crumbs and debris, and infrequent oiling that allows the wood to dry out and crack. Here’s how to stay on top of it.
Daily and Weekly Care
- Wipe the exterior with a dry or barely damp cloth after kitchen use. Dry immediately — never let water sit on the wood.
- Keep knives dry before storing them in the block. Moisture transferred from wet blades into the slots is the primary source of interior moisture damage and potential mold.
- Turn the block upside down periodically and tap it firmly over a trash can to dislodge crumbs, debris, and dust that accumulates in the slots over time.
- Never submerge, dishwash, or soak a wooden knife block. Water penetration causes the glued joints to weaken, the wood to swell and crack, and the interior to harbor mold.
Monthly Deep Clean
Once a month, use a long, narrow bottle brush or pipe cleaner to brush out the interior of each slot. For stubborn residue, a damp (not wet) brush with a drop of dish soap works, followed by a dry brush pass and thorough air-drying in a warm location. This is also a good time to inspect the block for any new cracks, dried glue delamination, or signs of moisture damage.
Annual Re-Oiling
Once a year (or when the wood starts to look dry and dull), re-apply a coat of your chosen food-safe oil. The process is quick: clean the block, apply oil generously to all surfaces including slot interiors, wait 20–30 minutes, wipe off completely, and allow to dry overnight. This keeps the wood nourished, the finish intact, and the block looking beautiful indefinitely.
Dealing with Stains or Mold
If you notice dark staining in a slot (often from moisture), sand the affected area lightly, treat with a diluted hydrogen peroxide solution (3%), allow to dry completely for at least 48 hours, then re-oil. For surface mold, the same treatment applies — followed by ensuring the underlying cause (a wet knife regularly stored in that slot) is addressed.
🔧 When to Refinish vs. When to Start Over
A knife block that has deep mold penetration, severe cracking at glue joints, or wobbly slots due to wood movement may be beyond simple maintenance. However, most issues can be addressed with light sanding, re-gluing delaminated joints with fresh glue and clamps, and a thorough re-oiling. A well-built block made from quality hardwood should remain structurally sound for 15–20 years or more with normal care.
Storing Knives Correctly in Any Block
The best maintenance habit isn’t about the block at all — it’s about what goes into it. Storing a knife correctly means sliding it in blade-spine-first with a slight downward tilt, so the cutting edge never contacts the wood. Reckless insertion is how knives get microchipped edges. If you’ve invested in quality blades, taking two extra seconds to insert them carefully protects both the knife and the block simultaneously.
This is particularly relevant for Japanese knives, which often feature harder, more brittle steels. Understanding the differences between knife steels — such as the edge characteristics of Shun versus Wusthof — can inform how carefully you need to handle each blade during insertion and removal. Harder steels mean better edge retention but require more care to avoid chipping.
Complete Build Reference: Materials, Time, and Cost
| Item | Quantity / Spec | Approx. Cost | Where to Buy | Notes |
|---|---|---|---|---|
| Hard Maple (3/4″) | 6–10 board-feet | $18–$35 | Hardwood dealer | Or substitute walnut/cherry |
| Titebond III Wood Glue | 8 oz bottle | $7–$10 | Hardware store | Waterproof, excellent for kitchen use |
| Mineral Oil (food-grade) | 8–16 oz | $5–$8 | Pharmacy or Amazon | Sufficient for 3–4 coats + future maintenance |
| Sandpaper (80/120/180/220) | 2 sheets each grit | $8–$12 | Hardware store | Or sanding discs for orbital sander |
| Bar Clamps (24″) | 6–8 clamps | $40–$80 (if buying) | Hardware store / rental | Consider renting if you don’t own them |
| Router + 3/8″ Straight Bit | 1 setup | $0 (rental: $25–$40/day) | Tool rental / owned | Most important tool for slot cutting |
| Rubber Bumper Feet | 4 pieces | $3–$5 | Hardware store | Prevents sliding and scratches to countertop |
| Total Material Cost | — | $41–$70 | — | Excluding tools you already own |
Time Investment Summary
| Phase | Time Required | Skill Difficulty |
|---|---|---|
| Planning and measuring | 45–90 minutes | Easy |
| Wood cutting | 1–2 hours | Moderate |
| Slot cutting | 1–2 hours | Moderate |
| Dry fit + adjustments | 30–60 minutes | Easy |
| Glue-up | 30 minutes active + 24 hrs cure | Moderate |
| Sanding (all grits) | 1.5–3 hours | Easy |
| Finishing (3–4 coats) | 30 min active + 3 days cure | Easy |
| Total Active Work | 5–10 hours | Beginner–Intermediate |
When it comes to what your finished block will house, the storage quality you build directly reflects the knife quality you’re protecting. If you’re still building out your collection, resources like this roundup of excellent chef knives under $75 can help you identify which blades are worth the care a custom block provides.
Frequently Asked Questions
Build Something That Belongs in Your Kitchen
A handmade knife block is more than a storage solution — it’s a statement about how seriously you take your tools and your craft. The project takes a weekend, costs roughly $40–$70 in materials, and produces something uniquely fitted to your knives, your kitchen, and your tastes. No commercial alternative can claim the same.
Start with a simple laminated maple block, work through the process methodically, and don’t rush the finishing. The satisfaction of reaching for a great knife from a block you built yourself is genuinely hard to beat. Now get out there and make some sawdust.