What is a Bread Knife Used For? The Ultimate Serrated Knife Guide
Discover why this specialized serrated blade is essential for perfect slices every time—from crusty baguettes to delicate cakes and beyond.
What Exactly is a Bread Knife?
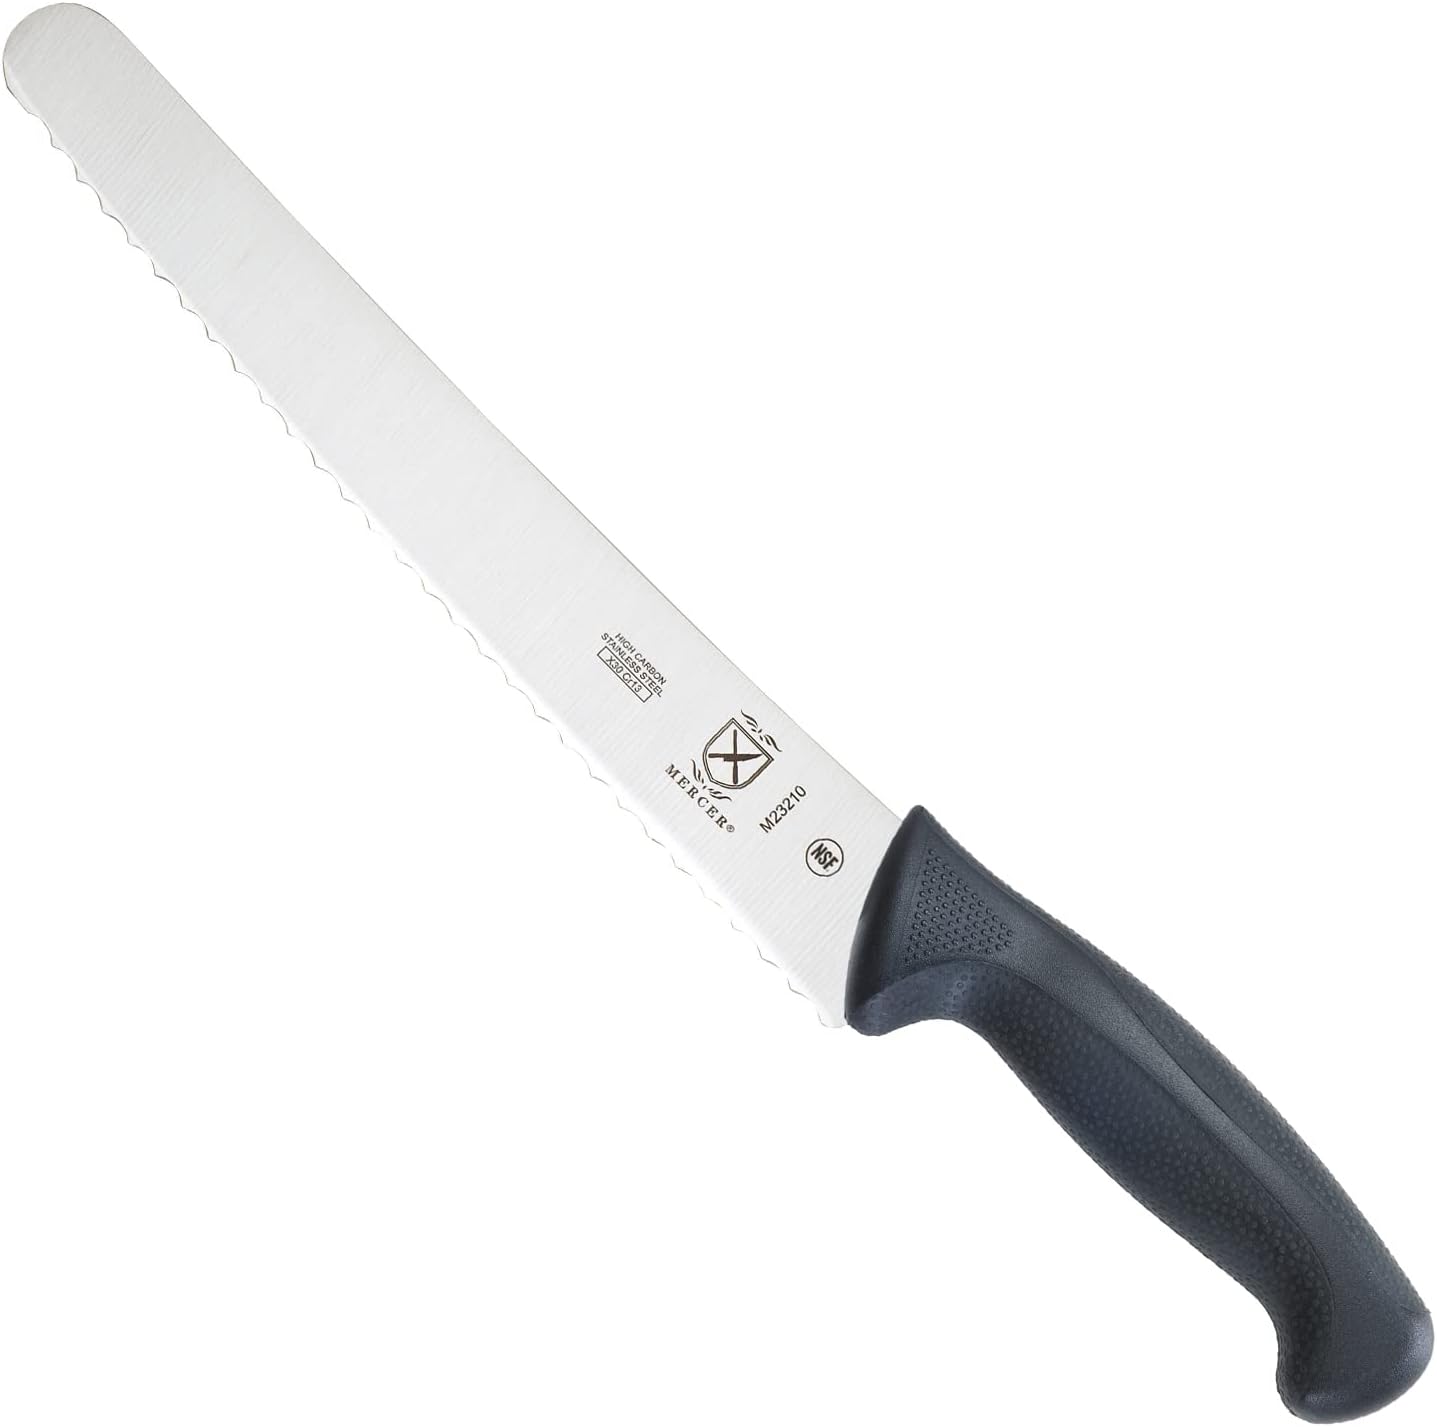
A bread knife is a specialized kitchen knife with a serrated edge designed specifically to cut through bread without crushing it. Unlike straight-edged knives that press down, bread knives use a sawing motion that gently separates crust and crumb, preserving the texture and structure of baked goods.
Often overlooked as a single-purpose tool, a quality bread knife is actually one of the most versatile knives in your kitchen. While its primary function is slicing bread, its serrated edge makes it indispensable for dozens of other kitchen tasks where a straight edge would fail.
Typical Length
8-10 inches for optimal slicing with minimal back-and-forth motion
Serrated Edge
Teeth range from 1-3mm, spaced to grip crust without tearing
Weight & Balance
Lightweight with forward balance for easy sawing motion
Anatomy of a Bread Knife: The Science of Serrations
The effectiveness of a bread knife lies in its unique design. Unlike straight-edged knives that slice with downward pressure, bread knives work like miniature saws:
Key Design Elements
Serration Pattern
Teeth can be pointed, scalloped, or wavy—each designed for specific bread types
Blade Length
Long blade (8-10″) allows full slices in one motion without repositioning
Balance Point
Forward balance reduces hand fatigue during repeated sawing motions
What Can You Cut with a Bread Knife? 20+ Practical Uses
Primary Uses for Bread
- Crusty breads: Baguettes, sourdough, ciabatta
- Soft breads: Sandwich bread, brioche, challah
- Artisan loaves: Multigrain, seeded, crusty rye
- Bagels and rolls: Without crushing delicate interiors
Beyond Bread: Surprising Uses
- Tomatoes: Perfect slices without crushing
- Citrus fruits: Clean cuts through peel and membrane
- Cakes and pastries: Layer cakes, cheesecakes, meringues
- Melons: Through tough rinds without slipping
- Chocolate: Clean breaks without shattering
- Roasted meats: Through crispy skin without tearing
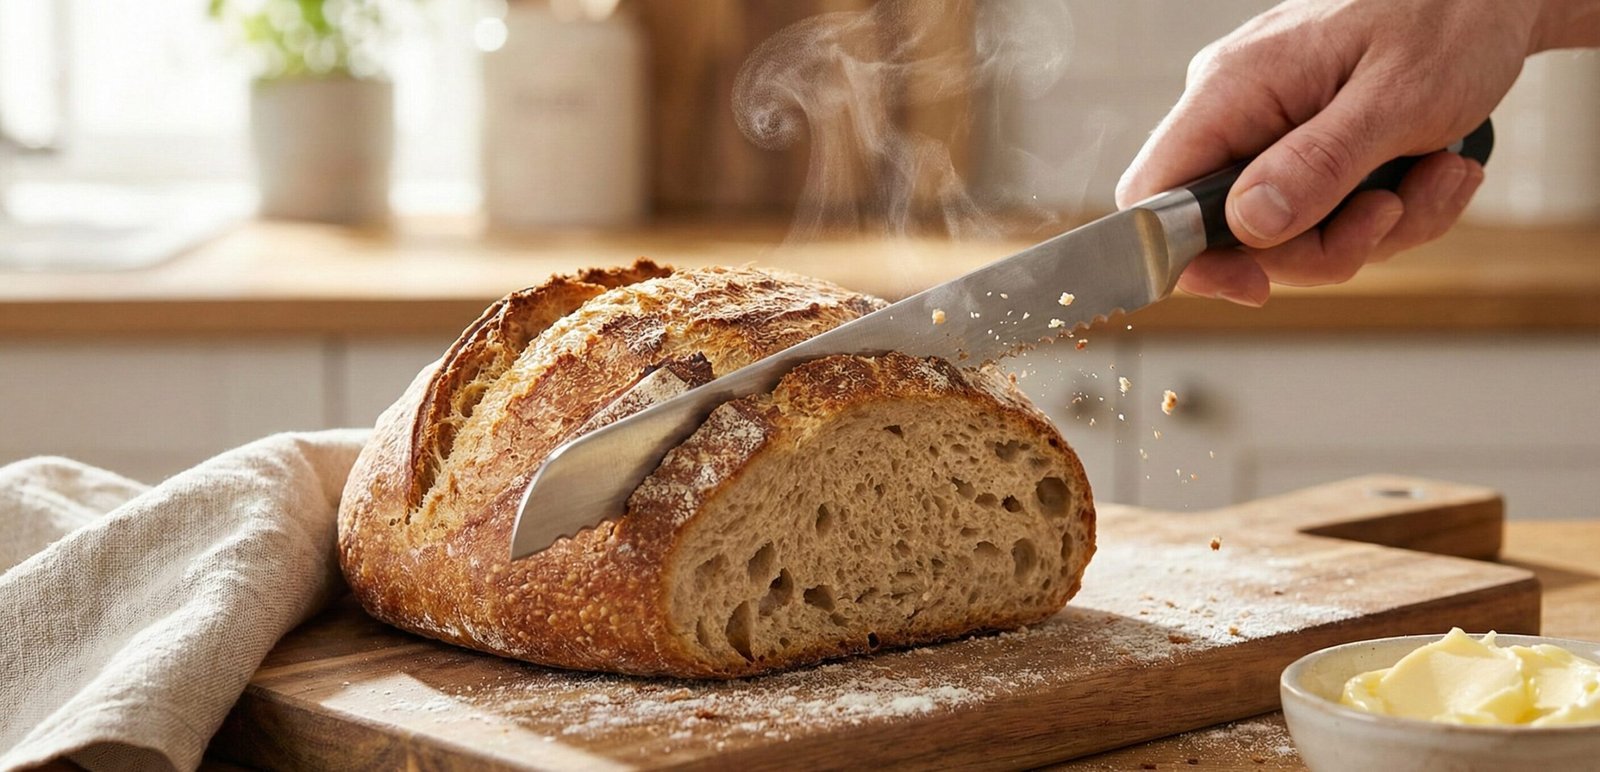
Let bread cool completely before slicing. Warm bread tears easily regardless of your knife. For crusty loaves, use a gentle sawing motion with very little downward pressure—let the serrations do the work.
Serration Types: Pointed, Scalloped & Wavy Edges
| Serration Type | Best For | Blade Length | Maintenance |
|---|---|---|---|
| Pointed Teeth | Crusty artisan breads, bagels | 8-10 inches | Difficult to sharpen |
| Scalloped Edge | Soft breads, cakes, tomatoes | 8-9 inches | Moderate difficulty |
| Wavy/Offset | All-purpose, crusty to soft | 9-10 inches | Easier to sharpen |
| Micro-serrated | Delicate pastries, soft fruits | 7-8 inches | Professional sharpening |
How to Use a Bread Knife: Proper Techniques
The Grip
Use a comfortable grip with index finger along spine for control
Sawing Motion
Gentle back-and-forth with minimal downward pressure
Slice Thickness
Maintain consistent thickness by using the full blade length
How to Choose the Right Bread Knife
What to Look For
- 8-10 inch blade length
- Comfortable, slip-resistant handle
- Quality stainless steel
- Good balance (slightly blade-heavy)
- Appropriate serration for your bread type
What to Avoid
- Cheap stamped steel blades
- Slippery plastic handles
- Poor balance (handle-heavy)
- Overly aggressive serrations
- Dishwasher-only cleaning instructions
Bread Knife Maintenance & Sharpening
Serrated knives require different care than straight-edged knives:
Never Dishwash
Hand wash only—dishwashers damage serrations and handles
Proper Storage
Use blade guards or magnetic strips—never loose in drawers
Sharpening
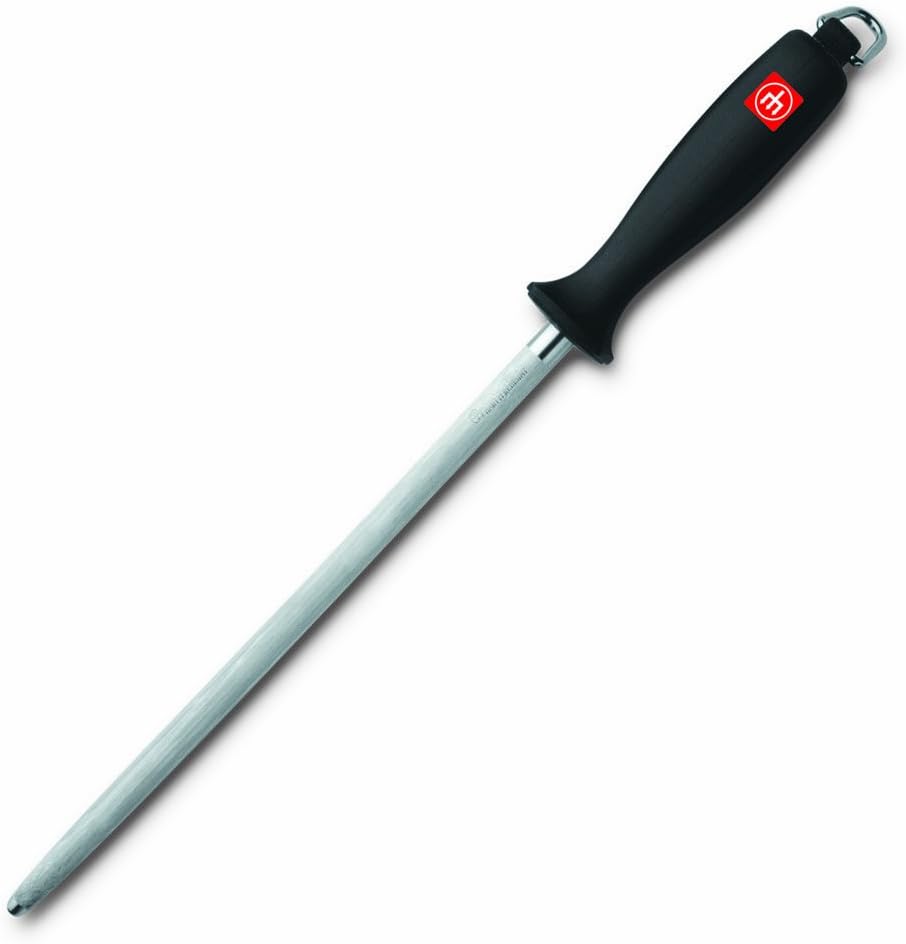
Use tapered sharpening rods or professional sharpening services
Frequently Asked Questions
Yes! Bread knives excel at slicing roasted meats with crispy skin—like chicken, turkey, or duck. The serrations cut through crispy skin without tearing the meat underneath. However, they’re not suitable for raw meat or boneless cuts where a straight edge works better.
With proper use and care, a quality bread knife only needs professional sharpening every 2-3 years. The serrations stay sharp much longer than straight edges because they contact food at multiple angles. Regular honing with a specialized serrated knife sharpener can extend time between sharpenings.
The History and Origins of the Bread Knife
Long before stainless steel and ergonomic handles, cooks solved the “bread problem” with whatever serrated or coarse-edged tools they had on hand. Early European households often used blunt, saw-toothed blades — sometimes little more than a strip of hardened iron with crude notches filed into the edge — because a smooth blade dulled quickly against the hard, ash-dusted crusts of wood-fired loaves. The dedicated bread knife as we recognize it today, with a long, narrow, uniformly serrated blade, became commercially popular in the late nineteenth and early twentieth centuries, as sliced bread moved from a rustic staple to a manufactured, standardized product sold in bakeries and, eventually, grocery stores.
The rise of pre-packaged sliced bread in the 1920s and 1930s actually reduced everyday demand for home bread knives in some markets, since consumers could simply buy a loaf that was already cut. But the tool never disappeared — it simply shifted roles. As artisan and home baking experienced a renaissance in the late twentieth century, and again during the sourdough boom of recent years, the bread knife reclaimed its place as an essential item in home kitchens. Bakers rediscovering naturally leavened, thick-crusted loaves needed a blade that could handle a crackling crust without tearing the airy, irregular crumb underneath — precisely the job a serrated edge does best.
Manufacturing techniques have also evolved considerably. Older bread knives were often stamped from a single flat sheet of carbon steel, ground by hand, and prone to rust if not dried immediately. Modern bread knives are typically forged or precision-stamped from high-carbon stainless alloys, with serration patterns cut by computer-controlled grinding wheels for consistency from blade to blade. This shift has made today’s bread knives sharper out of the box, more resistant to corrosion, and more affordable than their nineteenth-century counterparts, while still preserving the fundamental sawing mechanism that made the design successful in the first place.
Bread Knife vs. Chef’s Knife, Santoku, and Utility Knife
One of the most common points of confusion for home cooks building out a knife set is understanding exactly where the bread knife fits relative to the other blades already in the block. Each knife type is engineered around a different cutting mechanic, and using the wrong one for a task often produces worse results than simply being slower.
Bread Knife vs. Chef’s Knife
A chef’s knife is a straight or gently curved smooth-edged blade meant for a rocking or push-cutting motion — ideal for dicing onions, mincing garlic, or breaking down proteins. Its razor-sharp, unbroken edge is precisely what makes it a poor choice for crusty bread: the smooth edge compresses the crust as it presses down, and because bread offers little resistance until the crust suddenly gives way, a chef’s knife tends to crush the soft crumb underneath before it finishes the cut. A bread knife’s serrations, by contrast, “grip” the crust at multiple points and shear through it with a horizontal sawing motion rather than vertical pressure, which is why it produces cleaner slices with far less downward force.
Bread Knife vs. Santoku
The santoku, a Japanese-style all-purpose knife with a flatter profile and often a granton (dimpled) edge, is excellent for vegetables, fish, and boneless meat, but it shares the chef’s knife’s smooth edge and is not designed for crusty bread. Santoku knives can handle very soft sandwich bread in a pinch, but they will struggle with sourdough boules, baguettes, or anything with a substantial crust.
Bread Knife vs. Utility Knife
Utility knives sit between a chef’s knife and a paring knife in size and are sometimes sold with a light serration, which leads some shoppers to assume it can replace a dedicated bread knife. In practice, a serrated utility knife’s shorter blade (typically 4-6 inches) cannot span the diameter of a full loaf in one pass, forcing multiple overlapping cuts that produce ragged, uneven slices. It remains a good secondary tool for smaller items like dinner rolls, but it is not a substitute for a full-length bread knife on a large loaf.
| Knife Type | Edge Style | Best Task | Bread Performance |
|---|---|---|---|
| Bread Knife | Serrated | Crusty loaves, cake, tomatoes | Excellent |
| Chef’s Knife | Smooth/straight | Chopping, mincing, dicing | Poor on crust |
| Santoku | Smooth, granton | Vegetables, fish, protein | Poor to fair |
| Utility Knife | Smooth or light serration | Small produce, sandwiches | Fair on small items |
Blade Steel and Materials: What Actually Matters
Shoppers often assume that steel type matters as much for a bread knife as it does for a chef’s knife, but the calculus is a little different because serrated edges are sharpened and maintained differently than straight edges.
High-Carbon Stainless Steel
The vast majority of quality bread knives on the market today use high-carbon stainless steel, which blends the edge retention of carbon steel with the corrosion resistance of stainless. This is the sensible default for nearly every home cook, since it resists rust from acidic tomato juice or citrus without requiring the diligent drying and oiling that plain carbon steel demands.
Full Carbon Steel
Some traditional and higher-end bread knives are made from full carbon steel, prized for taking an extremely sharp initial edge and holding it slightly longer under heavy use. The tradeoff is reactivity — carbon steel can develop a patina or even surface rust if left wet, which matters more for a knife that regularly contacts moist crumb and acidic fruit. Carbon steel bread knives are best suited to cooks who are already comfortable with the wipe-dry-oil routine required by carbon chef’s knives.
Blade Coatings and Finishes
Some manufacturers apply a non-stick coating, such as a Teflon-style finish, to reduce friction and prevent crumbs from sticking to the blade during a cut. These coatings can make slicing feel smoother initially but tend to wear unevenly at the serration points, which are subjected to the most friction, so they should be treated as a convenience feature rather than a durability feature.
Handle Materials
Handles are typically injection-molded polymer, wood, or a wood-polymer composite (often marketed as “pakkawood”). Polymer handles are dishwasher-tolerant, lightweight, and resistant to swelling, making them the practical choice for most households, while wood handles offer a warmer grip and classic look but require more careful drying to avoid cracking over time. Full-tang construction, where the metal of the blade extends the entire length of the handle, generally provides better balance and durability than partial-tang designs, which is worth checking on any bread knife priced above entry level.
Offset Handles and Japanese-Style Bread Knives
Beyond the standard straight-handled bread knife, two specialized variants come up frequently in keyword research and shopper questions: offset bread knives and Japanese pankiri-style bread knives.
Offset Bread Knives
An offset bread knife has a handle that sits slightly above the cutting line of the blade, creating clearance between your knuckles and the cutting board. This design is especially popular for slicing tall loaves, layer cakes, and thick sandwiches, since it lets the blade travel in a flatter, more level plane without your hand hitting the food or board first. Offset handles are common in professional delis and bakeries for exactly this reason, and home bakers who frequently cut tall boules or multi-layer cakes often find the extra clearance genuinely useful rather than gimmicky.
Japanese Pankiri (Bread Slicing) Knives
“Pankiri” translates roughly to “bread cutter” in Japanese, and these knives typically feature a thinner, harder blade with finer, more numerous serrations than their Western counterparts. The finer scalloped edge is designed to produce an especially clean cut with minimal crumb scatter, which matters in Japanese baking traditions where soft, enriched shokupan-style breads are common and a rough cut would visibly compress the delicate crumb. Because the steel is often harder, pankiri knives can take a sharper edge but may be slightly more brittle at the tips of each serration, so they benefit from gentler handling than a rugged Western-style bread knife.
Which Style Should You Choose?
For most home cooks slicing standard sandwich loaves, baguettes, and sourdough boules, a traditional straight-handled Western bread knife remains the most versatile and easiest to maintain. Bakers who regularly cut tall, layered items should seriously consider an offset handle, while those focused on soft, enriched breads or who appreciate finer craftsmanship may prefer a Japanese pankiri design.
Choosing Blade Length by Bread Type
Blade length is not one-size-fits-all, and matching it to the bread you bake or buy most often will noticeably improve your slicing results.
Baguettes & Batards
7-8 inch blades are usually sufficient given the narrower diameter of these loaves
Round Boules & Sourdough
9-10 inch blades comfortably span the wider diameter in a single pass
Sandwich & Pullman Loaves
8-9 inch blades give consistent, even slices for sandwich-ready bread
Bagels & Rolls
A shorter 6-7 inch serrated blade offers more control on small, dense items
If you only own one bread knife, err toward the longer end of the range (9-10 inches). A longer blade can always be used on smaller items with a shorter stroke, but a short blade cannot be extended when you’re faced with a wide artisan boule — you’ll end up sawing back and forth multiple times across the same line, which increases the risk of an uneven or crushed slice.
Bread Knife vs. Bread Lame: Scoring vs. Slicing
Home bakers researching bread tools frequently encounter the term “bread lame” and wonder whether it can replace a bread knife, or vice versa. The short answer is that these tools serve entirely different stages of the baking process.
A bread lame is a small handle fitted with a single-edged razor blade, used to score the surface of raw dough immediately before baking. Scoring controls where the loaf expands during oven spring, both for aesthetic patterns and to prevent uncontrolled cracking of the crust. A lame’s blade is razor-thin, extremely sharp, and completely smooth — the opposite design philosophy from a bread knife, which needs a robust serrated edge to cut through a fully baked, hardened crust after the loaf has cooled.
Using a lame to slice finished bread would be dangerous and ineffective, since the thin, exposed blade offers no real handle clearance or leverage. Conversely, using a bread knife to score raw dough would tear and deflate the delicate surface rather than making a clean, shallow cut. Serious home bakers typically own both: a lame for shaping the loaf before baking, and a bread knife for serving it afterward.
Best Cutting Boards and Slicing Guides to Pair With a Bread Knife
The board underneath your bread matters almost as much as the knife itself. A few practical guidelines:
- Wood end-grain boards: Absorb the sawing motion well and are gentle on serration tips, though they require occasional oiling
- Bamboo boards: A budget-friendly, moisture-resistant middle ground, though slightly harder on blade edges than end-grain wood
- Plastic boards: Dishwasher-safe and hygienic, a practical everyday choice, but can develop deep grooves over time from repeated sawing
- Bread-specific slicing guides: Boxed wooden or bamboo frames with pre-cut slots that hold the loaf in place and guide the blade to produce uniform slice thickness — especially useful for sandwich bread destined for the freezer
Avoid glass or stone cutting surfaces entirely. They dull serrated edges rapidly because the hard, unforgiving surface makes contact with every serration point on each pass, and the risk of the blade skating unpredictably across a smooth, hard surface is genuinely higher than on wood or plastic.
Top Bread Knife Brands Compared
Shoppers researching “best bread knife brands” typically encounter a recurring shortlist of manufacturers known specifically for serrated-edge quality. Below is a general comparison of the categories these brands tend to fall into, without endorsing any single retailer listing.
| Brand Category | Typical Price Range | Known For | Best For |
|---|---|---|---|
| German Forged (e.g., Wüsthof, Zwilling-style) | $$$ | Full-tang construction, heavier balance | Serious home bakers, longevity |
| Swiss/European Stamped (e.g., Victorinox-style) | $$ | Lightweight, excellent value, NSF-rated handles | Everyday home use, budget-conscious buyers |
| Japanese Specialty | $$$ | Fine serrations, hard steel, precision grinding | Enriched breads, cake, detail work |
| Commercial/Foodservice | $ | Durable stamped steel, ergonomic grips | High-volume bakery and restaurant use |
Rather than fixating on a single brand name, focus on the underlying attributes covered earlier in this guide — blade length, serration type, tang construction, and handle material — since those factors predict day-to-day performance more reliably than brand reputation alone.
Budget vs. Mid-Range vs. Premium Bread Knives
Bread knives span a wide price spectrum, and understanding what changes at each tier helps you avoid both overpaying and under-buying.
Budget Tier
Entry-level bread knives typically use stamped (rather than forged) stainless steel, simpler serration patterns, and molded polymer handles. For occasional bread slicing in a household that doesn’t bake often, this tier can be perfectly adequate, though the serrations tend to dull faster and the blades sometimes flex more than higher tiers.
Mid-Range Tier
This tier introduces better steel formulations, more refined wavy or scalloped serration patterns, improved balance, and often a lifetime or limited warranty. For most home bakers who bake bread regularly, mid-range knives offer the best balance of performance and price.
Premium Tier
Premium bread knives generally feature forged, full-tang construction, hand-finished serrations, and premium handle materials like pakkawood or textured composite grips designed for extended comfort. This tier makes the most sense for dedicated bakers, small bakery operations, or cooks who simply want the best possible tool and plan to use it for years or decades.
Bread Knife Safety Guidelines
Serrated blades carry some safety considerations that differ slightly from straight-edged knives, and it’s worth understanding them regardless of your experience level in the kitchen.
- Never test sharpness with a finger: Serration points are individually sharp and can cause small, jagged cuts that are more prone to catching on skin than a smooth blade
- Keep fingers curled away from the blade path: The sawing motion travels farther along the food than a straight downward cut, increasing the distance the edge covers near your guiding hand
- Never carry a bread knife blade-first: Use a blade guard or sheath when transporting it, since the exposed serration teeth can snag on clothing or bags
- Store separately from other utensils: A drawer full of loose flatware and a bread knife is a common source of accidental cuts when reaching in blind
- Keep it away from small children: The long blade and sawing motion require more hand strength and coordination than most children safely possess
- Dry thoroughly before storing: A wet blade left in a sheath or block can develop rust that weakens the metal at the serration valleys over time
Common Mistakes When Using a Bread Knife
Mistakes to Avoid
- Pressing down hard instead of letting the serrations saw
- Slicing bread while it’s still warm from the oven
- Using short, choppy strokes instead of full-length passes
- Cutting on glass, stone, or metal surfaces
- Storing the blade loose in a drawer
- Washing in the dishwasher, which loosens handle rivets
- Using a short utility knife on a wide artisan loaf
Better Habits
- Let the weight of the blade and long strokes do the work
- Rest bread at least 20-30 minutes before slicing
- Use one continuous stroke across the full blade length
- Slice on wood, bamboo, or plastic boards only
- Store in a blade guard, sheath, or knife block
- Hand wash and dry immediately after use
- Match blade length to the diameter of your loaf
How Bakeries and Restaurants Use Bread Knives
Commercial kitchens rely on bread knives far more heavily than most home cooks realize, and the way professionals select and maintain them offers useful lessons for serious home bakers.
Many bakeries use offset-handle bread knives specifically because of the volume of tall loaves and layer cakes processed daily — the knuckle clearance reduces fatigue and repetitive strain over an eight-hour shift. Commercial kitchens also tend to rotate multiple bread knives through a sharpening schedule rather than relying on a single blade indefinitely, since consistent slice thickness affects both portion control and food cost calculations. Some bakeries use motorized bread slicers for high-volume sandwich bread production, but a hand-held serrated knife remains standard for artisan loaves, display cutting, and any situation where a customer expects to see bread sliced to order.
Restaurants serving bread service at the table often specifically select bread knives with a more aggressive, pointed serration pattern, since these cut through crusty artisan bread with less visible tearing — an aesthetic detail that matters when the presentation happens in front of a guest.
Bread Knives as Gifts: What to Consider
A quality bread knife is a popular gift for home bakers, new homeowners, and anyone building out a first knife set, since it fills a gap that many starter knife sets overlook entirely. A few considerations for gift-givers:
- Pair it with a cutting board: A bread knife and a dedicated wood or bamboo board make a natural gift set
- Consider the recipient’s baking habits: A dedicated sourdough baker will appreciate a longer, wide-diameter-friendly blade, while a casual sandwich-bread household may prefer a shorter, lighter option
- Look for a lifetime warranty: Many mid-range and premium bread knives include one, which adds long-term value to a gift
- Presentation matters: A knife that ships in a branded box or with a blade guard feels more gift-appropriate than a bare blade
Sustainability and Long-Term Value
Because a well-made bread knife can last for decades with proper care, it is one of the more sustainable purchases in a kitchen tool set relative to its price. Choosing a full-tang, high-carbon stainless blade with a reputable warranty reduces the likelihood of replacement due to handle failure or blade snapping — two of the most common reasons cheaper serrated knives end up discarded. Some manufacturers also offer blade resharpening or replacement programs, which extends the usable life of the handle and reduces overall material waste compared to buying a new knife every few years.
Common Myths About Bread Knives, Debunked
Serrated edges dull more slowly than straight edges, but they do eventually dull, especially the pointed tips of each tooth. Professional sharpening with tapered rods designed for serrations can restore performance well past the point most people assume the knife is simply worn out.
The two knives are built for opposite cutting mechanics. A bread knife’s serrated edge is a poor substitute for the precision chopping, dicing, and mincing tasks a smooth chef’s knife handles well, and vice versa.
Pointed, scalloped, wavy, and micro-serrated edges each behave differently depending on crust thickness and crumb density, as covered earlier in this guide’s serration comparison table.
Left-Handed Use and Ergonomic Considerations
Because most bread knives use a symmetrical, double-beveled serrated edge, the blade itself performs identically regardless of which hand grips the handle — unlike some single-bevel Japanese knives, which are ground specifically for right- or left-handed use. However, handle shape can still matter for left-handed cooks. Many ergonomic handles feature a subtle contour designed around a right-handed grip, with finger indents that feel natural in the right hand but slightly awkward in the left. If you are left-handed and shopping specifically for comfort, look for straight, symmetrical handles without aggressive right-hand-specific molding, or ambidextrous designs that manufacturers sometimes label explicitly.
Offset-handle bread knives deserve a specific note here: the offset is usually built to keep knuckles clear of the board when the blade is held in a standard grip, and this clearance works the same way for both left- and right-handed users since the offset runs vertically rather than laterally. The one exception is on some artisan offset designs where the handle curves slightly to one side; left-handed bakers should check listing photos or product descriptions for this detail before purchasing.
Beyond handedness, general ergonomic factors worth considering include handle circumference (a handle that is too thin can strain the grip during long sawing strokes), the presence of a textured or rubberized grip zone for wet hands, and overall knife weight — a heavier blade requires less arm effort to maintain sawing momentum but can fatigue the wrist faster during extended use, such as slicing a large batch of sandwich bread for a party or bake sale.
Warranties, Guarantees, and What They Actually Cover
Warranty terms vary widely across bread knife manufacturers, and understanding what is and isn’t typically covered can save you frustration later. Most limited lifetime warranties cover manufacturing defects — things like a blade that separates from the tang, rivets that fail prematurely, or serrations that were improperly ground from the factory. They almost universally exclude normal wear, including dulling from regular use, rust from improper drying, or damage from dishwasher cycles when hand-wash-only is specified.
Some premium brands offer a sharpening or replacement program, where you can send a dulled blade back for professional resharpening at a reduced cost rather than replacing the entire knife. This can be a meaningful long-term value factor, particularly for the harder, more brittle steels used in some Japanese-style bread knives, since resharpening serrations correctly requires specialized tapered equipment that most home sharpening kits do not include.
When comparing warranty language between listings, look specifically for whether “lifetime” refers to the lifetime of the product, the lifetime of the original purchaser, or a fixed number of years marketed loosely as “lifetime” — these distinctions occasionally appear in the fine print and affect resale or gifting situations down the line.
Step-by-Step: Slicing a Loaf Perfectly Every Time
Even experienced cooks sometimes rush this process, so it’s worth walking through the full sequence from start to finish.
Step 1: Let the Bread Rest
Freshly baked bread continues cooking internally from residual heat for a period after leaving the oven. Cutting too early releases excess steam, gums up the crumb structure, and makes even a great knife perform poorly. Most crusty artisan loaves benefit from at least 30-60 minutes of rest; enriched sandwich loaves can typically be cut sooner, around 20-30 minutes.
Step 2: Stabilize the Loaf
Place the loaf on a stable cutting board, cut-side down if it has a flat bottom, or use a bread slicing guide for consistent width. For round boules, consider slicing a thin stabilizing flat along one side first so the loaf doesn’t roll during subsequent cuts.
Step 3: Position the Blade
Rest the serrated edge lightly at the point where you intend to start the cut, holding the knife at a slight angle rather than perfectly vertical. Use your guiding hand to steady the top of the loaf, keeping fingers curled away from the blade’s path.
Step 4: Saw, Don’t Press
Begin a gentle back-and-forth sawing motion using the full length of the blade rather than short, repeated strokes in one spot. Let the serrations do the cutting work; applying heavy downward pressure is both unnecessary and more likely to crush the crumb.
Step 5: Follow Through
Continue the sawing motion smoothly through the bottom crust rather than snapping or breaking the last portion off by hand, which can tear the base of the slice. A complete, even stroke from top to bottom produces the cleanest final result.
Storage Solutions Compared: Blocks, Magnetic Strips, and Sheaths
How you store a bread knife between uses affects both safety and blade longevity, and the right solution often depends on kitchen layout as much as personal preference.
- Traditional knife blocks: Keep the blade fully enclosed and protected, though bread knives with unusually long blades sometimes don’t fit standard slots designed around chef’s knife dimensions
- In-drawer knife organizers: Save counter space and work well in smaller kitchens, provided the tray has individual slots rather than a jumbled compartment where blades can knock against each other
- Magnetic strips: Display knives for easy access and keep them fully visible, but a serrated blade should be placed on the strip carefully, spine-first where possible, to avoid repeated contact between the serration tips and the magnet’s metal edge
- Blade guards and sheaths: The most portable and affordable option, ideal for anyone who transports a bread knife to a second home, a shared kitchen, or a farmers market bread stall
Whichever method you choose, the underlying principle is the same as with any knife: prevent the edge from making unnecessary contact with other hard objects, and prevent bare skin from making unexpected contact with the edge.
How Bread Knife Needs Differ Around the World
Because bread traditions vary enormously by region, the ideal bread knife profile can shift depending on what kind of loaves dominate a given cuisine.
In France, the classic baguette’s thin, shattering crust and open, airy crumb favor a lighter blade with fine, closely spaced serrations that won’t tear the delicate interior. In Germany and much of Central Europe, dense rye and multigrain loaves with thick, chewy crusts call for a longer, more robust blade with deeper, more aggressive serrations capable of pushing through denser crumb without excessive sawing. In Japan, the soft, enriched shokupan loaf — closer in texture to a Western sandwich bread but with a finer, more uniform crumb — is often sliced with the pankiri-style knives discussed earlier in this guide, prioritizing a clean, minimal-crumb cut over raw cutting power. In the Middle East and parts of South Asia, flatbreads like pita and naan generally don’t require a bread knife at all, since they’re typically torn or cut into wedges with a straight-edged knife or kitchen shears.
Recognizing which tradition your typical bread purchases fall into can help refine your choice of serration type and blade length beyond the general guidance covered earlier in this article.
Additional Frequently Asked Questions
Manufacturers generally recommend hand washing. Dishwasher heat and detergent can dull serrations faster, loosen handle rivets over time, and cause pitting on carbon-heavy steels, even when the listing says “dishwasher safe.”
Some crumb scatter is normal with any serrated edge, but excessive crumbling usually points to bread that hasn’t rested long enough, a dull blade requiring sharpening, or using short choppy strokes instead of one long, continuous sawing motion.
For occasional slicing, a budget or mid-range knife performs perfectly well. For frequent bakers, the better steel, balance, and warranty coverage of a premium blade tend to pay for themselves over years of regular use.
A sturdy, full-tang bread knife can handle lightly frozen bread, but fully frozen dense loaves are better cut with a dedicated frozen-bread knife or after a brief partial thaw, since excessive force on frozen crumb can chip serration tips.
Dedicated cake knives are usually longer and thinner with finer serrations optimized for layered cakes and frosting, while bread knives are built more robustly to handle tough crusts. A quality bread knife can slice cake reasonably well, but a cake knife is a poor substitute for crusty bread.
How to Test Sharpness Safely and Know When It’s Time to Sharpen
Because serrated edges dull unevenly — some individual teeth stay sharp long after others have rounded off — it can be harder to judge overall sharpness than with a straight blade. Rather than testing sharpness against a fingertip, use safer indirect methods. Try slicing a ripe tomato with no downward pressure at all, letting only the weight of the knife and a gentle sawing motion do the work. A sharp bread knife will bite into the skin immediately and glide through; a dulling blade will tend to slip or require noticeably more pressure before the skin finally gives way.
Another practical test is the paper test: hold a sheet of printer paper by one edge and attempt to saw through it with light pressure. A sharp serrated edge will cut cleanly with minimal tearing, while a dull one will crumple or tear the paper rather than slicing it. If you notice your bread knife increasingly crushing crumb, requiring more downward force than it used to, or leaving ragged rather than clean slice faces, these are all reliable signs that it’s time for sharpening rather than simply changing technique.
Home sharpening of serrated blades is more specialized than sharpening a straight edge, since each individual serration valley needs to be addressed with a correctly sized tapered sharpening rod rather than a flat stone. Many home cooks find it more practical to use a specialized serrated knife sharpening tool designed for this exact geometry, or to send the blade to a professional sharpening service every couple of years, particularly for higher-end knives where an incorrect DIY sharpening attempt could damage the factory-ground serration pattern.
Removing Stains, Discoloration, and Rust Spots
Even stainless bread knives can develop surface discoloration over time, particularly from prolonged contact with acidic foods like tomatoes, citrus, or vinegar-based marinades left to sit on the blade before washing. A soft paste of baking soda and water, applied with a non-abrasive cloth and worked gently into the serrations, is usually enough to lift light staining without damaging the finish. For more stubborn discoloration, a small amount of white vinegar on a cloth can help dissolve mineral deposits, followed immediately by a thorough rinse and complete drying to prevent any further reaction.
True rust — as opposed to simple discoloration — is more likely on carbon steel blades or on stainless blades that have been left wet for extended periods, especially wedged into a tight spot in a drawer where air can’t circulate. Small surface rust spots can often be removed with a rust eraser or fine steel wool used gently along the direction of the serrations, followed by a light coating of food-safe mineral oil if the blade is carbon steel. Deep pitting rust, however, is usually permanent and a sign that the knife has not been dried and stored correctly over time; at that point, the structural integrity of the affected serrations may be compromised even if the rust itself is polished away.
Prevention remains simpler than remediation: always hand wash a bread knife promptly after use, dry it completely with a towel rather than air-drying, and avoid letting it sit in a sink of soapy water with other dishes, where prolonged moisture exposure and metal-on-metal contact both increase the risk of surface damage.
Pairing Your Bread Knife With Common Kitchen Tasks and Recipes
Beyond straightforward loaf slicing, a bread knife earns its place in the knife block through a surprising range of everyday recipe tasks. Sandwich prep is the most obvious extension — a bread knife makes clean work of slicing a sub roll horizontally without tearing through the soft interior, something a chef’s knife often struggles with on fresh, pillowy bread. French toast and bread pudding recipes both call for even, consistent bread cubes or slices, and a bread knife’s long blade makes quick, uniform work of a whole loaf destined for either dish.
Croutons are another underrated use case: cutting day-old bread into even cubes with a bread knife, rather than tearing it by hand, produces more consistent toasting in the oven or skillet. For stuffing and dressing recipes around the holidays, a bread knife can process an entire loaf into cubes in a fraction of the time a paring or chef’s knife would take, since the long blade covers more surface area per stroke.
Outside of bread entirely, a bread knife’s serrated edge is genuinely useful for slicing angel food cake, pound cake, and other delicate baked goods where a straight edge would compress the crumb. Some home cooks also reach for a bread knife when portioning watermelon or pineapple, where the tough, fibrous rind benefits from a sawing motion rather than straight downward pressure.
Ready to Master Your Bread Knife?
From perfect sandwich slices to delicate cake layers, a quality bread knife is an indispensable kitchen tool that goes far beyond just bread.